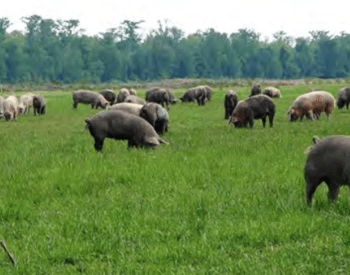
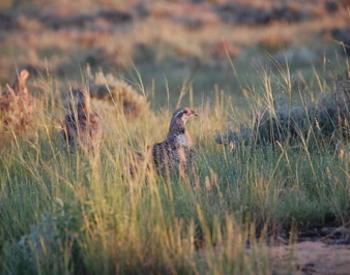
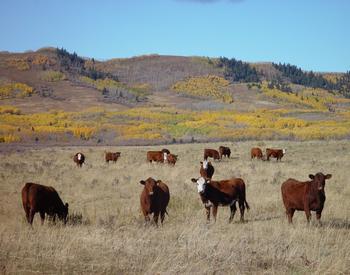
Rangeland monitoring is integral to good land management because it allows range managers to determine progress toward meeting resource objectives and reveals trends that could threaten rangeland productivity. Vegetation is commonly the focus of monitoring programs because it:
- Readily responds to changes in management inputs.
- Is an excellent indicator of the overall condition of rangeland.
Trend monitoring often involves collecting vegetation data at different points in time on the same site and then comparing results to detect a change. Trend is then described as moving “toward meeting objectives,” “away from meeting objectives” or “static.” In other words, vegetation trend data are important for determining the effectiveness of on-the-ground management actions.
For these reasons, a broad-based understanding of the importance of monitoring trends in rangeland vegetation exists. Once you’ve decided to begin a monitoring program on your ranch, how do you decide on an appropriate method to collect the needed information?
Selecting a monitoring method can be frustrating given the number of methods available in the data-gathering toolbox. For example, although an excellent resource, the Interagency Technical Reference (1999) describes 18 different methods for documenting changes in vegetation over time; all of which are valid, well-vetted methods. Having options is good, but at the same time they can become overwhelming particularly when dealing with something largely unfamiliar.
Therefore, we will not present the entire palette of possible rangeland monitoring methods in this article. Instead, we have attempted to distill down the list of possibilities and offer the following two complementary methods that are easy to use, repeatable, require a limited amount of time and produce information useful for determining trends in rangeland vegetation:
- Repeat photo monitoring: Repeat photo monitoring involves establishing a permanent photo plot and periodically (i.e., 1-10 years) taking both ground-level and transect view photographs. Comparing pictures of the same site taken over a period of years provides visual evidence of vegetation and soil trend. A properly located permanent photo point allows observation of changes in important rangeland attributes including plant species composition, total plant cover, perennial plant density, litter, spatial pattern of plants, plant vigor and soil erosion.
- Pace 180° (nearest plant) method: The pace 180° method is a quantitative procedure for monitoring vegetation trend. It involves documenting observations along a transect at specified intervals, using the toe of a boot to record groundcover “hits.” This method provides an estimate of ground cover (bare ground, litter, rock, perennial vegetation, moss and biological soil crusts), basal cover of perennial herbaceous plants (grasses and grass-like plants and forbs), foliar cover of woody species (trees and shrubs), and perennial plant composition.
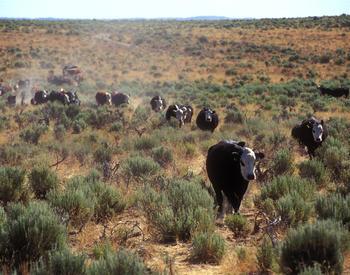
Areas of use
Repeat photo monitoring is suited for all rangeland vegetation types. Whereas the pace 180° method is best suited for use in upland plant communities comprised of perennial bunchgrasses, forbs and shrubs. The more complex the community structure and vegetation cover, the more difficult it becomes to determine “hits” due to observer bias, wind, etc.
Advantages and limitations
Repeat photo monitoring provides a rapid means for visually documenting changes in soil and vegetation resources. It requires little training for proper execution; however, it is extremely important that it is repeated in a consistent manner over time in order to be useful. The only limitation of this method is that is not quantitative. However, repeat photo monitoring can be quite helpful for interpreting vegetation trend that is quantitatively documented with the pace 180° method.
The pace 180° method is relatively simple to use as long as careful consideration is given to the vegetation type to which it is applied. It is suitable for measuring major characteristics of the ground cover of an area. It is possible to collect a fairly large number of samples within a relatively short time. Because it measures basal cover of herbaceous vegetation, pace 180° is also less sensitive to annual climatic variation or utilization by grazing animals than some other methods that rely on measurements of foliar cover.
A limitation of this pace 180° method is that tall or dense woody vegetation reduces the ability to pace in a straight line and the offset for obstructions described in the procedures adds bias to data collection by avoiding certain components of the plant community. Another limitation is that less predominant yet still important plant species may not be “hit” on the transect and therefore do not show up in the study records. This may be overcome by recording observed minor plant species separately.
Training
A minimum amount of training is needed for either method. Examiners must be able to identify the plant species, be familiar with the ground-level cover categories, and know how to collect basal and foliar cover data.
Study site selection
The proper location of monitoring studies is dependent on the objectives of the monitoring program. There are two primary approaches for selecting monitoring locations.
The first approach attempts to locate key areas that represent changes in vegetation and soil resources that are occurring in a larger area, such as a pasture, allotment, or management unit. A different approach identifies critical areas, which generally receive special focus because of inherent site factors, size, location, conditions, values, or significant potential conflicts among uses. If management objectives are specific to maintaining and improving a small piece of land such as a riparian area or a specific element of wildlife habitat, it may be appropriate to select a critical area as a monitoring location.
Once a study site is selected, it should be permanently marked with T-posts or rebar and documented on aerial photos or maps. The location’s coordinates should also be collected by a global positioning system (GPS) to help relocate the site.
Photo plot setup
Ground photos
Ground photos show the soil surface characteristics and the amount of ground surface covered by vegetation and litter. Ground photos are generally taken of permanently located photo plots.
- Select a location within your key or critical area to establish your photo plot. Use discretion when locating your close-up photo plot, as this will serve as the starting point for your pace 180° transect. Avoid locations where the subsequent transect will cross multiple plant communities or soil types (i.e. drainages, swales, outcrops, etc.). Document the location photo plots on the Study Location and Documentation Data form to facilitate relocation (see Appendix A for a printable version).
- A 3-by-3-foot square frame is used for photo plots. Frames can be made of PVC pipe, steel rods, or any similar material. However, the Burns District BLM uses two 6-foot wooden folding rulers (carpenter rules) to delineate the boundaries of the photo plot. The rulers are folded at the 3-foot mark and laid down to form a 3-by-3-foot square frame (Figure 1).
- Two-foot long, angle iron stakes are driven into the ground at two diagonal corners of the frame to permanently mark a photo plot (Figure 1). A 2-foot long rebar stake is driven into the ground at the center of the north side of the photo plot to reference where subsequent photos should be taken from (Figure 1). The camera point, or the location from which the close-up picture is taken, should be on the north side of the photo plot so that repeat pictures can be taken at any time during the day without casting a shadow across the plot. Paint the angle iron and rebar stakes with bright-colored permanent spray paint to aid in relocation. Repaint these stakes when subsequent pictures are taken.
- The photo identification card is placed flat on the ground immediately adjacent to the photo plot frame (see Appendix B for a printable version).
- To take the close-up pictures, stand over the rebar stake with toes touching the edge of the frame. Include the photo label in the photograph. Use a 35-mm camera with a 28-mm wide-angle lens or a comparable digital camera. Most digital cameras and many 35-mm cameras have a zoom feature and making sure this is set to the same focal length each time the photo is taken can help to ensure consistency between photos. Usually, zooming as wide as possible produces the focal length that is most easily repeated if the same camera is used.
Transect photos
Transect photos present a broad view of a study site. These pictures are also often helpful in relocating study sites.
- Transect view pictures are taken from the same point as the close-up view photos (i.e., standing over the rebar stake). The idea is to capture the vegetation and soil conditions in the direction that the pace 180° transect will be located. A T-post can be used to mark the approximate end of the pace 180° transect to help identify the direction and angle of the transect photo. If possible, also try to locate a permanent landmark (e.g., mountain peak, rock formation, etc.) on the horizon to facilitate orientation of repeat photos. Similar to the 3-by-3-foot photos, using the same focal length setting for repeat transect pictures will help ensure consistency between photos.
- The photo identification label is placed in an upright position so that it will appear in the foreground of the photograph.
- To take general view pictures, stand over the rebar stake and include the photo label, a general view of the transect direction, and, if possible, a small amount of sky in the pictures. A 5-foot long, 3/4 inch length of PVC pipe can be placed over the aboveground portion of the rebar stake. The camera can be positioned atop the PVC pipe to ensure the camera’s position and angle remain consistent for repeat photos.
- It is important that the photo point location be documented in writing and that the photo include a reference point in the foreground fencepost, fence line, etc.), along with a distinct landmark on the skyline.
- For subsequent monitoring previous photographs taken from photo points should be brought to the field to assist in finding the photo point and to ensure that the same photograph (bearing, amount of skyline, etc.) is retaken. The photograph should be taken at roughly the same time each year to assist in interpreting changes in vegetation and repeat pictures should include the same area and landmarks as in the initial picture. As always, recording field notes to supplement the photographs is a good idea.
- General observations on sites for which photographs are taken can be important in interpreting photos. Such factors as rodent use, insect infestation, animal concentration, fire, vandalism, weather events and other site uses can have considerable impact on vegetation and soil resources. This information can be recorded on note paper or on study method forms themselves if the photographs are taken while collecting other monitoring data.
Pace 180° method
First, determine the transect direction and select a prominent, permanent distant landmark such as a peak, rocky point, etc., that can be used as a reference point. The reference point will give you something to pace toward while running your transect. The direction and landmark (reference point) for the transect should be the same used for the transect photo. Be sure to record starting point, direction of transect (bearing or landmark), and direction of non-recording paces on Study Location Document Sheet (Appendix A).
Second, the transect should begin at one of the angle iron stakes used to permanently mark the 3-by-3-foot photo plot. Record the starting point (e.g., “the stake marking the NW corner of the photo plot”) in the comments section of the data entry form. Starting with either foot take two normal steps (i.e., one pace) toward the landmark identified as the permanent reference point. Try to not look down while pacing; this can bias your foot placement.
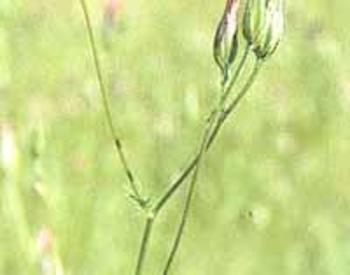
Upon completion of the second step, record the cover type (i.e., perennial vegetation by species, annual vegetation, rock, persistent litter, moss, biological crust or bare ground) that the toe of your forward boot rests upon. If the toe of your forward boot lands on perennial vegetation, record that plant species on the bottom line of the pace 180° data entry form (Appendix C). If you are unsure of the plant species, record whether the plant is a perennial grass (PG), perennial forb (PF), shrub (S) or tree (T).
If the toe of your forward boot lands on (“hits”) anything other than perennial vegetation (i.e., rock [R], persistent litter [L], biological crust [BC], bare ground [B], annual vegetation [AG or AF for annual grass or annual forb, respectively]), record that cover type on the bottom line of the data entry form and then record the species of the nearest perennial plant located within a 180° arc in front of your forward foot (Figure 2) in the top line of the data entry form. Recording the nearest perennial plant in the top line allows calculation of perennial plant composition described below in the section on calculations and associated interpretations. Repeat this process for 50 paces in the direction of the reference point, turn and take non-recording 10 paces perpendicular to the transect in either direction, and take 50 recording paces back to the start (mark the starting location with a rod or folding ruler to identify the return direction) (Figure 3).
Third, when obstructions such as juniper trees, ledge rock, etc., are encountered, sidestep at 90° from the transect line and continue pacing parallel to the transect to avoid the obstruction. Return to the original transect line as soon as possible by sidestepping at 90° in the opposite direction. Continue pacing along the transect bearing. If the obstruction is determined to be a highly important component of the community (e.g., juniper tree), this information can be recorded qualitatively on the bottom or back of the form.
Fourth, rock (R) is recorded as a “hit” when the toe of your forward boot lands on rock more than one-half inch in diameter. Only litter that persists for one or more years (i.e. persistent litter such as woody shrub debris, juniper needles) shall be recorded as a litter “hit.” Non-persistent litter (i.e., herbaceous litter) shall be recorded as bare ground or rock as appropriate. The presence and abundance of non-persistent litter will be captured with photo monitoring and can be noted on the bottom or back of the data collection form.
Fifth, a shrub or tree species is counted as a “hit” if the toe of your forward boot lands either on the shrub or tree’s stem or beneath the shrub or tree’s canopy (defined by the shrub or tree’s dripline, or the vertical downward projection of the periphery of a woody plant’s canopy) (Figure 4).
Sixth, a perennial herbaceous plant (i.e., grass, grasslike or forb) is counted as a “hit,” only if the toe of your forward boot lands on the basal portion of the plant (Figure 5). To count as a basal hit on live vegetation, the plant crown at or below 1 inch height above the ground MUST be intercepted by the toe of your forward boot.
Lastly, in situations where the toe of your forward boot lands on the basal portion of a perennial herbaceous plant that is beneath the canopy of a shrub or tree, the perennial grass or forb species is recorded as a “hit” on the bottom line. In such instances, the recorder should also record the shrub or tree species in the top line of the data entry form to identify the point as a woody species “hit.” This will allow the woody species to be included in the foliar cover calculations discussed below. Although not necessary, circling the shrub or tree entry in this scenario can be helpful for identifying the record as being only for woody species cover calculations and that it should not be included in plant composition calculations.
In most cases, do not count hits along portions of a transect that have been unnaturally disturbed, such as roads or trails. When such areas are encountered, proceed three paces past the disturbance before resuming the reading of “hits” along the pace transect.
Calculations and associated interpretations
(See example in Appendix D.1 and D.2)
Ground cover
Ground cover is determined by dividing the number of bottom line hits for all cover categories (i.e., perennial vegetation, annual vegetation, rock, persistent litter, moss or biological crust) except bare ground by 100 (i.e., the total number of bottom line hits). Ground cover describes the percent of an area that is covered by vegetation, gravel, rocks, bare ground and litter. Measuring ground cover over time will indicate if the amount of bare ground is stable, increasing or decreasing. Increases in bare ground usually indicate an increasing risk of runoff, erosion and weed invasion.
Vegetation cover
Vegetation cover is determined by dividing the number of perennial vegetation hits on the bottom line (includes all herbaceous basal and shrub basal and foliar hits recorded on bottom line) by 100 (i.e., the total number of hits). Vegetation cover is often a good indicator of a site’s resistance to degradation when measured over two or more points in time.
Although not included on the data entry form, the basal cover of herbaceous vegetation and foliar cover of woody plants can also be calculated by species or by functional group (i.e., perennial grasses and grass-like plants, perennial forbs, shrubs, and trees). For basal cover of perennial herbaceous plants, count the number of bottom line perennial herbaceous plant “hits” by species and divide by 100 (total number of bottom line).
For foliar cover of woody species, count the number of bottom line “hits” and the number of bottom line herbaceous plant “hits” that occurred beneath a woody plant canopy (circled on the data form), sum the two, and divide by 100.
Vegetation composition
Vegetation composition is determined by tallying the number of times a perennial plant species has been recorded (top or bottom lines). Circled foliar shrub hits are not included in composition calculations. Vegetation composition refers to the percentages (proportions) of various plant species in relation to the total on a given area.
Measuring vegetation composition over time gives an indication of whether desirable plants or functional groups are being maintained on the rangeland or being replaced by undesirable vegetation such as weeds.
Conclusion
Trend monitoring allows the determination of the direction of change in vegetation over time. Vegetation data are collected at different points in time on the same site and the results are then compared to detect a change. Trend is described as moving “toward meeting objectives,” “away from meeting objectives,” or “static.” In other words, trend data are important in determining the effectiveness of on-the-ground management actions.
In this article, we have assumed that the overarching, primary management objective of your grazing operation is to maintain the function and productivity of rangelands. We presented methods that experience has shown to be efficient and repeatable, yet robust enough to detect changes in vegetation attributes important for evaluating the function and productivity of rangeland over time.
There are certainly more intensive methods that would provide a higher level of detail, thereby allowing the detection of much finer changes in vegetation attributes than the tools we presented, but there is always a tradeoff. In this case, the higher-intensity methods require more time and are less easily accomplished, without a marked increase in the applicability of the information to decision-making within a grazing management program.
We subscribe to the philosophy that the best monitoring program is the one that not only gives you the needed information but also fits within the time and resources that can be committed to over the long term. In other words, the best kind of monitoring is the kind that gets done.
References
Interagency Technical Reference. 1999. Sampling Vegetation Attributes. BLM Technical Reference 1734-4. National Business Center, Denver, CO. 158 p.