Transcript
[Music] My name is Kelly Street, and I'm a registered dietician with the Oregon State University Extension Service Family and Community Health Program in Clackamas County. In this video, we will discuss the Oregon farm direct marketing law and demonstrate how to process a fruit syrup using a water bath canner.
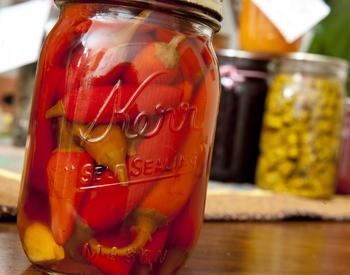
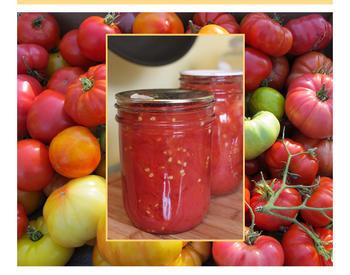
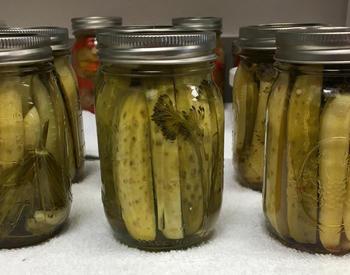
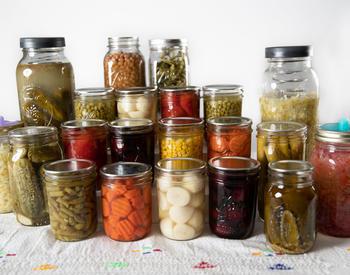
So, what is the Oregon farm direct marketing law? The farm direct marketing law, passed in 2012, allows farmers to produce certain low-risk value-added products, such as fruit spreads, pickled, and lacto-fermented fruits and vegetables, and sell them directly to the consumer without a processing license, as long as they grow the produce themselves. This law provides farmers with an opportunity to generate a supplemental income source, add variety to their offerings, use up excess produce, and extend their market season. We have found that farmers need a little bit of guidance in implementing the law, including where to find tested recipes and interpreting labeling and record-keeping requirements. That is why OSU Extension is delivering education on the farm direct marketing law through a series of videos and workshops. Information on the law can also be found in the Oregon State University publication "Oregon's Farm Direct Marketing Law: Producer Processed Value-Added Products, A Guide for Farmers and Market Managers". The catalog website link for that publication is listed on the slide. You will find tested recipes and current food preservation instructions in the USDA Guide to Home Canning "So Easy to Preserve", the University of Georgia National Center for Home Food Preservation, and Pacific Northwest Extension Service food preservation publications, as well as publications from other extension services located throughout the United States. A tested recipe is one where the data supports food safety. If you want to produce an acidified food, such as a relish or salsa, using your own recipe, you must first submit it to a recognized Process Authority for approval. This process is outlined in the OSU publication mentioned in slide number two. [Music]
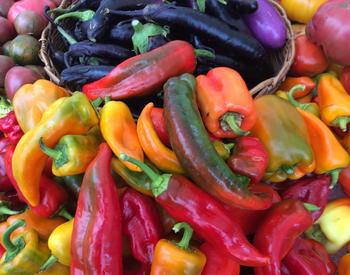
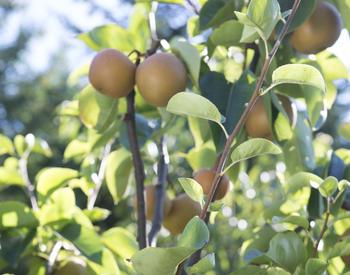
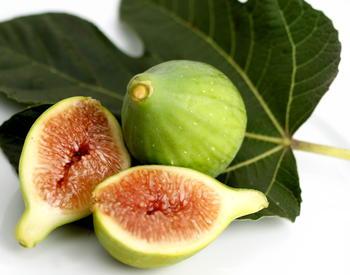
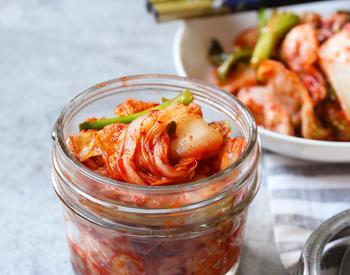
Today, we have selected a fruit syrup recipe from the USDA Guide to Home Canning, which we will process using a water bath canner. The basic canning steps demonstrated here will always stay the same regardless of the recipe that you are following. Fruits, with the exception of melons, Asian pears, figs, and white peaches, are high in acid. Their pH is below 4.6; therefore, they can be safely processed in a water bath canner without adding additional acid. Fruit syrups can be made from a variety of fresh or frozen fruits. They add flavor, texture, and color to waffles and pancakes, pastries, ice cream and desserts. They are also a delicious addition to milkshakes and smoothies, and alcoholic and non-alcoholic beverages. The ability to substitute different fruits comes in handy if you find yourself with excess during harvest time. Fruit syrups made from fresh fruit are typically thinner in consistency than commercial products. If you want a thicker consistency at serving time, you can dissolve up to 1/2 tablespoon of cornstarch into a pint of canned syrup and gently boil it to the desired thickness. Small farm-produced fruit syrups are great for gift-giving and keep the flavor of summer alive all year long. Customers will love it, so let's make some.
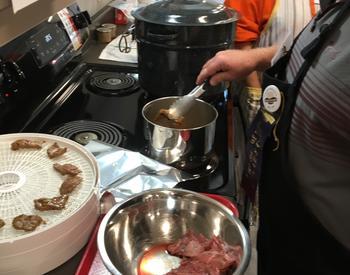
We begin by assembling our canning equipment and utensils. A water bath canner is a large metal container deep enough that one to two inches of briskly boiling water can cover the jars. The canner must have a tight-fitting lid and a rack. The rack keeps the jars from touching the bottom of the canner and allows the water to circulate freely under the jars. Mason jars designed for home canning are recommended. They come in a variety of sizes, including quarter pint, half-pint, pint, quart, and half-gallon. They come with self-sealing lids and screw band rings. The lids are one-time use, but the rings can be reused until they become rusty or dented. Other canning utensils that are helpful to have on hand include a jar lifter, a funnel, a bubbler, a timer, hot pads, and a ruler. Always start by washing your jars, lids, and rings in hot, soapy water. Fill the water bath canner approximately half full with water. Place the jars in the canner to heat up and turn on the heat to simmer, and you can begin to make your fruit syrup. To shorten our demonstration time, we prepared our fruit juice earlier using a steam juicer. Here is how we did it: fill the bottom of the pot of the steam juicer with a few inches of water and a handful of marbles. The marbles will rattle if the water level gets too low, alerting you to add more water. Place on the stove, turn heat to high, and bring to a boil. Next, rinse six and a half cups of berries of your choice and place in the top basket. Now, put the middle portion of the steamer on top of the bottom pot and place the top basket with the berries on top of the middle portion, and then add the lid. Double-check that the hose is closed with the clamp and place a bowl underneath. Set a timer and simmer for 30 minutes. When the timer goes off, drain the juice that is collected in the bowl into a bowl. Be very careful as the juice will be hot. Set the timer for an additional 15 minutes if the fruit still appears to be holding juice and then drain the remaining juice. Next, we combine five cups of the steamed juice with six and three-quarter cups of sugar into a large saucepan. I'm going to head over to the stove. Okay, so we let the mixture simmer for one minute, and now we're going to remove it from the heat. And next, we are going to skim off the foam. [Music]
Now we are ready to fill our jars. The first thing we're gonna do is we're gonna use our jar lifter to remove a couple of jars from the canner. It's always handy to have a tray here so that you don't burn your hands trying to get back and forth from your stove to your countertop. I'm gonna quickly set that here. Okay, and now I'm ready to fill the jars with my juice. So, I am going to set the funnel right on top of the jar, and I'm going to ladle my juice right into my jar. And again, you want to be careful while you're doing this because your mixture and your jars are both very hot at this point. Okay, go ahead and fill a second jar. So, we want to make sure that we leave a half an inch of headspace at the top of the jar, and headspace is the space between the inside of the lid and the top of the food mixture or liquid. Too little or too much headspace in the top of the jar can keep a proper seal from forming during processing. The next thing we're going to do is we are going to remove any air bubbles from the side of the jar. Be sure that you use plastic and not metal when you're doing this because you don't want to take a chance on chipping the side of one of your jars. The next thing we're gonna do is wipe off the surface with a clean, dampened paper towel. Again, we don't want any food to come in contact with the surface of the lid because that could also prevent
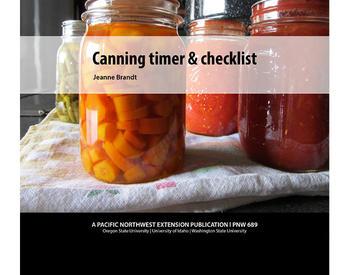
a proper seal. And then we are going to put a lid on top like so, and then we are going to add the rings and we are going to just tighten them to fingertip tight. Again, we want to make sure that we ensure that some air can escape during that processing to ensure a proper seal so we don't want it too tight. Next, we will place the jars back in the canner on the stove. Be sure to keep the jars upright in the canner. This recipe yields between eight and nine half pints of syrup. Add more hot water to cover the top of the jars by two inches. It's also a good idea to have a pot of hot water simmering on the stove just in case you need to add more. Place the lid on the canner, turn the heat to high, and wait for the water to boil. Once the water starts boiling, we start timing for ten minutes. You will need to adjust the processing time for elevations over a thousand feet as the syrup processes. Adjust the heat to maintain a gentle rolling boil. When the processing time is complete, turn off the heat and remove the canner lid. Now, set the timer for five minutes. This additional time helps ensure a vacuum seal. When the timer goes off, use a jar lifter to lift the jars straight up out of the canner and onto a flat surface covered with the heavy towel. Place the jars one inch apart from each other to allow for adequate air circulation around each jar. Allow jars to cool for 24 hours without touching them. Next, test each jar for a vacuum seal. Lids have sealed if the lid is concave in the center, does not move, and has a clear ringing sound when tapped. Remove the rings and wipe the jars to clean them, then you are ready to label them. Be sure to follow the labeling guidelines that are outlined in the farm direct marketing law. You will want to store the jars in a cold, dark, dry place for best quality. Sell and/or consume the syrup within one year. Thanks so much for joining us for this recipe demonstration using the Oregon farm direct marketing law. We hope you have found it helpful. Thanks for watching. For more information on the Oregon farm direct marketing law, you can contact the Oregon State University Extension Service in the Clackamas County office, the OSU Extension Service Small Farms Program, or the Oregon Department of Agriculture Food Safety Program. [Music] You [Music]
This video is one of a series of four produced by the Oregon State University Extension Service in Clackamas County that explains the Oregon Farm Direct Marketing Law (OFDML) and illustrates science-based, step-by-step food preservation techniques. In this video we demonstrate how to make a simple fruit syrup using a water bath canner. For more information on the OFDML, or food preservation recipes or techniques, you can go to Oregon’s Farm Direct Marketing Law: Producer-Processed Value-Added Products or Home Food Safety and Preservation Program