Transcript
From the Oregon State University's extension service, you are listening to In the Woods with the forestry and natural resources program. This podcast aims to show the voices of researchers, land managers, and members of the public interested in telling the story of how woodlands provide more than just trees. They provide interconnectedness that is essential to your daily life. Stick around to discover a new topic related to forests on each episode.
Welcome back everyone to the In the Woods podcast presented by the forestry and natural resources extension program at Oregon State University. I'm Scott Levengood, extension specialist in wood products. And I'm your host for today's episode on a hot topic in forestry and wood products and architecture for that matter.
And the topic is mass timber. And in particular, we focused on mass plywood panels. In this episode of In the Woods, we'll be touring Freres Engineered Wood. In fact, uh, you could probably tell from the audio we are there now. And this is, uh, truly a one of a kind facility. Freres Wood produces mass plywood panels.
And in fact, I think they're the only ones in the country, maybe the world, that makes this product. Our tour guide today is Cody Beairsto, project coordinator with Freres Engineered Wood. Good morning, Cody. Hey Scott, it's a pleasure to be here. Cody. Uh, please tell us a little bit more about yourself. You know, what you do, where you went to school, things like that.
Sure. So, uh, I started working really here at Freres only three years ago. Doesn't seem like it's been that long since I've been doing so much. Uh, but just before coming to Freres, I finished up at Oregon state. I was doing an undergrad with civil engineering, structural engineering, kind of specifying, and went into my master's in the wood science program.
Getting to do a little research in CLT. Uh, diaphragms, floor systems and how they respond to earthquakes, uh, kind of moved outta that part of my life in academia, into working with Freres first in QC and QA, and kind of got a little bit of a taste of the laboratory life testing materials, breaking materials, and I enjoyed it.
Uh, but also I've always been looking for the opportunity to stretch a little further. Uh, so just here recently in the last month or two, I've been able to move into the project coordinator role, helping Freres really with the mass supply side of things, both planning these projects, getting logistics figured out, uh, and just, you know, a number of other things when it comes to planning a project, all the, the detailing that comes with making something from a concept and getting it into production.
And what does that look like? Well, great Cody, thanks. Uh, pleasure to be here too. Uh, this episode's gonna be a bit like one of my favorite TV shows, How it's Made. However, during this episode, we're gonna have to work a little bit harder than they do on the TV show. Uh, we're gonna have to describe what we're seeing and that our audience is only able to hear.
Uh, but before launching into that, uh, we should, of course, first start with understanding the product itself. What are mass plywood panels or MPP as it's often known? Yeah, so, you know, on one hand it can seem almost self descriptive, right. Mass ply panels. But on the other hand, it can be almost a little bit misleading too, given how unfamiliar we are with this one of a kind product.
So if we're thinking mass ply panels, uh, it sounds like listeners might be familiar with CLT. Uh, but just to give a quick descriptor, CLT or cross laminated timber is really a, a massively glued together panel. A little bit, kind of like a massive Jenga tower where you've applied glued to the faces of all the strips of wood.
Now that's CLT. Now, if you wanna think about something of an equivalent product. MPP is still a panelized product, uh, as opposed to being made out of pieces of dimensional lumber, though, uh, think four by eight sheets of wood that are glued together, both on end and on face. To make these mass format panels, uh, and they can be used in a variety of formats, all from floors to walls, to beams and columns.
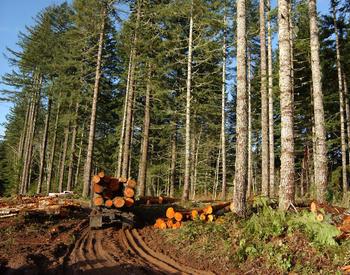
Uh, really, almost any element of a building. We can probably make it out of MPP. Great. Thanks. A great way of describing it. Um, just for our listeners here to tell we are actually standing in the log yard of Freres, uh, plywood plant plant two here in Lyons, Oregon. And the noise you're hearing is, uh, uh, loaders picking up logs and, uh, big crane moving loads of logs.
And, uh, we're gonna move into the, the actual plant itself here soon so that you can get some ideas on what, what the equipment in there does and what it sounds like. So, Cody, as you said, this is a really a unique product, but, uh, now where did the idea for mass plywood come from? Yeah, so the idea for mass ply really started, oh man, even five, six years ago, you know, we're looking back 2015, 16, 17, uh, where Tyler and Kyle Freres, the two brothers who are, you know, really heading up a lot of this operation.
We're looking for some other uses, uh, for the veneer here. You know, we're always looking for ways to advance, uh, different products. The company can make to better utilize the fiber that we're getting in here. You know, using logs more efficiently and, you know, there's always some set of veneer that you might either have a tough time getting rid of, or have a hard time selling on the open market.
And mass ply is a concept, you know, just coming from a bunch of market research, trying to see where there was a need, uh, really fit the bill for having an opportunity to put some veneer, some really good and some, uh, you know, less so on the market into a high quality product that's able to perform. You know, that was sort of, the goal was how can we get this veneer, uh, that we can't get rid of and how can we not only make it perform as good as any other, but also, you know, give it value both for us and for the customer.
Uh, so mass ply is a concept started then and ever since, you know, 2017, 2018, uh, has really been taken off at the mass ply plant, just up the canyon here from Lyons.
All right, well, again, since this is, uh, intended to be a, a virtual mill tour, let's, let's talk about how these mass plywood panels are made. Uh, before we walk around the facility, since it can get a little noisy, uh, let's start with a really high level overview. What are the individual steps involved in making MPP?
Yeah, so if I'm gonna run over this with kind of a mile high view, MPP is gonna start all the way back to the log. And they're gonna basically process that log down into a nice usable block size of wood, something big enough that we can put a knife to, and that we can peel the veneer and we'll make out this big, long ribbon.
Uh, once you peel the veneer and you got a ribbon, you can clip it to widths in order to make the very familiar four by eight shape that we're all familiar with with plywood and LVL. And so after you've clipped it and you've peeled your veneer. Now you can send it out to the dryer. The dryer's gonna make that veneer usable for wood products.
And at that point you can grade it based on visual characteristics, mechanical properties and moisture. And from there, you've got a usable sheet able to make up pretty much whatever you want from that point on. From there that wood is sent off to our plywood plant. In our case, our plywood plant is our producer of MPP LVL stock.
And by LVL, I'm talking laminated veneer lumber. That plywood plant's got a special line that they use to lay up. Uh, our proprietary layup that gives us that one inch thick layer that creates ultimately the mass ply panel. So using this one inch thick four by eight panel, we bring that into the MPP process where we join those panels on ends to make whatever length we need.
And we lay 'em together side by side and glue 'em up to make width and thickness we need. At that point, all that's left is secondary processing that gets our MPP panel cut to shape, ready for customer use and sent out the door on a truck. All right, well, we've made it now to the mass plywood panel facility itself and, uh, pretty, pretty quiet in here.
Um, so that'd make it easier. We can actually do a walking tour here without a lot of noise getting in the way. So just to recap, we've got the, the logs arriving, the bark being removed. Um, they're cut to length. They're they're steamed to soften them up. Veneer is peeled, clipped to width. It's dried, it's graded for strength and, and appearance properties that plywood was laid up in the last facility we just visited.
And now, we are ready to actually talk about the steps involved in making the mass plywood panels themselves. All right, so to start things off, we're gonna be all the way at the beginning of the process for MPP. And this happens at the scarf line. So when I'm talking about the scarf line, what I'm really referencing to is the type of the joint that we use to make our any number of length panels that we do in this plant.
You know, there are many different kinds of in joints as we call them. There's finger joints. There's really a butt joint. When you just put two pieces of wood face to face to each other, and you try to gloom together. And in this case, we have what's called a scarf joint. That's sort of where you make a beveled cut through the surface of the wood at some angle, it might be 10 degrees, 12 degrees, and you build in basically a slant or a ramp onto the end of your panel. Then you do that to the other panel, the next panel behind it, except that that slant or that ramp is turned upside down so that you can marry those two together.
And if they have the same surface, the same profile, then when you glue 'em up, you're gonna have a continuous piece of wood. So in this case, this scarfing process basically cuts one scarf joint on one face. It takes the panel out and using robotic arms and suction cup technology, just like we did at the plywood at the, uh, plywood plant.
It flips that panel end on end. 180 degrees along that short axis, and it's gonna cut a scarf joint on the other end of the panel. Only upside down from where the first one was. And the result of that is gonna be one panel that's got two scarf joints on either a scarf joint on either end essentially. Now, those panels get stacked up and they get preloaded in what we call batch wood. We'll run a certain volume of this scarfed panel material and store it on the ground until we're ready to fill an order.
And usually that happens in any matter of a single day to a number of weeks, depending on the size and the volume of a given project. You know, small buildings, houses, uh, doctor's offices can be done in a matter of a day or two. Um, whereas skyscrapers 10, 12, and 18 stories can take a number of days to even weeks in order to get that much wood scarf and ready to go.
Once that batch wood is ready, then we begin to feed the next step of the process. The scarf line feeds right into the RF press. Now just like the plywood plant had a hot press, something that forces that glue to cure through heat and pressure. Well we're trying to do the same thing here, except the way that we deliver heat to the glue is just a little bit different.
We're still using steel platens in order to press these joints together, but instead of using heated platens and forcing heat into the middle through time and duration. Rather, we're getting heat into the joint, through the use of RF technology, by RF I mean radio frequency. Just like the way you might microwave a meal at home, or you might heat up a glass of water that way.
Uh, it's gonna be the exact same way. We're gonna use RF waves to go through the panel and it's gonna heat up that moisture that's in the joint causing just the glue itself to cure and give us a really fast, really solid cure out on the joint. Once those panels have actually been scarfed, glued together and put through the RF press for curing.
Essentially what you're left with is a continuous length of panels being glued together. End on, end on end. And so as we go through the outfeed or the output of that RF press, really the next step is to figure out, well, how long do we need the lamella to be? And so based on orders that come in from the sales and the project coordinating department.
We know how long and how much of each length that needs to be done in order to fill a job specific requirements. And in this case, on the out feed of that, RF is just a small little flying saw. It comes across the width of the panel and cuts it at the right time in order to produce panels that are long enough to be able to get all the parts that we needed nested or in this case arranged in the billet cut out properly.
Uh, once those final lengths are cut. They're sent down a roll case for a nice, easy transition into the next step, which is the sanding process. Now, this is tough to see through podcast forms. I'll have to tell you that as we're laying up these scarf joints together, there's a little bit of an overlap between the thin part of the joint of that slant and the top of the next panel.
Just a little bit of a lip. And so the goal of the sanding process is to knock down that little bit of a lip to give us a nice, smooth surface. So that later on in the process, we have a really, even non, uh, undulating surface that we're able to glue together. And that's good because the glue that we use requires a fairly consistent profile in order to stick together.
So as the panels come down, the roll case, they'll go through this double face sander, a double drum, double barrel sander. And sand the bottom and the top of the panel at the same time. As the panels move through the sander, they're fed through using a series of rollers and belts and out the other side should be a relatively uniform and nice looking sanded surface to boot.
Uh, the last step in the process, if so required is what we call the gang saw. So the gang saw, unlike the flying saw makes cuts along the length of the panel as opposed to the width. And so what that gang saw does is able to cut our four foot wide. However long billet into one, two or three smaller widths.
And what that allows us to do is to be able to create the specialized brick layup pattern, uh, on the MINDA press. And we'll get to that here in a little bit, but for now, all we need to know is that we have the capability to cut our four foot wide panel into two foot wide parts that allows us a lot of flexibility on the next part of the process, which is the MINDA.
All right, so now with SCL or LVL panels, scarfed or sanded, and the ones that need to be are sawn down the middle. We can now move on to the next part of the process, which is laying up the MPP itself. And so where we're at now, here in the plant is really in the batch wood part of the product. This is where we've got all of our scarf to length.
But now at this point, we've gotta organize 'em by job. Get 'em put into lengths and put 'em into batches. And sent on down the role case in order to be laid up essentially backwards. So as we're looking here, there's two parts of this whole MINDA operation. And when I'm talking about MINDA, as I referred to earlier, that's the company that creates the big press for us.
The big press that's going to glue these up from just one inch thick layers into up to 24 inch thick layers. Uh, and the first step of that is the dry stack. So that's where we take columns of these four foot wide and these two foot wide lamellas and we put 'em over underneath a vacuum gantry, something of a mechanical arm that sucks up the layers and places them down on a roll case.
And specifically for us, it puts them down essentially in reverse order to how they're going to end up in the press. We call it a dry stack because there's no glue going between these layers yet. You're essentially compiling your recipe. So then when you it's time to put it together, like in the kitchen, when you pre-measure ingredients, it's fairly quick and fairly easy to assemble that into a meal or in our case, a panel, uh, the vacuum gantry assembles these panels, and really only a couple different ways.
It's either going to stack the panels in a, what I might call a Lego brick formation. So just like you, if you're gonna build a Lego brick wall, You're not gonna stack the Lego bricks right on top of each other and next to each other, because if you try to push that wall over, it's gonna fall apart pretty quickly.
Whereas if you decide to make a little bit of an overlap in the bricks, and then you overlap the bricks over and over again, making a brick wall pattern. That Lego wall holds together quite a bit better. And in the case of MPP, it's the exact same thing. Using this Lego brick or this brick pattern. We're able to alternate these four foot wide panels and these two foot wide panels to cover up the gap between the layers below it.
And this gives us a really solid sturdy panel. And truthfully, that's how we're able to do this span in multiple directions, both along the main length of the of the part as well as across the width. So that's all in the dry stacking process. You're getting your recipe right, you're putting your panels together, and then last but not least, you're finally moving down the line into the MINDA. So the MINDA looks a lot like the dry stacking gantry. There's a bunch of vacuum arms that are above the billet and they pick it up one layer at a time, one layer of the whole recipe. So that might include two or even three different layers or lamellas of wood all at once.
Those are laid down onto a conveying belt and then an extruder head, which is another type of glue technology is used to lay down the glue layer by layer onto the panel. Now, the extruder head, what it's really doing is laying out beads of glue. So we're laying out one bead of resin and right behind that is another bead of what we call catalyst.
So the catalyst is something of a formic acid. It's this really strong, really potent acid. And as I'm standing here now, it sort of singes my nose hairs and it, what it does is it causes that resin to begin to solidify, to begin to cure. You know, when I talk about catalyst catalyzing really means to speed up the reaction that is the glue.
So our, our glue head lays down resin and catalyst across the entire layer. And as it's doing that, the vacuum gantry above is at the same time. Picking up, uh, the next layer to be put down on top of it. And effectively after that, it's a rinse and repeat cycle. The glue head goes back and forth applying glue as the vacuum gantry goes down to pick up the next, already laid out layer and put together the MPP panel.
At this point, the MINDA is able to put together anything from a two inch thick panel to a 24 inch thick panel, anywhere from four feet wide to 10 or even 12 feet wide. And we can make billets as long as 48 feet and all the way down to 32 feet and anything in between is in the realm of possibility and how we're able to optimize our nests, so to speak.
And the nest again is really just that arrangement of how parts fit into a raw piece of wood. So moving on from there, the layup is finished and complete. And that conveyor that everything was built upon is then going to carry these billets through and through underneath the operator station and into the press itself.
Now, unlike any press we've seen yet today in the company, this press has absolutely no heat in it at all. The RF press tried to cure the glue using, you know, radio frequencies and heating up the water in the glue. The hot presses over at the plywood plant, they use heat and heating up the wood to accelerate the curing of the glue inside the panel.
But this panel process is far too large, too thick to be able to drive heat into the center of that billet. So rather than relying on heat to catalyze the reaction to speed it up, we rely on that formic acid to do the job for us. So at that point, without the heat, all we rely on to cure out the MPP is time. So over the next 90 minutes, that panel is gonna sit under pressure and it's gonna wait.
It's gonna wait for that formic acid to do its job and solidify the glue, turning it from something of a liquid, into something, more of a gel and from a gel to more of almost a plastic consistency. And before you know it, after about 90 minutes, you have something of a tacky glue that is able to roll outta the press to be separated. And at that point, we can begin to think about sending these panels into the secondary processing part of the process.
All right, so now that we've left the MINDA press, we're making our way to the secondary processing side of the MPP plant. So this is where the panels themselves come out.
They're separated and we can basically send them down one of two tracks. We can either send it to the, the big band saw. And that big band saw specializes in just cutting, uh, both length and width cuts, uh, for big rectangular pieces of wood. Think columns and beams of a building and whereas if we need to get some more specialized parts, maybe you need curves or you need specialized bolt holes, or, you know, spline elements for a wall.
Um, a lot of very specific, very specialized joints that go into these timber panels. Then you gotta think about the CNC machine. That's the computer numeric controlled, uh, cutting machine. And so we often just refer to it as the CNC. And so as far as the process goes, you know, stepping through here, looking at the CNC and there's basically two fronts.
The first front is tackling the programming side. And so our CNC manager and specialist is responsible for taking files from the customer. You know, these might be output from a CAD program or they might be, well, CAD and many different file formats for that matter. You know, IFFC files, SAT files are among the many things that we request from engineers in order to feed into this machine.
Once you have those files, you can break them up. You can program each panel part by part, give it different rules and different paths for the tools to follow. Everything from a standard rip saw and crosscut saw. To a router bit that will actually cut channels and pockets and do specialized paths.
Um, you can do it all using the CNC machine. And in this case, if we're looking at our CNC setup, Uh, the particular way that we hold the panels is a little unique. You know, many setups might have something called a vacuum table that holds down the panel using a vacuum to the surface. Uh, for us, these panels are so large, their own self weight is enough to hold them down to the degree that we actually have sawhorses, you know, these saw horses allow us to hold the panel at separate intervals. And because of that, the surface area and the weight creates enough friction that we don't need to worry about that. This increases production time, allows us to do things a little quicker and ultimately it makes it very easy to do what comes next, which is to offload.
All of these parts, these pieces, these specialized parts of a building onto the roll case using an overhead crane. So if we were to look up into the building right now, we'd see a handful three, four different cranes throughout the structure, you know, spanning well over 60, 70 feet across the building with several different hooks on each crane, allowing us to connect, uh, straps and hooks and be able to lift these panels and put 'em into place onto a whole roll case.
In this roll case, which is just a string of rollers and series allows us to move these massive pieces of wood throughout the facility, uh, without accruing damage, no marks. And for many of our customers, this allows us to really assure a nice finish coming off the line. You know, being able to maintain that sanded surface that we had all the way back at the scarf line.
So, if you don't decide to take the panel through the CNC machine, your other option might be taking the panel through the saw line. So the saw line process is fairly straightforward. If not just a little bit different. The panels are gonna come out of the press, down a set of chains, and it's gonna drag it all the way over to a big metal red frame.
And you can really imagine this red frame kind of like a dolly is gonna pick up a heavy load. The panel's gonna butt up close to. The dolly or the red frame in this case is going to tilt back and it's gonna use a couple of forks underneath the panel to gently lift the panel up and tilt it into place.
And after that, the panel is already tilted up at the right angle in order for the panel to slide into and be ready to be cut. The panel just gently slides off the forks and is set onto some chains that transfer it into the actual band saw. Now, the band saw is really made up of two key components here.
We've got the actual carriage and that carriage moves the panel through the saw and allows us to make these cuts all the way down the length, basically cutting the panel into whatever widths that we want. And then there's the actual band saw component of the blade. So the band saw is responsible for making those cuts, keeping it straight
and then on the out feed, the carriage simply lets the panel go and a set of chains, take it away to the next part of the process. Now what's kind of neat about this carriage is not only is it able to move back and forward moving the wood through the bandsaw. Like you might move, uh, piece of wood through your bandsaw at home in your home shop.
Um, but the carriage is also able to flip the panel back and forward. Just like you're flipping a pancake. By flipping the panel on one face and onto the other, that allows us to use the bandsaw to basically what we call edge the panel to give it nice clean edges on each side of the billet. Now this panel or billet as I refer to it, once it has clean edges, that gives us a nice working surface to be able to continue to make our remaining cuts on.
Now, once the band saw finishes making these rip cuts or cutting the panel into different widths. Essentially what you're left with are these long strips, all the same width, but not necessarily finished components yet. What we need to do next is take those long strips of wood and they can be anywhere from 32 to 48 feet long, and we've gotta cut the final piece of production wood out of it.
And so what that looks like is the band saw on its roll case, sends the panel down, down, down. To a roll case. That's almost 15 feet below where we actually make the rip cuts and it's gonna send that strip of wood all the way down, half the length of the plant to another machine that we call the P E T or the precision end trimmer. The end trimmer has one job
and that is just to make cross cuts. Or in other words, it's gonna cut the billet into appropriate lengths. So we might have a 48 foot billet that needs three, say 16 foot long beams cut out of it. Now that's kind of rough. Um, because there's gonna be a little bit of loss due to the width of the blade as it cuts the wood out.
Um, so more often than not, we will create a bill long enough to accommodate all the parts we need, plus a little bit more. And essentially the PT makes one cut to get the raw end clean, and then it's going to run that billet all the way through to a bump stop. And that bump stop is the precision part of this whole machine.
The bump stop is on a moveable base that allows it to go to any length that we need to be in that 60 foot range relative to where the band side is. After that we make a cut, the P E T precision bump stop moves, and we send that finished cut on down the line, making room for the next part to be finished up.
With all those cuts made we're left with billets cut into beams that are all perfect width, length and thickness and ready to move on to the shipping department for packaging and sending out the plant. So as these MPP panels are moving down the roll case, they basically all have one destination, whether that's off the CNC or that's off the saw line, they all end up at the shipping department for the MPP plant.
Now, the interesting thing about the MPP plant is the shipping department relative to the rest of the plant is actually fairly small square footage. Uh, this is one of those facilities that really relies on sort of a lean production mentality. One of those things where it's hand to mouth, you're only making as much as you need, and you're delivering it about as fast as you can get it off the line.
And so here, we've got a couple of folks in the shipping department who are regularly in tune with the planning and in my case, what's about to be project coordinating. To get load sequences figured out, you know, when do these panels need to be taken off the truck? Where do they need to be? And what's that order?
And just that need alone dictates how these panels get cut in the process, where they get placed, how they come to the production line? So that we can minimize the number of picks and the amount of handling that needs to be done on these panels. And so in this relatively small area, this relatively small square footage, we're able to stack panels, essentially how they're going to look like on the truck or on the rail car and using the massive overhead cranes we talked about.
We can pick up over 15,000 pounds all at once and set them down straight on the truck, the car, and get them out the door in a relatively short period of time, especially relative to some other processes.
All right, Cody, thank you so much for the time that you've taken with us here today. And, uh, before we wrap up this episode, got just a few more questions for you and what we call the lightning round.
Question one. What is your favorite tree species? I'm gonna have to say Doug fir I think if I said anything else, I'd be lying. Fair enough. That's about all we can see and smell around us in fact. And question two, what's a unique tool that you use that helps you with your work? Yeah, I would say, you know, up until recently here, the unique tool was actually the UTM or the universal testing machine.
Um, that was one of those tools that I was using to evaluate the mechanical properties of the wood. And it was quite interesting to get into not just the mechanics of that machine, but also the sensors and how you determine accuracy and precision. It was interesting to me and it yielded a lot of cool results.
Right, as a structural product, that's all really important stuff, right. Now, lastly, what other resources can you share related to mass timber for any of our listeners that would like to dive a little deeper on the subject? Yeah, I think, you know, for recommendations and mass timber in general, I might start with the CLT handbook as a resource, and that's gonna give you broad stroke overviews of the industry.
Of the product performance of special niche uses, et cetera. You know, that's gonna be something of a deep dive, uh, I guess, into the industry as a whole, um, for people who are maybe unaffiliated with the industry, but if you're familiar with it, that's gonna be a really good starting point. Uh, but beyond that, I might also offer up a few extra sources here for MPP as well.
Um, Frereswood.com or Freres engineered wood as the company is now, branding, is a fabulous website that has the opportunity to see MPP, um, both for performance with design and structures, as well as environmentally. You know, we work really hard with our, uh, life cycle analysis and our E P D or environmental product declaration, uh, to really get out there, just the benefit of using this product, using wood in general, you know, how can carbon sequestration really help out in the building process?
And uh, and, and to boot as well. You know, how safe are these products? How do they get used? Well and effectively? And I think our website is a fantastic source. And if I might offer up one more too, just to check out all the social media, uh, interfaces, YouTube and Facebook and all the other ones that are out there, um, you'll be able to get pictures of what the company's doing.
You'll be able to get how to videos and blogs. I often find myself writing blogs on little niche topics about what we do and things that we interact with, and yeah. I think that's a great starting point.
Great. Well, again, thank you Cody. It's really great to see you again and to talk to you today and to have a chance to see how this very cool new product is made.
And yeah, just wanna say thank you again for having me on, you know, this is one of those things that I really appreciate to do. I love it. And any opportunity I have just to interface and talk to people about the cool things that we're doing here. It's great. Thanks again. All right, great, thanks Cody. Well, this concludes another episode of OSU forestry and natural resource extension's In the Woods podcast series.
Thank you all so much for listening and don't forget to subscribe. Bye bye.
Thank you so much for listening. Show notes with links mentioned on each episode are available on our website inthewoodspodcast.com. We would love to hear from you, visit the tell us what you think tab on our website to leave us a comment, suggest just a guest or topic, or ask a question that can be featured in a future episode. And, also, give us your feedback by filling out our survey.
In the Woods was created by Lauren Grand, Jacob Putney, Carrie Berger, Jason O'Brien and Stephen Fitzgerald, who are all members of the Oregon State University Forestry and Natural Resources Extension team. Episodes are edited and produced by Kellan Soriano. Music for In the Woods was composed by Jeffrey Hino and graphic design was created by Christina Friehauf.
We hope you enjoyed the episode and we can't wait to talk to you again next month, until then what's in your woods?
In this episode, Scott Leavengood takes a tour with Project Coordinator, Cody Beairsto, of Freres Engineered Wood to learn about the production process of Mass Plywood Panels.

