Wildlife cameras, often called trail or game cameras, are cameras that are strategically placed on your property to take pictures and video of wildlife while you aren’t around. The cameras are typically triggered by motion and store the pictures internally for you to view later. Originally, wildlife cameras were used in wildlife management research, but as camera technology improved they became affordable and available to the public.
There are many fun and educational benefits to placing a wildlife camera on your property. With the help of these cameras, you can develop a cumulative list of the diversity of wildlife species found on your property to supplement the wildlife section of your property’s management plan.
Wildlife cameras can also document the activity of rarely seen wildlife, monitor animals without disturbing them, and scout the presence and movement of game animals. Additionally, these cameras can be an added security measure if you are concerned about illegal trespassing on your property.
If you have a large property, you do not need to purchase a lot of cameras. First try purchasing one and systematically moving it around your property a few times a year to capture multiple habitats.
Alternatively, you may be interested in just monitoring areas of high priority or habitat value, such as a pond or bird’s nest. It is always helpful to know where animals congregate on your property to help you make an informed decision on placement.
Once you determine the general location, placement will depend on the animals you’d like to see. Here are some suggestions to maximize your viewing potential.
- Place the cameras higher and angle them slightly downward. This will increase your visibility in thicker brush while increasing the chances of seeing both the large and small animals.
- Use a mount over a strap for better stability.
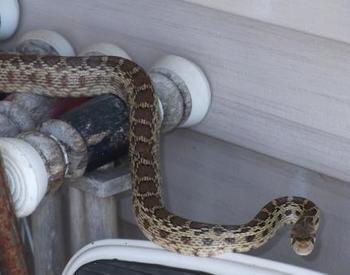
- Interested in seeing some amphibians, snakes or small carnivores? Consider putting some cameras closer to the ground.
- Placing cameras slightly off the trail at a curve, will cause the animals to walk toward it. This will increase the number of pictures of the animals looking directly at the camera and decrease the number of blurry photos if your camera has a slow trigger speed.
- Clear branches, large shrubs and leaves from around the camera to minimize setting off the motion trigger on a windy day.
- If you are using the camera to scout for game animals, minimize your scent by wearing gloves.
- Double check the camera’s placement and test it before you leave. There is nothing more disappointing than returning to a camera that you forgot to turn on.
If you are worried about the camera being seen, protect it by getting a security box or label it with your name and phone number. Making note of the serial number may help authorities if the camera is stolen. The risk of this should be low on private property.
Considerations when choosing camera features
With the growing popularity of wildlife cameras, there are lots of choices out there.
Picture quality
Picture quality is often rated by the lens, image sensor, and number of megapixels. A higher number of megapixels leads to higher resolution photos that capture more details, so they look better if you are cropping the photo to increase the size of the captured animal.
However, don’t let megapixels drive your decision when buying the camera. Instead, consider what you’ll be using it for. Higher megapixels will be great for a professional outdoor quality photo, but you can still get a good-quality picture for species ID or home security with a lower count.
Since wildlife cameras don’t usually advertise the lens and sensor quality, it is always a good idea to look at sample photos from the camera online.
Motion or heat sensors
Typically, wildlife cameras are triggered to take pictures by motion, however, some are coupled with heat sensors. If you’re looking to monitor salamander migration to your pond, heat sensors aren’t going to pick up these cold-blooded animals. Mammals, on the other hand, are warm-blooded and will have no problem setting off a heat sensor.
Time-lapse mode
Time-lapse mode takes pictures at specific intervals or times of the day despite triggers — such as every five minutes.
With many models, you can choose how often a camera takes pictures and how long it will operate in time-lapse mode. This can be useful if you have a meadow or small pond where you know activity will be higher at certain times during the day.
Detection range
The detection range usually includes an angle and a distance that make up the detection zone. These values help you determine the farthest distance an animal can be from the camera to trigger a photo.
Consider picture quality here too, i.e., the more megapixels you have the more details captured. If you have low megapixels and the camera is set up for a long trigger distance, you’ll capture fewer details and markings in the animals. And pictures may look pixelated when they are blown up. Long trigger distances are important in a meadow but may be less important in a denser forest setting.
Trigger speed
Trigger speed is the time it takes for the camera to take a photo once the animal enters the frame. Trigger speeds of less than half a second are ideal. Anything longer and you could end up with a lot of empty frames and animal butt photos. Although Animal Butts sounds like a great coffee table book!
On the other hand, if the camera is looking over a baiting station — food or salt lick — which situates the animals looking directly at the camera, then a slow trigger speed may not be much of a factor.
Recovery speed
Recovery speed is how quickly the camera can reset and take a new picture. Slow recovery speeds of one to two seconds may save you on memory, but you may miss some visitors if there are multiple animals together. With a fast trigger speed, but slow recovery time you may get a great photo of the doe, but you’ll miss the mountain lion that was stalking her.
Photo bursts
Other cameras can take bursts, or several photos per second. This can increase your chances of getting a good photo.
If you’re only curious about what’s out there, you may not need burst mode. However, if you are looking for a good picture, burst mode will give you more options to choose from. You’ll even get better shots of fast-moving animals.
Other cameras will take ten-second video clips, which can be useful if you are interested in documenting animal behavior, like watching predators around nesting birds, but videos take up a lot of memory and battery. This may be difficult to manage if you don’t check your cameras often.
Time stamps
Time stamps are important if you want to collect information about times of the day or year when certain animals access your property. This can be a really useful tool if you know that a certain bird species migrates through your property during a specific season. This can help you monitor arrival patterns.
Some cameras go the extra mile with moon phase, temperature settings and barometric pressure indicators as well. These are only important if you are a serious hunter who doesn’t have the time to go scouting.
Battery life
Battery life plays a large role during high activity and is a consideration if you don’t live on your property to maintain the cameras frequently.
Alkaline batteries are cheaper but will degrade picture quality over subsequent use and cooler temperatures.
Lithium batteries are longer-lasting, are often rechargeable, give better consistency of quality and work better in cold weather. These qualities may save money over time by not having to replace your alkaline batteries as often.
Some cameras recharge with solar packs or allow for attaching a solar charger. These have the potential to run indefinitely, but if you are placing the camera in dense forest, solar packs may not be efficient for you.
Screens
LCD screens make camera setup easier, especially while adjusting placement to get a good shot. You can view the pictures right away and directly on the camera without an adapter or extra device. This is the option for you if you can’t wait until getting home to look at the photos.
For hunters, no screen may encourage you to get in and out faster without leaving a scent. No screen will also save you on cost.
Storage
Pictures are typically stored on an SD card. If your camera takes high-resolution photos, bursts, video, or you won’t be able to check and clear the SD card regularly, you’ll want a minimum size of 32- or 64-GB card because these features take up a lot of storage space. If you don’t have an LCD screen, view pictures by downloading them onto your computer directly from the SD card.
Before checking photos on your digital camera, be sure your wildlife camera software is compatible or pictures may be lost. There are a few more expensive models that will remotely transfer your photos via cellular technology to your email for a monthly fee. This feature is less invasive if adjusting the camera will disrupt the animals you are watching, but is only effective if you have cellular reception in the camera location.
It is important to note that this tool, if positioned correctly or set for time-lapse photo, has the potential for an enormous number of pictures. You may have an amazing shot of a bird catching a snake, but it’s no good if you can’t find it. Some cameras come with or have the option to add on photo-management software that usually comes with photo enhancement tools. This can be helpful if you don’t consider yourself an organized person or if you want to tinker with the pictures.
Lighting
Depending on the species, animal activity can increase at night. Night photos require light for a good shot. Picture quality will decrease at night, but you can still get a clear picture within an acceptable range. Higher flash ranges will show animals at farther distances from your camera.
There are three types of lights to choose from. The first is your traditional white light flash. These are good for getting close-up, full-color photos where you need to see specific markings. This light, however, may spook the animals, but research suggests that they are only spooked for a brief time before acclimating to the flash and resuming normal behavior. These lights aren’t the best option for security cameras because the noticeable flash could be seen by the intruder.
Other options to regular flashes include infrared light or “low glow,” and black infrared or “no glow.” Both of these options take black and white photos.
Infrared lights produce a visibly faint red glow when taking pictures. The red glow, when positioned correctly will not spook animals, but the light can be seen when looking directly at the camera. These cameras typically take better night images compared to the black infrared cameras, but there are exceptions.
No-glow cameras emit no visible light while taking photos so your subjects will be unaware of the cameras at nighttime. These light options are typically preferred for security cameras and hunters because they don’t spook deer or trespassers.
Excitement for both you and your friends
Wildlife cameras can be a great addition to your property and a useful tool for augmenting your management plans. If you keep your objectives in mind and choose wisely on the features, there is no reason you can’t get a good quality camera that does what you need for a reasonable price. Now, go out and set your cameras to show off the wildlife on your property.