One of the most effective tools for caring for your land is a management plan for your property. Using this rural resource guideline, our plan template and the assessments from the other rural resource guidelines in this series, you can create a plan that will help you achieve your land stewardship goals. Learn why land management planning is important, what makes up a land management plan and how to put one together.
What’s in a management plan?
In a nutshell, a plan is a written document that describes your property, identifies what you want to do with it, and outlines a strategy for accomplishing your property management objectives.
There are many different plan formats. We have created a template that is relatively simple but comprehensive. The Land Steward plan template includes:
- A cover page.
- Property specifics (location, zoning, acreage, etc.).
- A property map and description.
- Resource assessment summaries that describe the conditions on your land.
- A description of your values and vision for the property.
- Clearly defined and attainable management objectives.
- Planned activities or projects and timeline.
- Project record and monitoring guidelines.
Why make a plan?
Surveys of participants in the OSU Extension Land Steward program tell us that making a plan for their land is one of the most effective aspects of the program. Stewards care about their land, and a plan empowers them to make informed and strategic decisions. It helps them follow through to achieve their goals for their land.
Benefits of creating a plan
- Learn more about your property. As you go through the process of creating a land management plan, you will collect information that will give you insight into past and current conditions and potential future outcomes for your property.
- Clarify your property management goals. Creating a plan will force you to hone in on what’s truly important to you. What do you really want to do with your property? What do you want it to look like in five or 10 years? How do you hope to use it?
- Focus and prioritize. There are always many possible projects that require time and money. A plan helps you prioritize the most essential actions.
- Communicate your intentions and plans to others. A plan is a great tool to use with advisers, contractors and even heirs or other family members who help care for the property now or will do so in the future.
- Demonstrate your commitment to stewardship. Completing a plan shows that you’re organized, serious and that you have a concrete vision for the future of the property. Management plans are often prerequisites for cost share assistance and various types of forest and farm certification programs. While the plan you create here might not completely meet the requirements of these programs, it will give you a great starting place.
A plan is a living document
Your plan is not cast in stone. Life happens, and circumstances may change. The plan is meant to be used and updated as needed, not sit on a shelf gathering dust.
Review your plan once a year to schedule activities and update your progress. Consider updating the plan at least every five years to reflect new goals or objectives.
The plan is also a great tool for organizing business records and keeping track of activities on your property. We recommend you put it in a three-ring binder.
Creating your plan
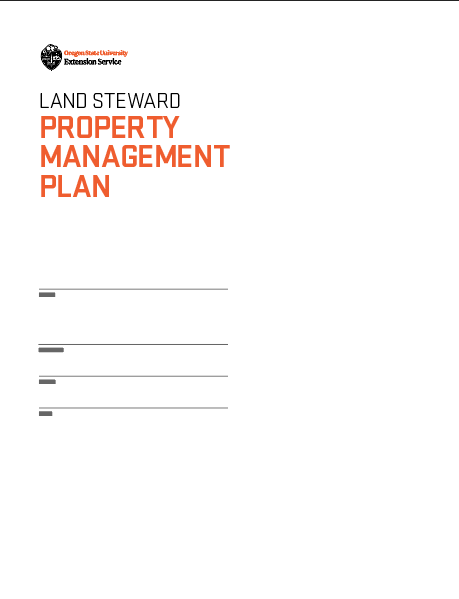
Examine the Land Steward Property Management Plan template. Page through it and look at the organization and components. Reference the plan template as you continue reading below. Each content box has some guidance. You can fill in this template or use the categories as an outline to create a plan document from scratch.
Cover page and property information
The first three pages cover basic information and are straightforward to complete. Much of the information will be available on your deed or your county website.
There are boxes to list your zoning and any special assessments. Note that these are not necessarily the same! Review Economics and Enterprise: Financial Considerations of Rural Life, EM 9315,for more information on zoning and special assessments for farm and forest land.
Property map
Creating a property map (page 3 on the template) is a helpful exercise. It will show you the relationships between the main features on the property such as the home site, outbuildings, woodlots, pastures, streams and so forth. To create a property map you’ll need a base map, ideally a current or recent aerial image that shows your property lines. You can find or create a base map using various online mapping tools. Links to a few of the many online mapping resources can be found in the resources section. How to Create A Property Map with Google Maps shows you basic steps to use Google Maps for creating a map. Land Mapper is a quick way to get a variety of maps for your property. Additionally, your county assessor’s office may be a resource for a map of your property. You could even draw a map by hand if you have a small property.
Divide your property into zones
We recommend subdividing the property into different management zones or units and delineating these on the aerial photo. Google Maps and other online mapping tools mentioned can help you do this, but all have a learning curve.
Management zones are based on things like:
- Land use or objectives (such as farm, forest, residential, wildlife reserve, etc.).
- Major vegetation zones (including pasture, oak woodland, mixed conifer forest, etc.).
- Soil types and topography.
- Access (including roads, fences and gates).
Management zones are often separated by features like roads, streams, fences, vegetation type and terrain (distinctive features of the landscape).
The benefit of identifying and mapping subzones is that you can hone in on the specific management needs of each subzone, which are likely to be different from those of adjacent zones.

Property description
Page 4 of your template provides a place to briefly summarize the property history, terrain, current uses and landscape context. This section of the plan is optional — but it’s great background information.
Your vision for the property
What’s your vision for your property five to 10 years or more down the road? What would you like to do with it? What do you want it to look like? This is one of the most fun parts of the planning process, but also among the most challenging. You have to decide what you really want and what’s feasible given limitations of time, funding, energy and competing commitments. It may help to draft your vision at the start of working on your plan, and then come back and refine your vision after you have completed your resource assessments and learned what is possible for your land.
Your vision will depend partly on your personal values and overall goals. To jump start your thinking, complete “Worksheet 1: My land stewardship values.”
On page 5 of your plan, briefly describe your five-to-10-year-property-management vision.
Natural resource assessment summaries
Using the land steward rural resource guideline series to help build your plan
The next section of your plan is a list of natural resource assessment summaries for a variety of resources you may find on your land (forest, stream, pasture, etc.). Use the Land Steward Rural Resource Guideline series to evaluate your natural resources and create these summaries. Each guideline provides introductory information on how to care for natural resources. Each document includes assessment worksheets that will help you evaluate the condition of that resource and identify some actions you may want to take. Summarize your assessment findings in the natural resource assessment section of your plan.
Reading the guidelines and completing the assessments will help you:
- Understand the current condition of your resources.
- Identify possible needed actions or projects.
- Identify questions you may have.
- Suggest resources to find assistance.
Use any of the guideline topics that are relevant to your land and include your assessment findings in your plan.
Completing the resource assessments in the Rural Resource Guidelines
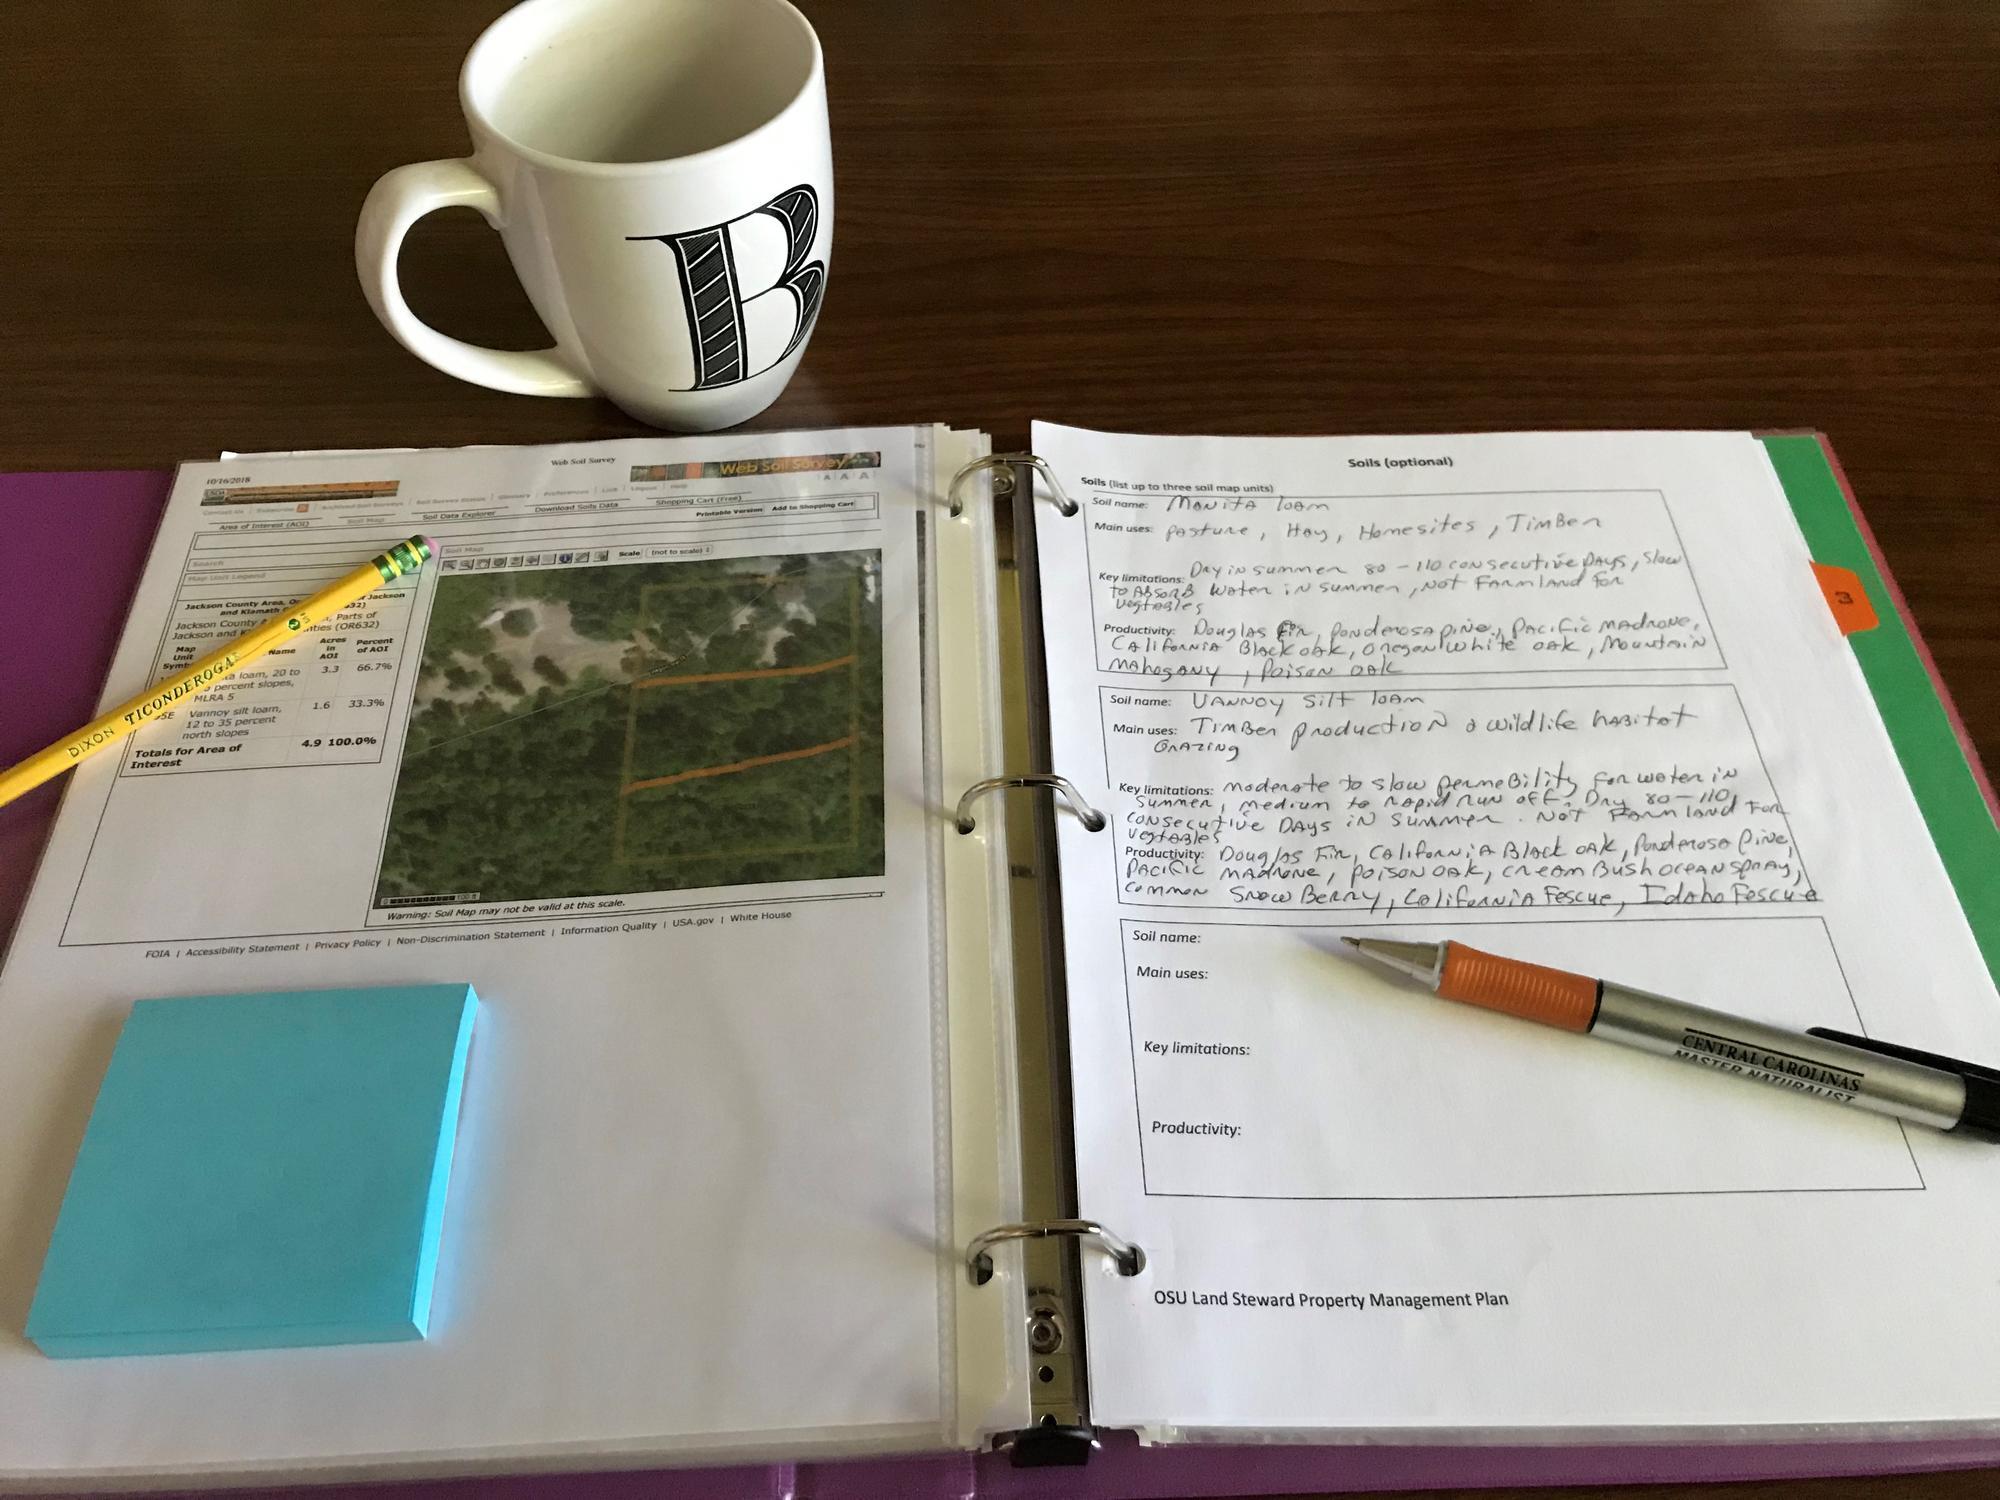
Each resource assessment consists of one or two worksheets. The first worksheet helps you assess the condition of the resource. The second helps you evaluate your management activities as they relate to that resource.
To complete the assessment, print out the worksheets and get a clipboard and a pencil. Then go outside to look at what you see on your land. For each assessment, plan to spend about 30 minutes to an hour making observations.
When you’re done, summarize your findings in the boxes on pages 6–10 of your management plan.
In the first box, summarize your goals for the resource. Examples of goals might be: maintain a healthy riparian zone and good water quality, or support a forest with diverse wildlife habitat and low fire hazard.
In the second box, you’ll summarize the main findings of the assessment. These include resource concerns and good conditions. Examples of resource concerns are soil erosion on a steep slope and noxious weeds in a pasture. Examples of good conditions are clear, sediment-free water in a stream and beneficial, weed-free forage in a pasture.
In the third box, list potential follow-up actions. Using the examples from above, these might include re-vegetating a bare area to reduce erosion or eliminating a patch of noxious weeds. The idea is to summarize the important findings of the assessment and the important follow-up actions.
As you work through the assessment, you may have questions. You may not be certain whether something you’re seeing is a resource concern or not. One of your follow-up actions might be to research key questions you have as a result of the assessments.
Major goals
Once you have completed all of your resource assessments, it is time to identify major goals for your property that will help you create the vision you have for your land. Take a moment to revisit the vision statement you created earlier. Some of your thinking may have changed due to what you have learned about your land. Review the goals you listed for each resource in your resource assessment summaries (pages 6–10 of the plan).
Next, identify three to five major goals that support your vision. These may contain goals from your assessments or they be more general goals. You also may want to subdivide your major goals into three categories:
- Quality of life.
- Natural resources.
- Production/economic goals.
The choice is yours. They are your goals.
Reality check
OK, it’s time for a quick reality check:
- Do your goals match the time you have available and your financial resources?
- Do you have the knowledge and equipment needed? If not, can you acquire them?
- Are there any significant regulatory, legal or technical constraints?
- Do you manage your land in partnership with others? Are all managers in agreement? How about kids or other family members?
- Do your vision and goals fit with the potential and capabilities of your land?
In many cases Land Stewards have found that they have needed to modify their initial vision for the property due to one or more of these real life constraints — and that’s OK. For example, one couple decided they wanted to find a smaller piece of land with less to manage after completing their assessments and plan. Another couple decided they wanted to buy another 120 acres to be able to steward more of the landscape. Yet another landowner was hoping to clear a stream-side area for agriculture, but found riparian regulations did not allow for his goal. To paraphrase the saying: “Well informed is well planned.”
Priority actions (objectives)
Now it’s time to list your priority actions. These are concrete steps that will help you achieve your goals. Consider your vision, major goals and the results of your resource assessments. What are the most important actions needed to meet your goals and address resource concerns? List one to five priority actions in your plan.
Goals versus priority actions: Goals are broad statements of purpose and intent. Priority actions are similar to objectives — they should be specific, measurable, time-bound and realistic. Completing these actions will help you meet your broader goals and achieve your long-term vision. Review the example in the box on page 2.
Develop an action plan and timeline
Now that you’ve established your vision, goals and priority actions, it’s time to develop your priority action plan (see page 10 of plan). This is a straightforward process. For each of your priority actions, describe specifically what will be done. Add a start and completion date.
List who will do the work. Identify needed resources, such as equipment, technical assistance or additional funding.
Monitoring: Show change and impact
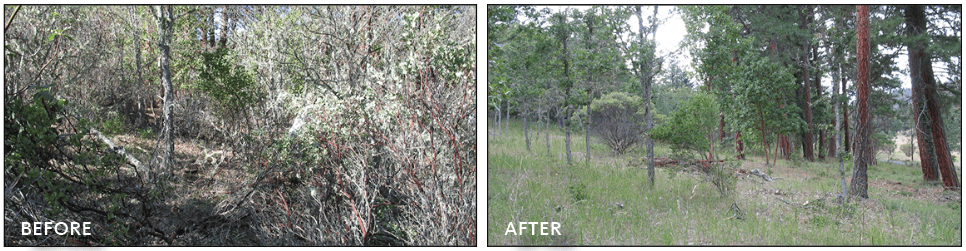
Photo point monitoring
We strongly encourage you to document your projects with repeat photos. On an everyday basis, change in vegetation is usually slow and subtle. But over time, the impacts can be dramatic.
Repeat photo monitoring is pretty simple: Take a photo at the start of your project, at the end, and repeat photos from the same location over time. This will show change and impact. You will be happy you did it!
Photo monitoring tips
- Put a stake (capped rebar is better) in the ground where you take the photo, so you can re-locate your photopoint.
- Include an object, such as a recognizable tree, in the frame of your photo so that you’ll be able to duplicate the original photo.
- Take repeat photos at the same time of the year, so seasonal differences such as vegetation changes in winter versus summer don’t mask the impact of your work.
- File the photos with descriptive name and date.
- Just do it! You will be glad you did!
For details, see the link in “Resources,” below.
Other monitoring methods
If taking photos isn’t an option for you, you can simply keep notes in a dedicated journal, or walk the land with a with a clipboard and a copy of the project monitoring sheet provided in the plan template on page 15. Be sure to include your monitoring notes in your plan later.