Dahlia flowers — with their many colors, shapes and sizes — enchant gardeners in Oregon and around the world. These easy-to-grow summer bloomers are beloved by people and bees. People have been growing and using dahlias for hundreds of years — but not always for the reasons you might think.
Dahlias were originally cultivated by Aztec people — not for their flowers, but for their stems and tubers (Figure 9), which were used for food and medicine. Spanish colonists brought dahlias to Europe in the 18th century, where they were largely rejected as a food crop but embraced as a flower. Today, 42 species and 57,000 cultivars of dahlias are grown in over 40 countries around the world.
You can enhance your landscape with dahlias by planting them directly in the ground or growing them in containers. All the blooms in the classification chart below also work as cut flowers for a bouquet.
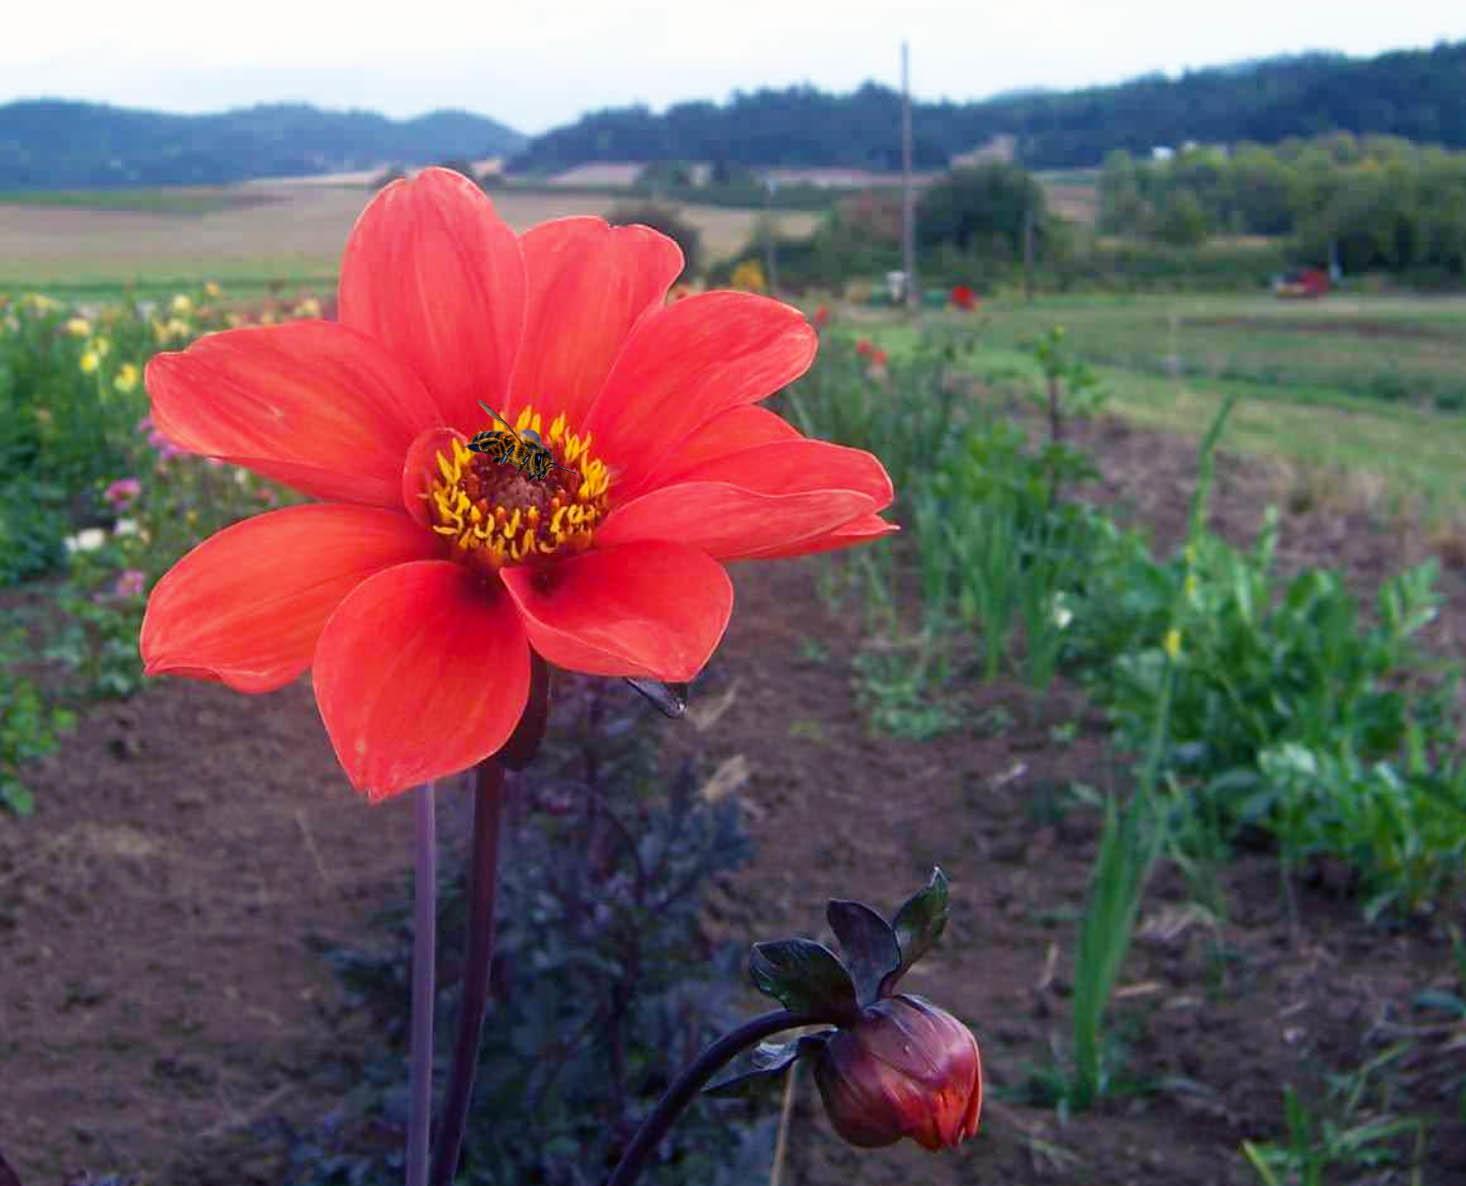
Not only do dahlia flowers make beautiful arrangements, but they are also a great source of nectar and pollen for bees, butterflies and other insects. The best flowers for attracting bees are those with the open centers described in the “other” category below. This is because their pollen and nectar are in the center of the flower. Dahlias with many petals are difficult for pollinators to feed from.
Bees are attracted to white and yellow dahlias, while butterflies prefer red and purple flowers.
Home and commercial growers across Oregon have great success growing dahlias. This publication will help you learn how to adapt dahlia cultivation to the variety of growing conditions throughout Oregon.
Dahlia classifications
Types
Decorative
- Formal Decorative (FD) — petals are usually flat and evenly spaced throughout the flower.
- Informal Decorative (ID) — petals are usually flat and can be wavy, twisted or curly. Petals are placed irregularly throughout the flowers.
Cactus
- Semi Cactus (SC) — The base of the petals is flat, and less than half of each petal is rolled or quilled.
- Cactus (C) — The base of the petals is straight and narrow; petals are rolled for about half of their length. Petals are straight or almost straight.
- Incurved Cactus (IC) — The full length of the petals is curled; petals are not straight but are curled inward.
Ball
- Ball (BA) — Blooms are ball-shaped or slightly flattened at the face. Flower is over 3.5 inches in diameter.
- Miniature Ball (MB) — Miniature balls and balls have the same form features, except for size. Flower diameter is 2–3.5 inches.
- Pompon (P) — Blooms are almost round and have tightly quilled petals. Flowers are 2 or less inches in diameter.
Other
- Stellar (ST) — Stellar blooms are shaped like decorative blooms. Petals are long and narrow with pointed tips. They resemble a star.
- Waterlily (WL) — Blooms are double, symmetrical and cup-shaped from the side. Waterlily blooms are mostly flat.
- Novelty (NX) — Blooms look different than any other category described.
- Single (S) — Flower has an open center; one row of flat petals circles a disc.
- Peony (PE) — Flower has an open center. Two or more rows of flat or irregular petals circle a disc.
- Collarette (CO) — Bloom has a disc at the center surrounded by a set of multiple or irregular petals that form a collar. This collar is surrounded by one row of flat or slightly cupped petals.
- Anemone (AN) — Petals surround a dome of elongated florets, or small flowers.
- Orchid (O) — Bloom has ray florets surrounding a disc; this is an open-centered flower.
- Orchette (OT) — Bloom resembles orchid dahlia but has a collar.
- Mignon Single (MS) — Bloom has one row of petals; flower diameter is less than 2 inches.
Propagation methods
Dahlias can be grown from tubers, pot tubers, cuttings and seeds.
A dahlia tuber (Figure 5) is the tuberous root of the dahlia plant. Planting tubers is the most common way to propagate a dahlia plant. Propagation using tubers is the main form of propagation discussed in this publication.
Pot tubers (Figure 6) are are grown in a restricted environment, such as a pot or small container, rather than planted in the open ground. Due to having been grown in a restricted environment, the pot tubers may have broken necks or other types of damage. Tubers with broken necks may not grow (Figure 15).
Cuttings (Figure 7) are a form of clonal propagation. Cuttings are taken from a tuber. They produce flowers that have the same characteristics as those produced by the tuber they were taken from. See The American Dahlia Society for more information on propagating dahlias using cuttings.
Seed dahlias (Figure 8) are grown by seed collected from the bloom. Dahlias produced by seed do not look the same as the plants that the seeds came from. They are used by dahlia breeders to create new varieties.


Preparation for planting
Site selection
Soil
A soil test will indicate which amendments your garden needs before you plant dahlias. See A Guide to Collecting Soil Samples for Farms and Gardens, EC 628.
The ideal soil composition for dahlias is loose, fertile and well-drained. However, dahlias can grow in almost any type of soil with the proper amendments. Soil amendments may include organic matter such as compost, manure or coconut coir, as well as lime, elemental sulfur, and inorganic or organic fertilizers. Organic matter increases the capacity of the soil to hold water, air and nutrients for better plant health. See Improving Soils with Organic Matter, EC 1561.
Dahlias prefer a soil pH of 6.5–7.0. Your soil test results will tell you the pH. Some Extension offices will conduct a pH test for free.
If your pH is low, add lime in early fall or late spring to adjust the pH. The fall rain and snowmelt help lime break down and begin to work. Traditional agricultural lime and dolomite lime can take up to six months to significantly change soil pH. Plan your application of lime before the next planting season when using these lime sources. “Fast-acting” lime sources on the market begin correcting soil pH immediately.
If the pH of your soil is high, you can add elemental sulfur to your soil to lower the pH. Acidifying Soil in Landscapes and Gardens East of the Cascades provides more information about how to lower the pH of your soil.
Regardless of the type of amendment you apply, adjusting soil pH to 6.5–7.0 maximizes the availability and uptake of nutrients that dahlias need for healthy growth.
Sunlight
Dahlias prefer a site with a minimum of six hours of sunlight to maximize blooms.
Planting
Planting timing
Dahlias are relatively easy plants to grow, yielding beautiful blooms from midsummer through fall. Plant tubers outside in late spring when the soil temperature is around 60°F or warmer consistently for several days in a row. This is usually between late April and the end of May. To start a tuber early indoors, plant it in a 1-gallon pot with newly purchased or sterilized potting soil.
Start cuttings or small plants indoors in February or March. As plants begin to grow indoors, ensure they have plenty of light to prevent them from getting leggy or weak. Once the first two leaves have emerged, water once a week and fertilize every two weeks (see “Fertilization,” below).
Planting tubers
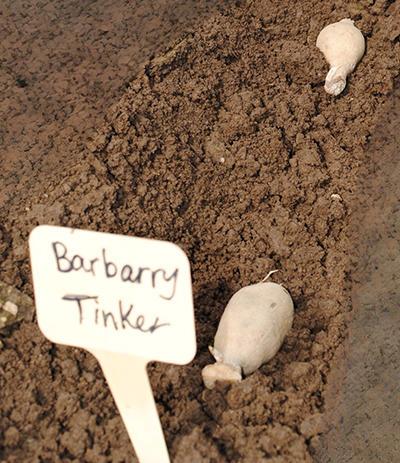
Healthy tubers should be firm and plump, not shriveled or spongy. They will look and feel like raw sweet potatoes. They come in a variety of sizes and shapes, but these attributes provide no indication of the flowers tubers produce. A small tuber can produce a big flower!
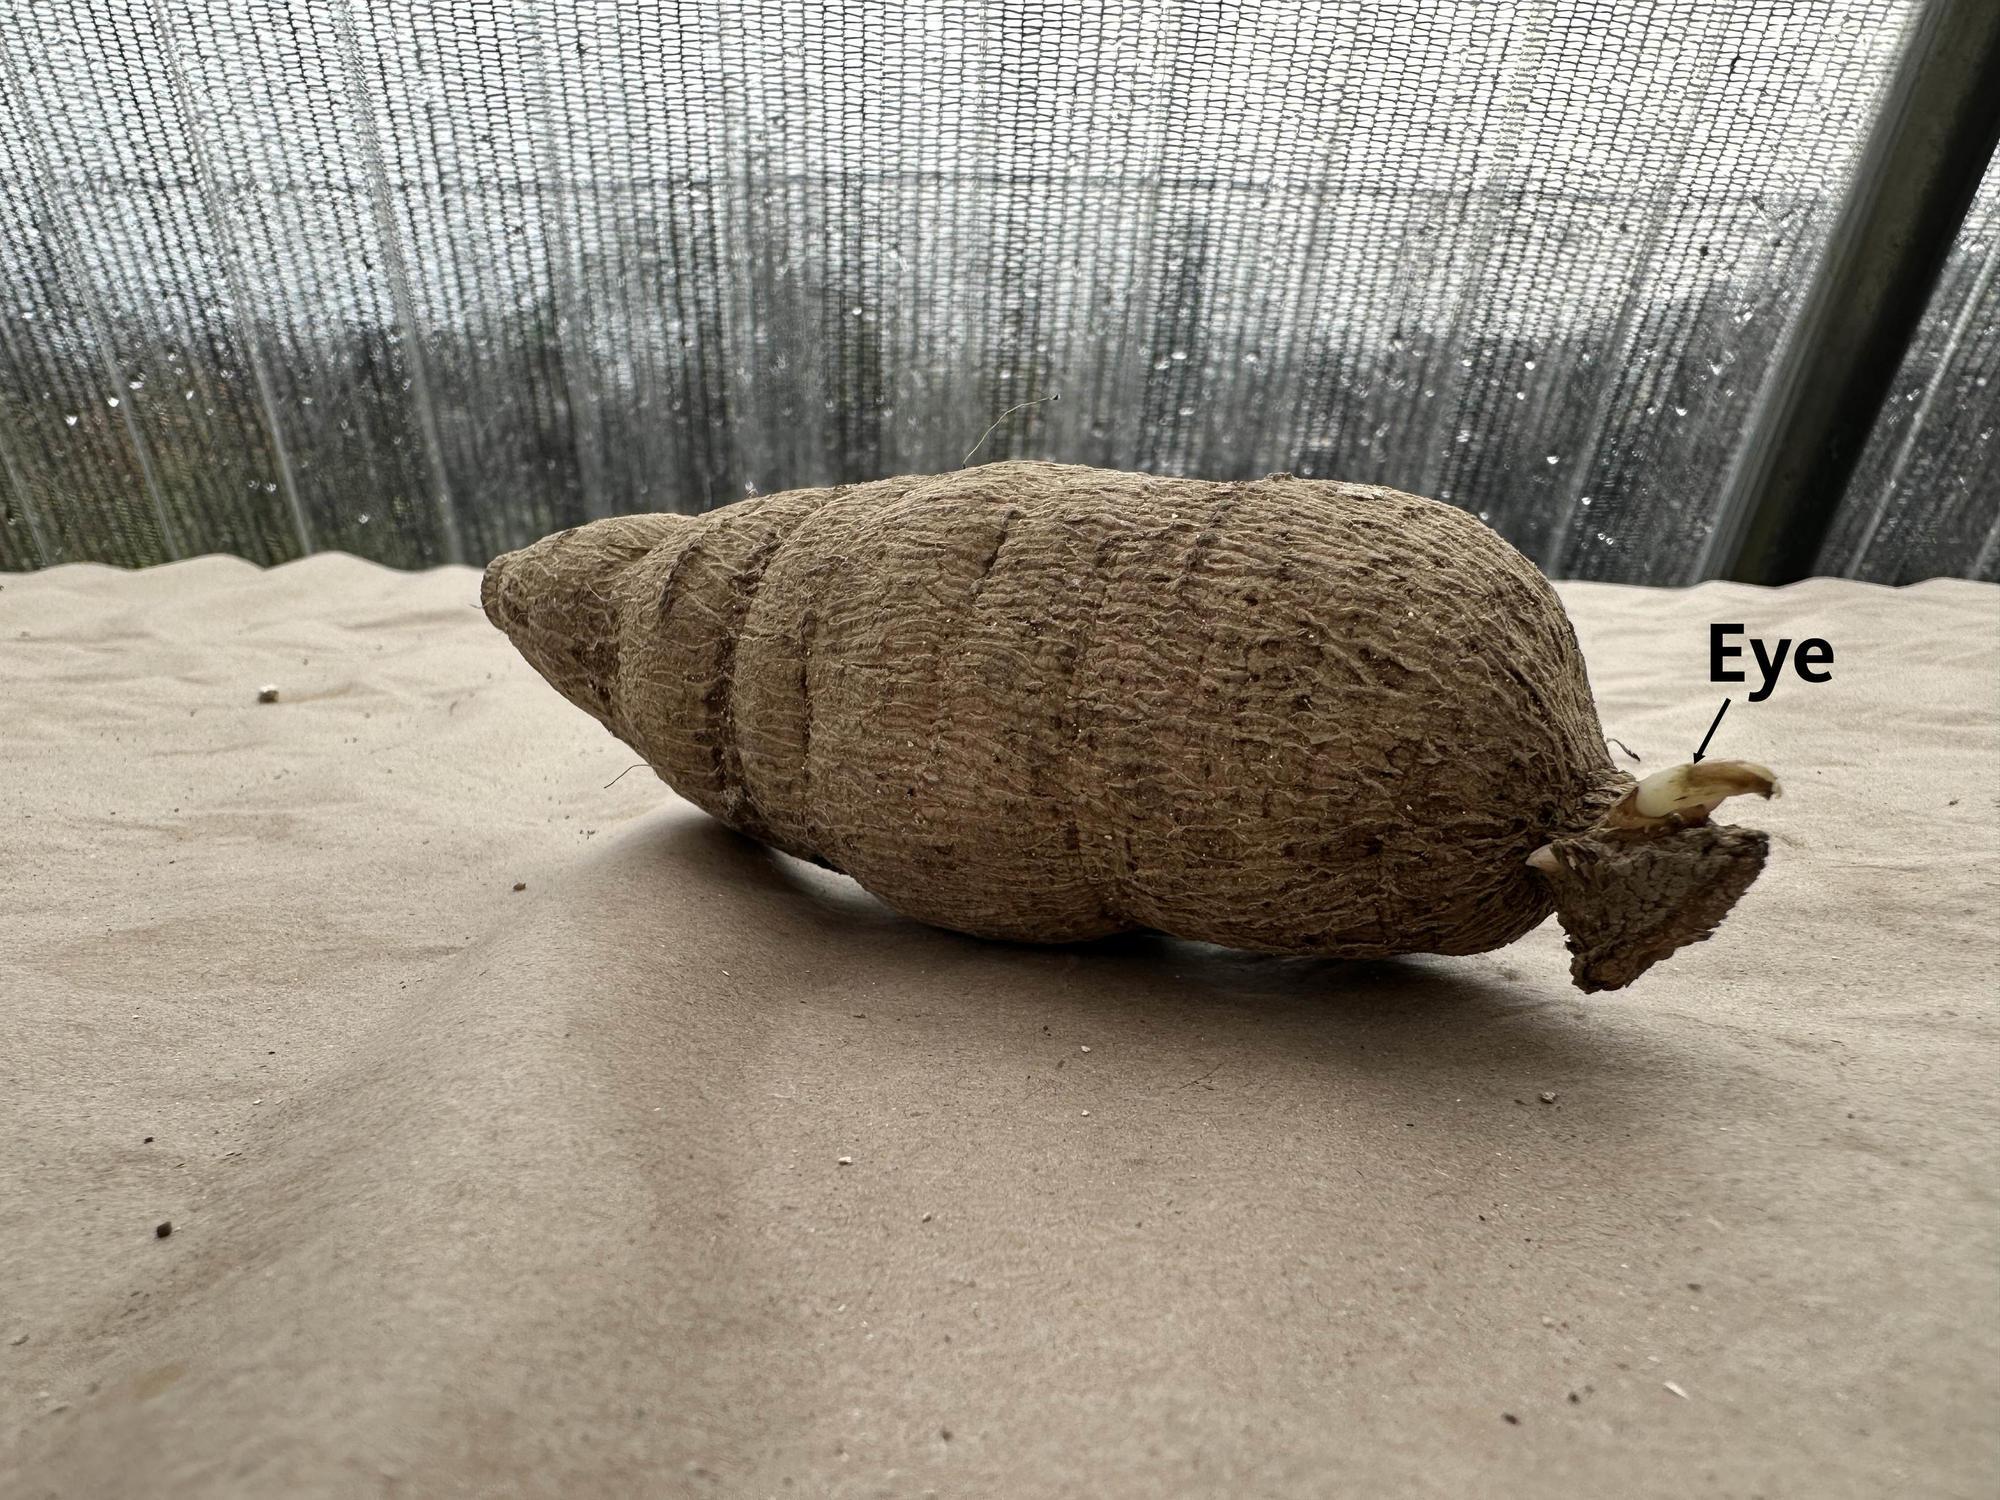
You will want to see at least one “eye” on the tuber — this is the start of your dahlia plant. Eyes develop along the crown of the tuber. The crown is a bulging ridge around the thin portion of the tuber called the neck. Initially, the eye will just be a bump on the crown and then develop into a sprout or shoot. Don’t worry if the sprout or shoot gets broken off before the tuber is planted; the tuber will likely produce another.
Planting steps
Planting in the ground
Dahlias that will be taller than 36 inches usually need stakes. If you are using stakes, pound a stake in the ground next to where you will plant your dahlia. Dig a hole about 4–6 inches deep next to the stake.
Add fertilizer and mix it into the soil. Ensure the fertilizer is well covered with soil before placing your tuber in the hole. Then, lay the tuber horizontally in the hole with the “eye” of the tuber facing up. The end of the tuber with the eye should sit a couple of inches from the stake (Figure 5). Cover the tuber with soil and pat it gently with your hands. If you are planting several dahlias in the same location, separate them by about 2 feet to give each plant room to grow.
When planting, the soil should be slightly moist. If the soil is dry, lightly dampen it with a small amount of water. After planting, do not water until the first two leaves are present.
Planting in containers
Growers without a lot of garden space may decide to grow dahlias in pots or other containers. The best types of dahlias for container gardening are low-growing and dwarf varieties. Pots used for growing dahlias should be 12 to 18 inches deep and wide to accommodate their size. Fill the pot with potting soil, plant your tubers, label them and water lightly until sprouts emerge. You will need to fertilize your dahlias in pots more frequently than you do in your row gardens — about once every two weeks. An all-purpose fertilizer for blooming plants works well.
Caring for your dahlias
Fertilizing
Your soil test will provide you with specific information about the fertilization needs of your dahlia plants. If fertilizer is needed, apply a low-nitrogen fertilizer such as 5-10-10 or 10-20-20 (also known as a potato or vegetable fertilizer). Applying too much nitrogen promotes weak stems, small or no blooms and tubers that rot or shrivel in storage.
Fertilizer applications can begin 30 days after planting. Apply fertilizer at three- to four-week intervals as needed throughout the growing season. If applying a granular fertilizer, spread the appropriate amount around the plant within a 1-foot ring and lightly work it into the soil. The fertilizer should not touch the dahlia stalk or plant. Watering the plants after fertilizing helps dissolve the fertilizer, making it more available to the plant's roots.
Start withholding fertilizer in September; this will enable the dahlia tubers to “harden off.” The hardening-off process toughens the tubers’ outer layer, which helps them avoid damage during digging. Hardened-off tubers will also store much better over the winter.
Watering
Dahlias are large plants and need a fair amount of water. Ideally, keep your soil consistently moist — never let it become soggy and never let it dry out. Your soil and climate conditions will impact your ability to manage moisture. If your soil is sandy, expect to water often. If you have clay soil, amend your soil to improve drainage and then water accordingly. Some guidelines:
- Mulch to preserve soil moisture if you expect dry conditions. Do not let the mulch touch the plant’s stalk.
- Do not overwater — dahlias do not like wet feet. This is especially important when the tuber is planted but the plant is not up yet.
- The soil should be slightly moist when planting. If the soil is dry, it may need to be spritzed with a small amount of water. After planting, do not water until the first two leaves are present. Tubers are susceptible to rot at this point.
- Monitor plant health regularly. When plants droop, they exhibit stress. Often, this is due to lack of water. (Some droop in the hot midday sun is normal). If water is needed, water slowly so it seeps deep into the soil. Loose, well-drained soil helps the water to seep in easily and allows air to reach the roots.
- Water near the roots. If you must water the foliage, water early in the day. (See exception below for hot days.) Avoid overhead watering or sprinkling when blooms are open. Overhead watering of blooms can lead to bloom spot and cause stems to bend or break. This happens when the flowers hold water and become heavy.
- Water plants on warm sunny days when the soil temperature exceeds 95°F. This helps to cool the plant and soil. Soil temperatures over 95°F can be lethal to plant roots. Watering during these conditions reduces plant stress due to high temperatures.
Staking
As your dahlia plants grow, secure them to make sure they are able to support the weight of the flowers. Tie them to stakes with garden twine. You may need to tie them up several times as they get taller. The first tie should secure the lower portion of the plant’s stalk to the stake. Secure the branches with subsequent ties.
Stakes can be made of wood or metal and should be a minimum of 4–5 feet tall. In a larger garden, use T-posts placed every 15 feet with rope or thick twine at 18-inch intervals to corral your dahlias. Tomato cages also work well for a single dahlia in the garden.
Weeding
Weeding around your dahlias is very important. Weeds tend to grow quickly, and they compete with the dahlias for space, water and nutrients. Here are some tips to make weeding your dahlias a bit easier:
- Weed after it rains or after watering. Wet or moist soil is soft and loose. If you plan to pull weeds, doing so after a good rain or a healthy watering will make the chore much easier.
- Remove all of the roots! Garden weeding will last longer if you get the entire plant, root and all.
- Add mulch as you weed. As you pull the weeds, spread some quality composted mulch or wood chips over newly exposed soil right away. Pulling weeds often disturbs buried weed seeds, causing them to grow. By spreading 2–5 inches of mulch over the area, the newly raised weed seeds will not have as much of a chance to grow.
- Clean up as you go! Bring a large container or trash can with you to clean up the pulled weeds. You can compost most weeds, but try to avoid composting any that have gone to seed. Throw the seed heads in the garbage to prevent your compost from becoming all weeds.
Pruning
You can use several methods of pruning to shape your dahlias and stimulate growth throughout the growing season:
Topping
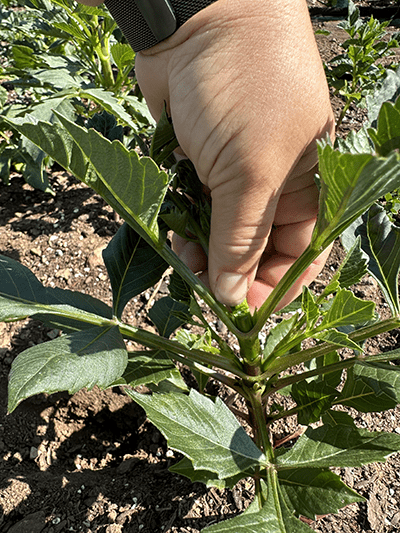
When your plant is between 12 and 16 inches tall, it will usually have at least four sets of leaves on the center stalk. Pinch off the sprout between the top pair of leaves to stimulate growth at the other leaf nodes (Figure 11). This will give you a stronger, bushier plant.
Disbudding
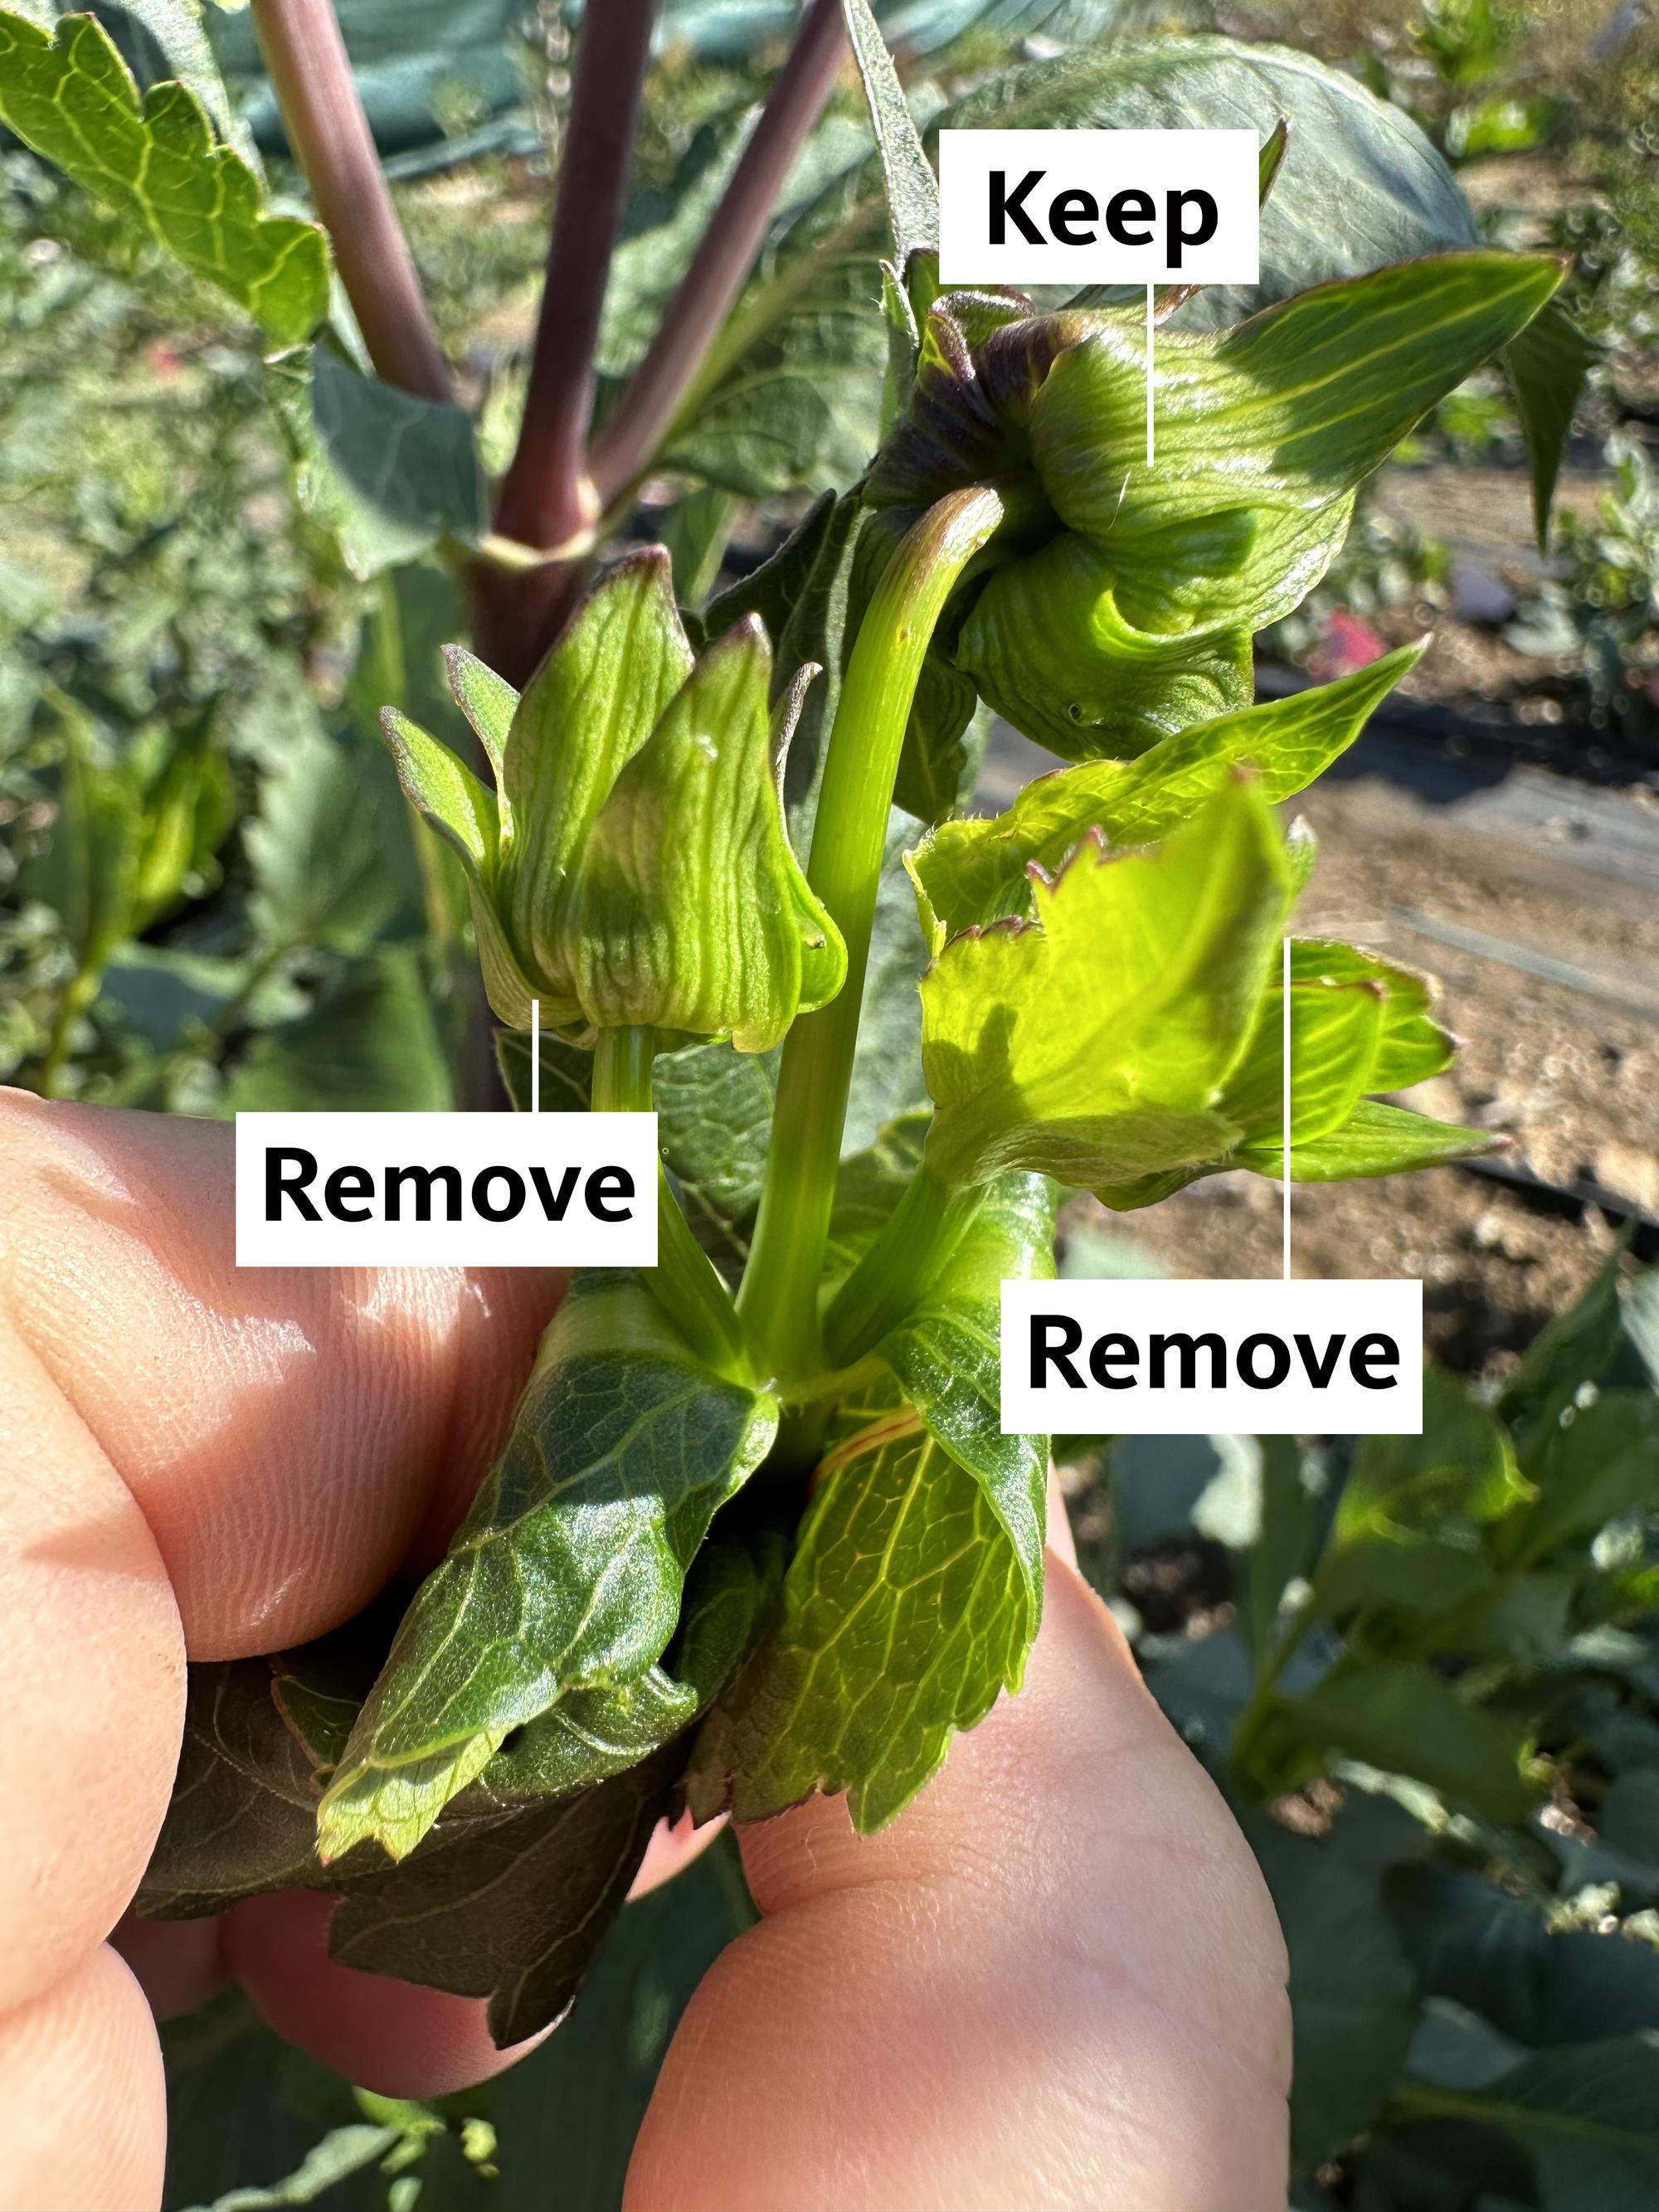
Remove the outer two buds from the three that develop at the end of each branch (Figure 12). This will leave you with longer stems for vases. This method does reduce the total number of flowers, but the flowers that remain will show up better on the plant. You can also disbud a few stems and leave the others to grow normally.
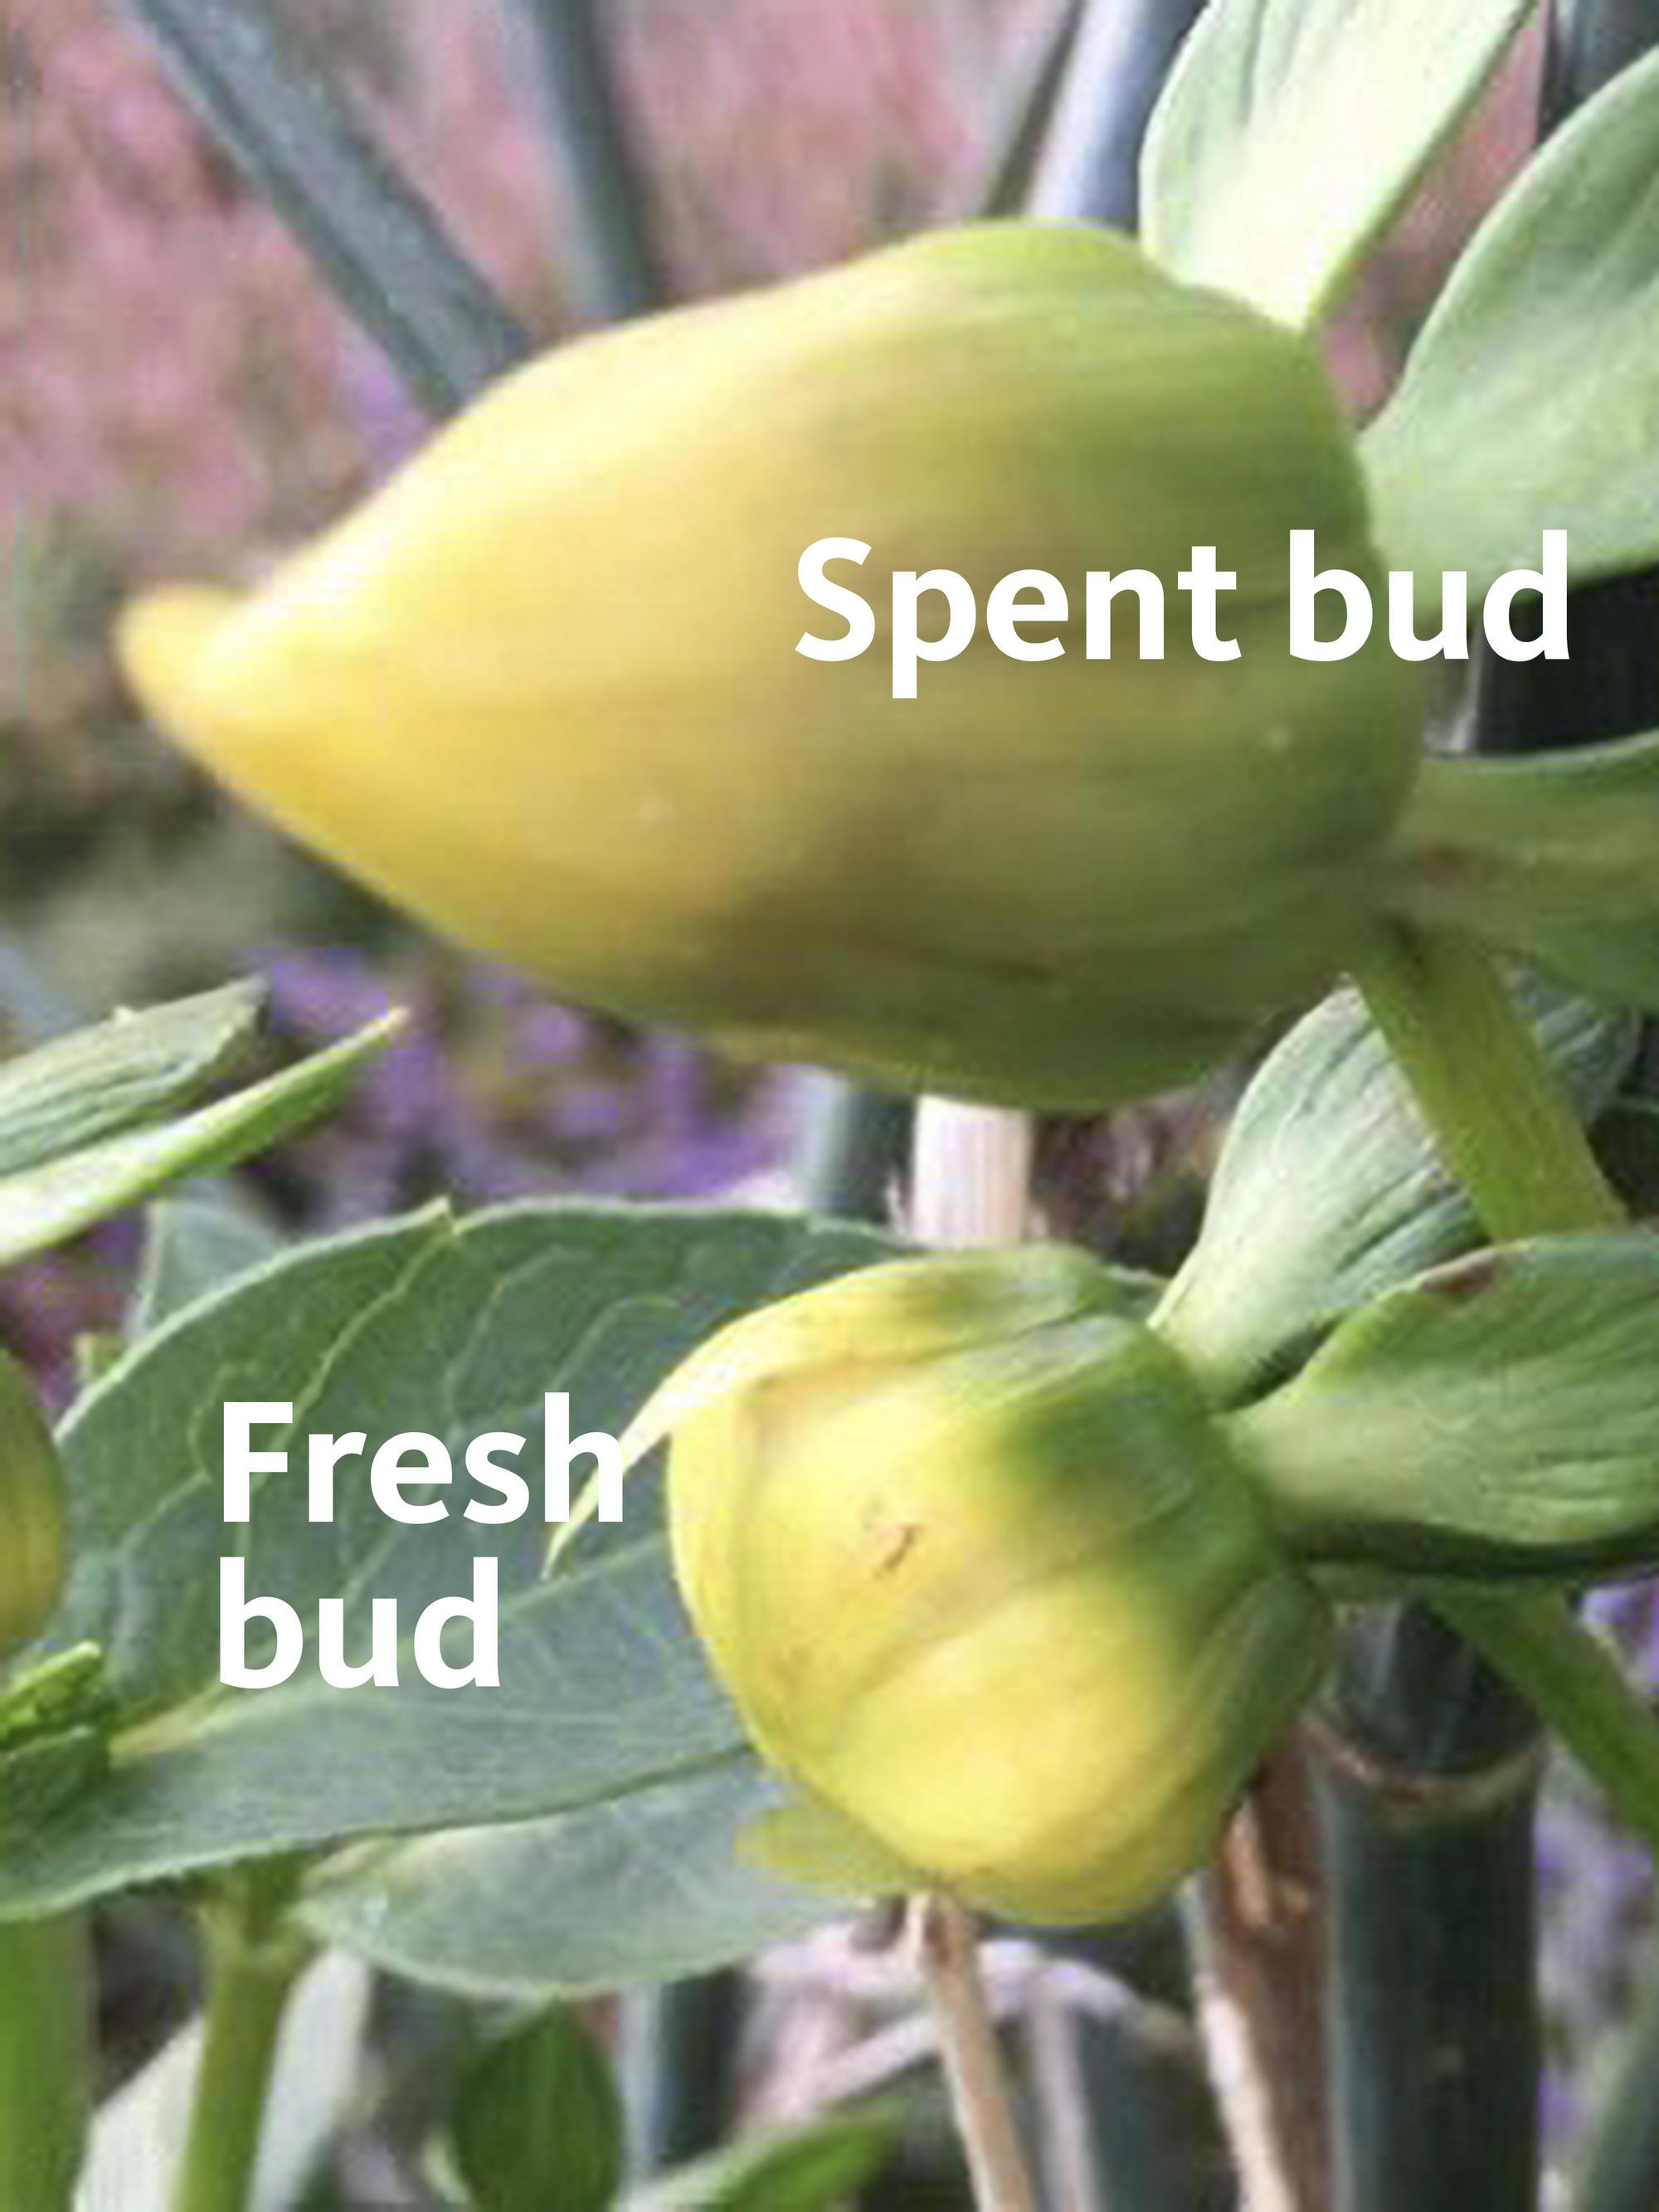
Deadheading
To keep your dahlias healthy and maximize flower production, remove the spent flowers, or deadhead (Figure 13). A spent dahlia bloom will appear pointed or conical. A fresh bud will appear rounded and possibly more compact. When deadheading, hold the spent dahlia in your hand and move your hand down the stem to the next set of leaves, bud or side shoot. Make your cut just above this spot. Cutting back the stems to the next set of leaves will encourage the plant to produce longer stems.
Removing the bottom leaves
When your plants are fully grown, cut the bottom two or three sets of leaves off the plant. This helps with air circulation. It also helps keep the ground clean around the dahlia plant, which reduces disease. The lower leaves drain the sugars from the upper part of the plant that produces the blooms.
Cutting flowers
The best time to cut dahlias is in the cool of the morning. Snip the stem diagonally with clean pruners or scissors. Take the stems that are long enough to use in your bouquet. It is better to wait until the bloom is open or nearly open, as the buds will not open once they are cut.
Cut the stem just above a set of leaf nodes and side buds. New shoots will grow from these nodes. After you have harvested your blooms, cut them on the diagonal and then put the bottom of the stems in 2–3 inches of very hot (not quite boiling) water. Let the stems stay in the water for at least one hour. The hot water treatment conditions the stems so the blooms will last for four to six days.
Dahlia diseases and pests
Diseases
Dahlias are susceptible to bacterial, viral and fungal diseases. Most diseases appear when a pathogen is present and a plant is stressed due to environmental factors or care.
If the dahlias you are growing have a bacterial or viral disease, discard the plant and tubers. To avoid spreading these diseases to other dahlias, do not compost infected plants or tubers. Sterilize all tools by dipping them in bleach.
One of the most common bacterial diseases is crown gall, which is identified by an extra lump-like growth or multiple growths on the crown of the tuber. You can find images of this disease in the Pacific Northwest Management Handbook. Crown gall is not treatable and spreads easily. If you suspect a tuber has crown gall, discard it. Sterilize all tools used on the infected plant before using them on other dahlia tubers.
Stunted growth, yellow streaks or spots on the leaves often suggest viral diseases. Both the plant and the tuber can host viruses. There is no treatment for dahlia viruses. If you notice the symptoms of a virus on your plant, remove the plant, as viruses can also spread. Dahlia mosaic virus is one of the most common viral diseases of dahlias. Learn more about how to diagnose and treat this virus in Dahlia Mosaic Virus: A Pictorial Guide to Symptoms and Diagnosis.
Powdery mildew is a common fungal disease of dahlia plants identifiable by a gray, powdery substance on the leaves. You can often prevent fungal diseases like powdery mildew through proper plant maintenance. To prevent fungal diseases, water at the base of the plant and not overhead. Air circulation is also important for controlling fungal diseases. If a portion of a plant is infected by a fungus, remove any infected leaves and reduce overcrowding to increase airflow to the plant.
Insects and predators
Aphids, cucumber beetles, earwigs and slugs are some common insects that may affect your dahlias. Several comprehensive resources to identify and manage these insects are listed below.
- Aphids are common on plants. You can treat them with insecticidal soap. Spray both the buds and the leaves of the dahlia during the cooler parts of the day.
- Cucumber beetles are light green with black spots. The cucumber beetle chews on the leaves, flowers and stems of dahlia plants. Cucumber beetles can be challenging to control, but some gardeners have success using trap crops as well as some insecticides.
- Earwigs come out at night and are damaging to the flower blooms. Organic and conventional traps help to eliminate earwigs.
- Slugs and European garden snails attack the young dahlia plants at night. Put down bait two weeks after planting or when first sprouts appear.
- Field mice, voles and gophers will eat dahlias. Voles can use mole runways to get to the tubers. Gophers create their own tunnels. Trapping is the best control.
Digging, dividing and storing dahlias
Digging dahlia tubers
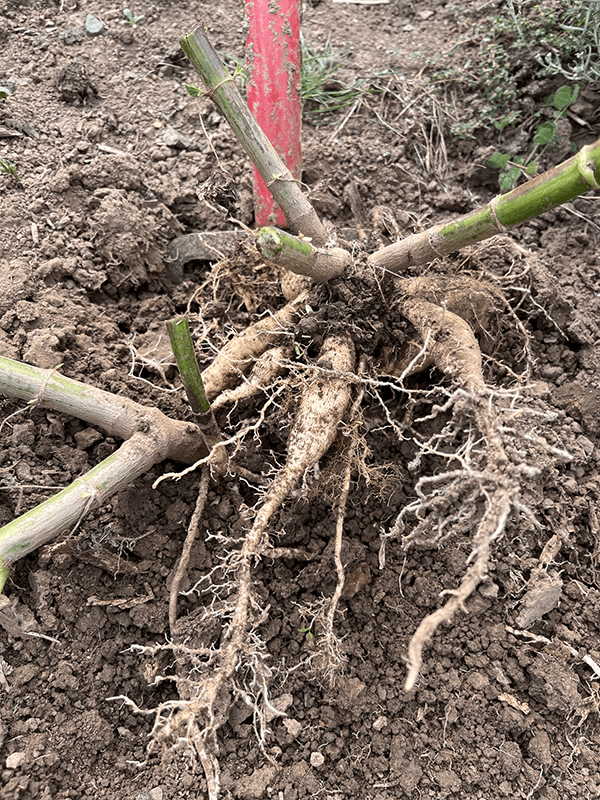
You can divide your dahlias (Figure 14) for propagation in fall or spring. Prepare for division after a hard frost has killed the stalks of your plants. First, remove all foliage with pruners or your hands. Then, with a sharp knife, cut off the stalk, leaving 4–6 inches above the ground. Dahlias can handle rain but will rot if the ground freezes. If the weather permits and a freeze is not in the forecast, cut stalks and leave them in the ground for three to seven days. Leaving them in the ground before digging gives an opportunity for the eyes to show sooner, making dividing easier. If there is a chance of frost, you can dig dahlias the same day you cut the stalks.
Regardless of the time of year you choose to divide your dahlias, clean the tuber clump to remove any excess soil clinging to the tubers. Remove as much soil as possible while still in the garden. Holding the tuber in your hand, gently remove any loose soil while being careful not to damage it. Avoid using sharp tools, as this will damage the skin on the tubers, which will affect the storage ability of the tubers. Cleaning the tubers makes it much easier to see viable eyes.
Fall division and storage of tubers
Fall is the most common time to divide tubers. This allows you to have an earlier count of how many tubers you have, which will help you to make decisions about future purchases.

After removing the excess soil from your tubers in the garden, select an area to wash your dahlia clump that drains well and can withstand the accumulation of wet, muddy soil removed from the clumps. The ideal washing station will have ample light, a water source from a hose and a working platform with a mesh screen to allow loosened soil to fall through. Use an adjustable nozzle to control the stream of water; the stream should be strong enough to wash but not so strong that it damages the skin of the tubers. Follow these steps to wash and store your tubers:
- Wash the clump, being careful not to damage the skin of the tubers.
- After washing, allow the clump to air dry before beginning the division process.
- While you’re waiting for your tubers to dry, assemble your tools for division: a sharp knife, needle-point pruners, a table and a comfortable chair.
- When the tuber clumps have dried, examine each and locate the mother tuber or any tubers with broken necks (Figure 15). Broken necks are tubers that dangle and bend between the tuber, crown and stalk. Remove and discard all broken-necked tubers first.
- Trim off excess feeder roots or tails at the ends of all potentially viable tubers.
- Locate tubers that have viable eyes. The eye of the tuber will be the growth point or sprout from which next year’s plant will grow. In fall, the eyes will be a swollen bump next to the stalk and crown. Not all tubers have viable eyes.
- With the sharp knife or needle-point pruner, remove the tuber from the stalk.
- Once you have divided your tuber clumps, rinse them in a 10% bleach solution and allow them to air dry on a mesh screen. You can add a powdered fungicide to the water as a precaution. Read and follow all label directions for safely handling fungicides.
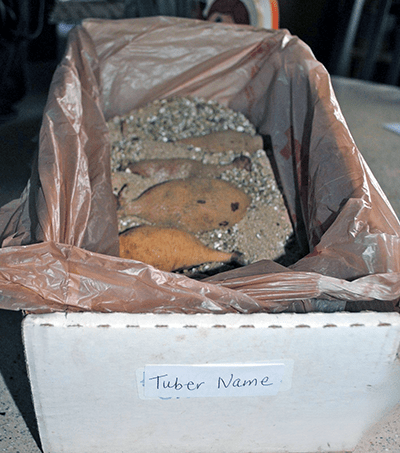
- Once the tubers are dry, place them in storage containers. Plastic bags or cardboard boxes work well (Figure 16).
- Select a medium such as coarse vermiculite, coconut coir or wood shavings to add to the bag. (Note that wood shavings tend to cause the tubers to shrivel. If you choose to use wood shavings, monitor the tubers throughout the winter and lightly mist them if they begin to shrivel.) Add enough medium to cover the tubers.
- Do not close the storage bag; this will cause excess moisture to build up, which can lead to tuber rot.
- Store your bags in a dark location that will not freeze. Ideally, this location will be 34˚–40˚F. Dahlia tubers will stay dormant throughout the winter at this temperature.
- Throughout the winter, periodically check the storage bags for excess moisture. This will show up as condensation on the bag. If you notice condensation, check the bag for any rotting tubers. If present, remove rotted tubers and allow the bag to air dry before returning it to your storage location.
- As spring approaches (March–April), begin to break the dormancy of your overwintered tubers. Move them to a 40˚–50˚F location, which will help trigger the tubers to form visible eyes (sprouts) if they have not already done so.
Spring division and storage of tubers
Dividing in spring makes it easier to see the eyes, which can accelerate the process. However, dividing in spring can be more challenging. If you choose this time of year, follow the steps below.
- Harvest the tubers in fall as described above (unless you’re overwintering your tubers — see “Overwintering,” below). Remove excess soil while still in the garden, but do not use water to wash the tubers before storing them over the winter.
- Allow the tuber clump to air dry for a few days, removing some moisture from the soil clinging to the clump. Do not store tuber clumps that are soaking wet and muddy.
- Once dry, store the tuber clumps in a cardboard or wooden box. Plastic storage totes work, but do not place an air-tight lid on the tote. The buildup of moisture in a sealed plastic container can rot your tubers. Cover clumps with layered newspaper, coconut coir, coarse vermiculite or wood shavings.
- Place your storage containers in a location that will not freeze. Ideally, this location will be 34˚–40˚F. If the clump freezes, it will rot, and you will lose your tubers.
- Throughout winter, periodically check your storage containers for the buildup of excess moisture; this will help you notice when your tubers are on the verge of rotting.
- As spring approaches (March–April), begin to awaken your overwintered tuber clumps by moving them to a location that is 40˚–50˚F. This will help to trigger the tuber clump to form visible eyes (sprouts) if it has not already done so.
- Follow steps 4–7 in “Fall division and storage of tubers” to divide your newly awakened tuber clumps. Note that in spring, the viable eye will be evident, like the eyes of a sprouting potato.
Overwintering
Overwintering of dahlia tubers means leaving dormant tubers in the ground over the winter. This method saves on storage space in winter. Your ability to overwinter your dahlia tubers depends on where you live and how cold it gets in your area. If you are in USDA Hardiness Zone 7 or above, the climate in your area makes it possible to overwinter dahlias in the ground. Note that voles and gophers sometimes eat dahlia tubers stored in the ground. Trapping is a good control method for both pests. If you choose to overwinter your dahlias, follow these steps:
- Make sure the area where you are overwintering dahlias drains well and has no freestanding water.
- Cut the stems on the dahlias to ground level after the first frost of the season.
- Cover the area with a sheet of 6-mil black plastic.
- Apply at least 4 inches of organic mulch or leaves.
- Uncover in the spring when there is no threat of frost.
- Dig and divide your overwintered dahlia tubers every three years. In years where you are not digging and dividing tubers, remove the plastic and mulch in early spring to expose the tuber eyes to the sun. In years where you are digging and dividing overwintered dahlia tubers, expect the clumps to be larger and heavier than those that are divided annually. Dig up overwintered dahlia tubers in spring after the last frost. Divide them using steps 1–7 in “Fall division and storage of tubers,” and dry for about 24 hours before replanting in the ground.
About the authors