Introduction
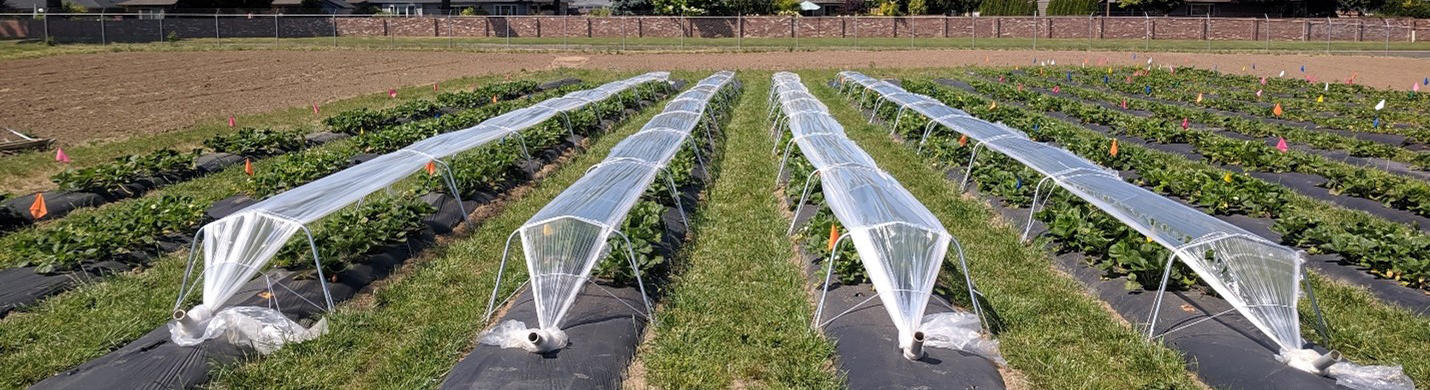
Low tunnels are temporary structures made of plastic sheeting draped over hoops designed to cover a single row of plants. They protect crops from rain and extend the growing season. This publication covers the basics and benefits of low tunnels, and describes how to build a low tunnel for horticultural crop production. Learn about:
- Tunnel options.
- Available materials.
- Construction.
- Installation.
Our examples feature a low tunnel system tested in western Oregon’s Willamette Valley, but the information may also apply to western Washington and other regions. For specifics on crop management, see the OSU Extension Catalog.
Spring and fall temperatures in western Oregon average about 55 degrees F, with 8–10 inches of precipitation for each season. During these cooler months, low tunnels can offset low temperatures and protect crops from high rainfall. This practice produces an earlier harvest in spring and extends the growing season to late fall.
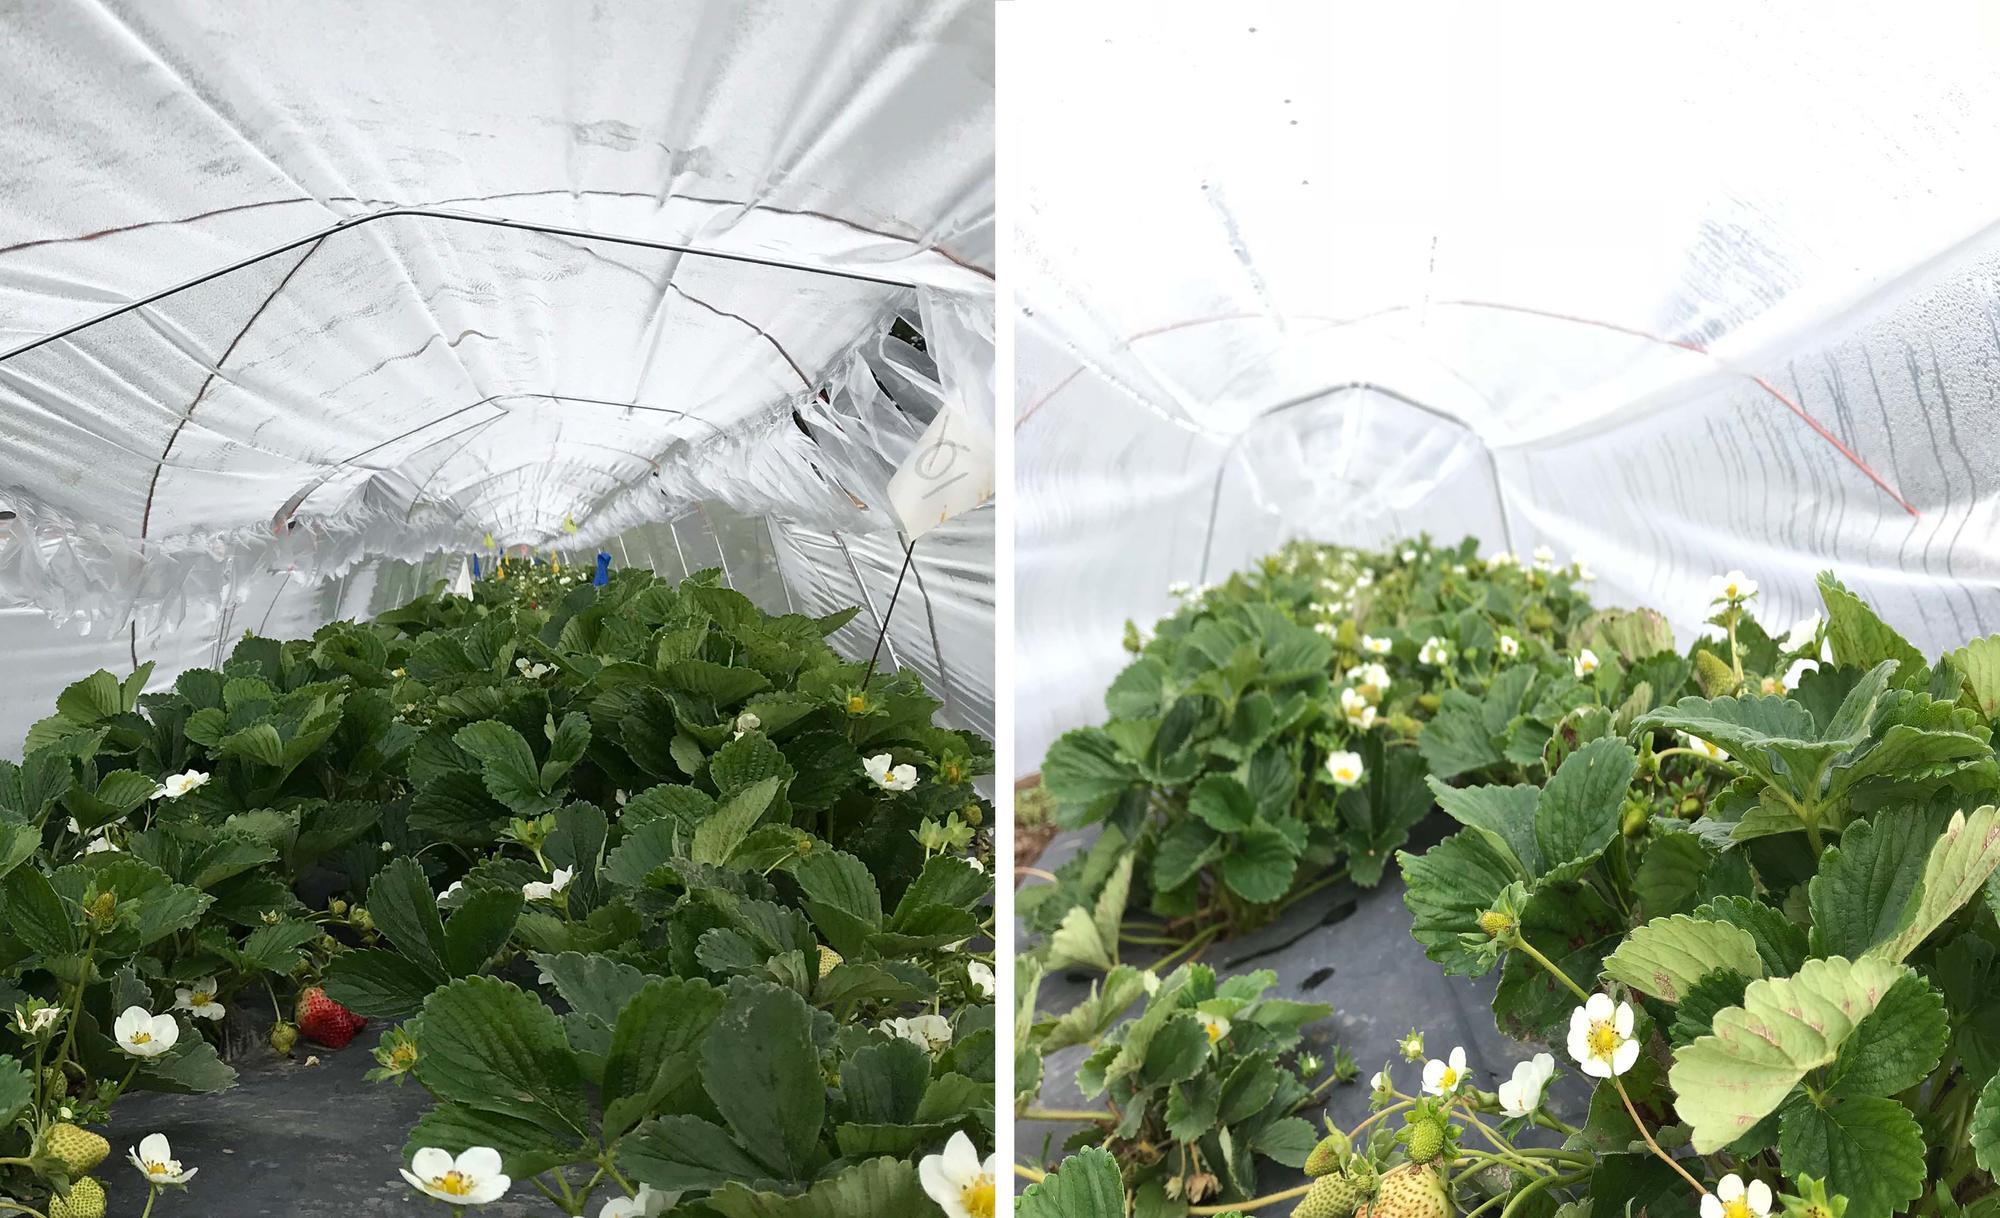
Low tunnels are generally 2 to 3 feet tall and cover a single production row or raised bed. They are constructed out of long sheets of plastic laid over a semi-permanent structure or hoops. Low tunnels are better suited for shorter crops — those less than 2 feet tall when fully mature and fruiting. Tunnels provide protection from the rain in the cool spring and fall. This makes them ideal for crops that are susceptible to mold and other fungal diseases that increase with moisture, and crops that can be manipulated to produce earlier or later. Low tunnels are the most cost-effective for growing high-value or heat-tolerant crops, such as strawberries, peppers, eggplants, melons, herbs, certain cucumbers and off-season greens.
Low tunnels are widely used in regions of the world where specialty crops endure challenging weather. They are popular for crops that benefit from season manipulation for export or high-value domestic markets.
Low tunnels provide many benefits, including:
- Season extension due to higher air and soil temperature inside the tunnels than outside. Warmer temperatures allow crops to develop faster, promoting early flowering and fruit production. Low tunnels enable extended growth periods in fall when temperatures begin to decline.
- Crop protection from damage that may be caused by rain, frost, hail and strong winds. Some plastics have also been reported to reduce UV damage such as sunburn and improve quality.
- Reduction of disease issues by protecting the crop from rain. Tunnels reduce the moisture that would facilitate the spread of disease spores. They also eliminate standing water on plant leaves and plastic mulch.
- Increased yield and crop quality due to early- and late-season production and an increase in marketable yield from reduced environmental damage and disease.
Some producers grow crops in high tunnels. High tunnels are also covered in plastic, but unlike low tunnels, are tall enough to walk through — at least 6 feet. Low tunnels have several advantages over high tunnels, including:
- Ease of assembly and disassembly. Low tunnel materials can be readily moved with crop rotations.
- Low cost. Low tunnels use fewer materials and require less specialized labor.
- Improved soil management. Removing the plastic in winter and rotating tunnel location may promote leaching of salts by precipitation in rainy areas of Oregon. These actions can help prevent long-term concentrations in soil salinity, in comparison to permanent high tunnels where the plastic may stay in place for many seasons.
This publication is a guide for building low tunnel systems with materials available in Oregon, including construction materials and their estimated costs; a step-by-step building guide; and management, maintenance and seasonal care of low tunnels.
Components of a low tunnel
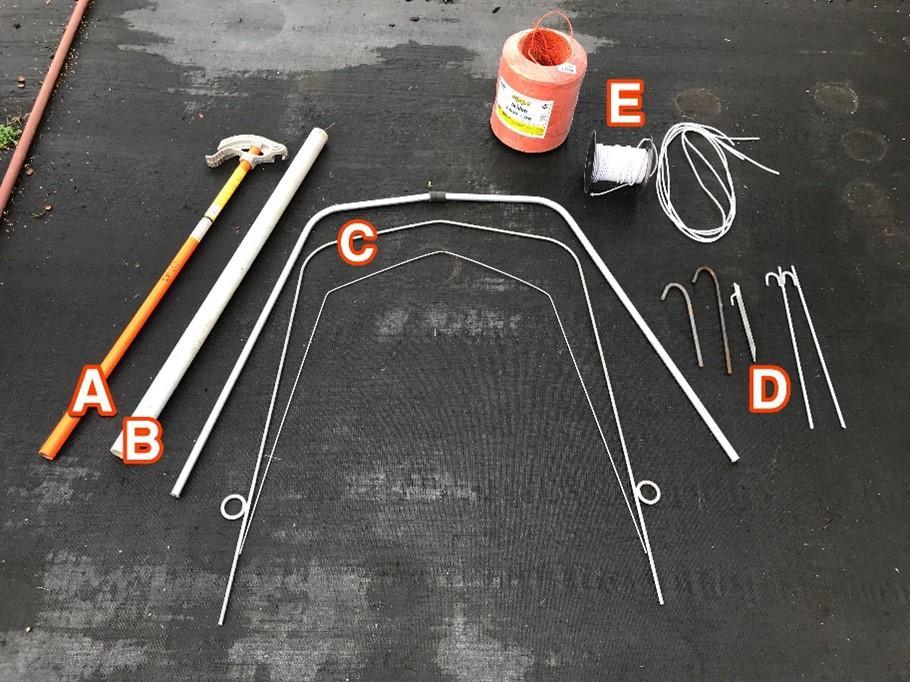
Materials
Install or remove tunnel components during or immediately after the rainy season, or when the soil is moist, for ease of installation. Dry soils make it difficult to insert components. The following options use locally available materials that were tested at the North Willamette Research and Extension Center in Aurora, Oregon. Our goal was to evaluate the operation, structural integrity and feasibility of low tunnels for commercial production of strawberry.
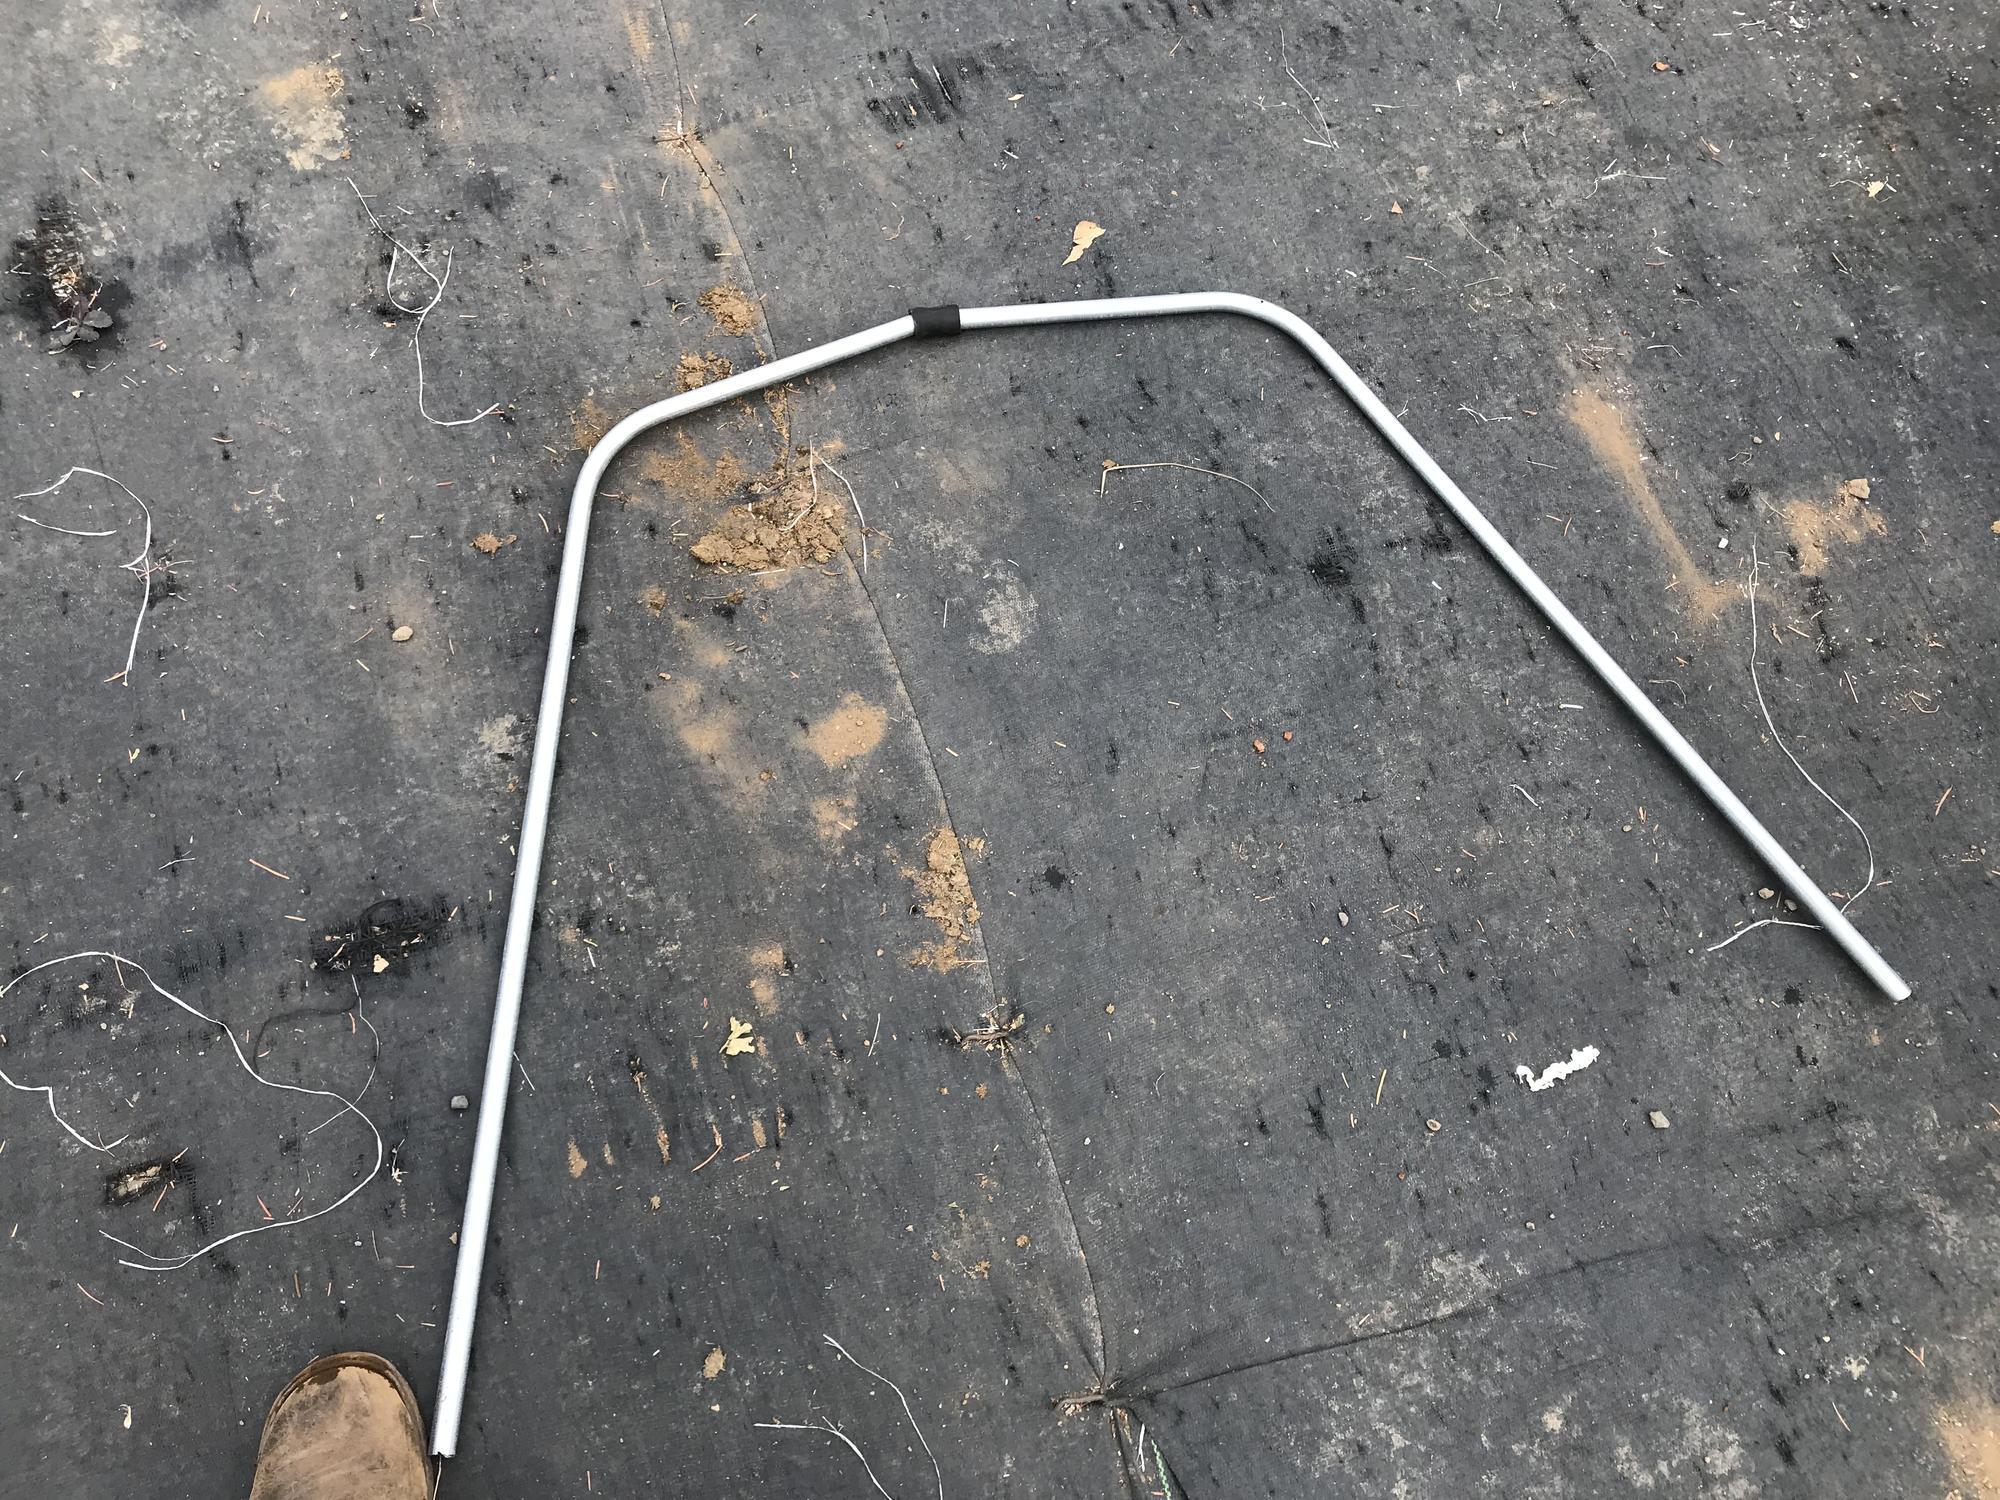
Hoops
You can make long-lasting hoops from galvanized electrical conduit, galvanized wire or other materials such as PVC that can be bent into 6- to 8-foot-long hoops.
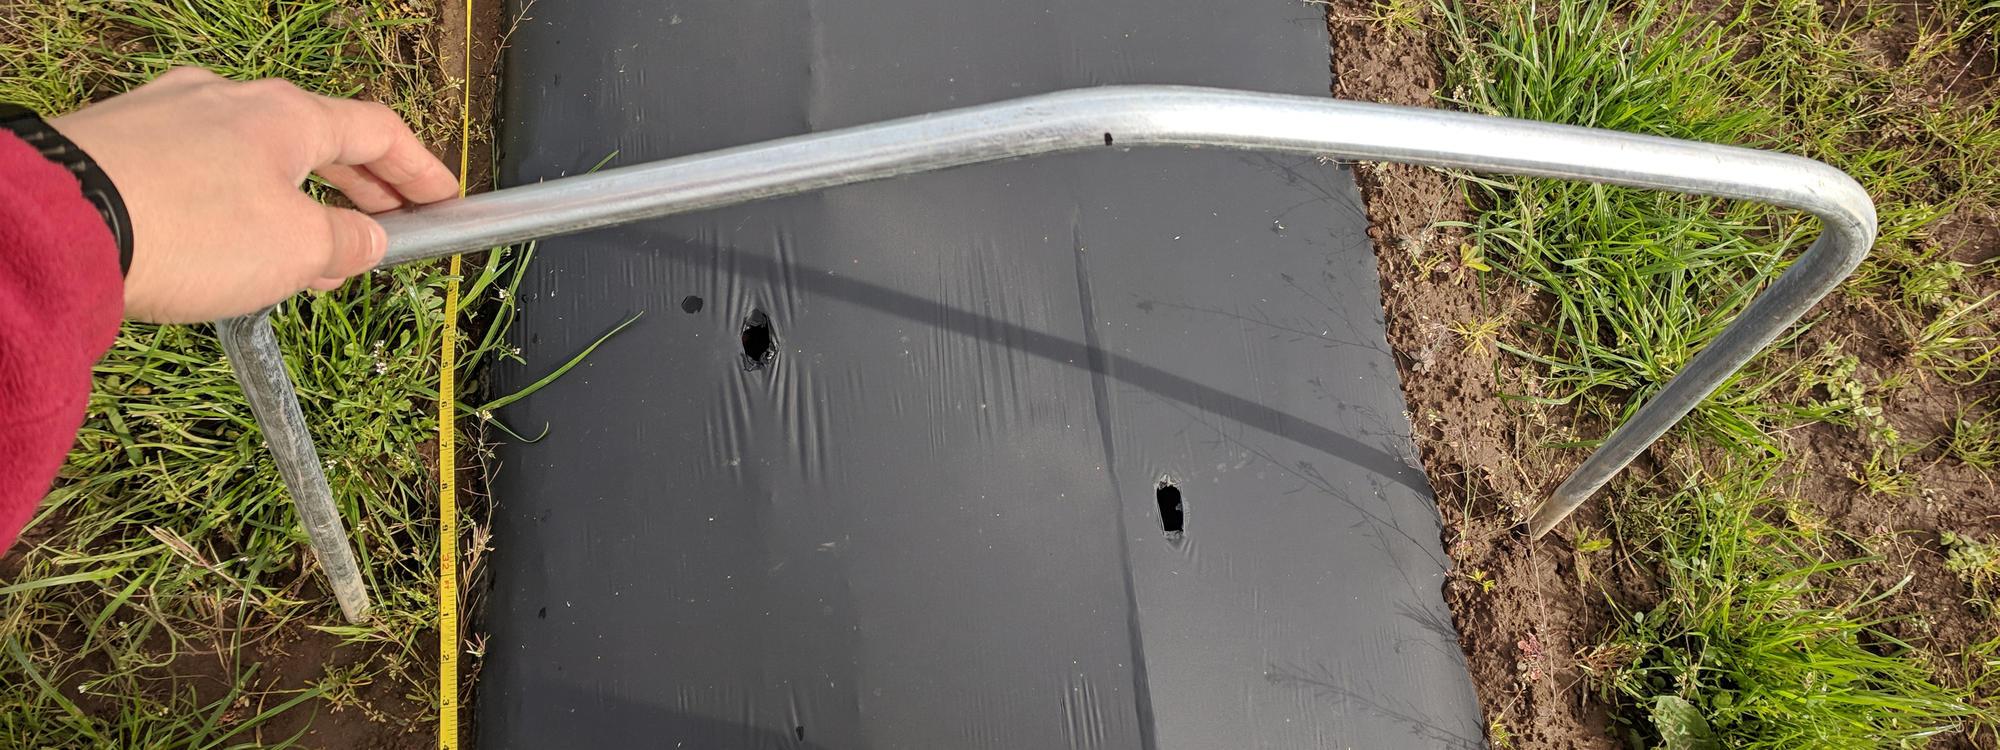
The exterior, or top of the hoop, should measure 2–3 feet above ground level once the ends are inserted into the soil at least 6 inches deep on each side. Adjust hoop width for the width of the row or bed. Use smaller hoops for shorter crops such as lettuce. Use longer, taller hoops for taller crops such as eggplant.
Place hoops every 4–5 feet down the bed or row to provide adequate support for the plastic. If the plastic sags, it could touch the crop and allow rain to accumulate, damaging the tunnel. Low tunnel structures have not been evaluated for snow load in Oregon and may not be suitable for winter use. If you live in an area that may receive snow in fall or early spring, use 4-foot spacing so that the tunnel does not collapse under the weight of the snow.
Spacing of hoops may depend on site conditions, such as prevailing wind speeds, wind breaks and slope. These conditions may require you to add more hoops for structural integrity. Thicker or heavier hoop materials provide more support but can also add expense. Low tunnels longer than 300 feet may lack the structural stability to last through the season in western Oregon.
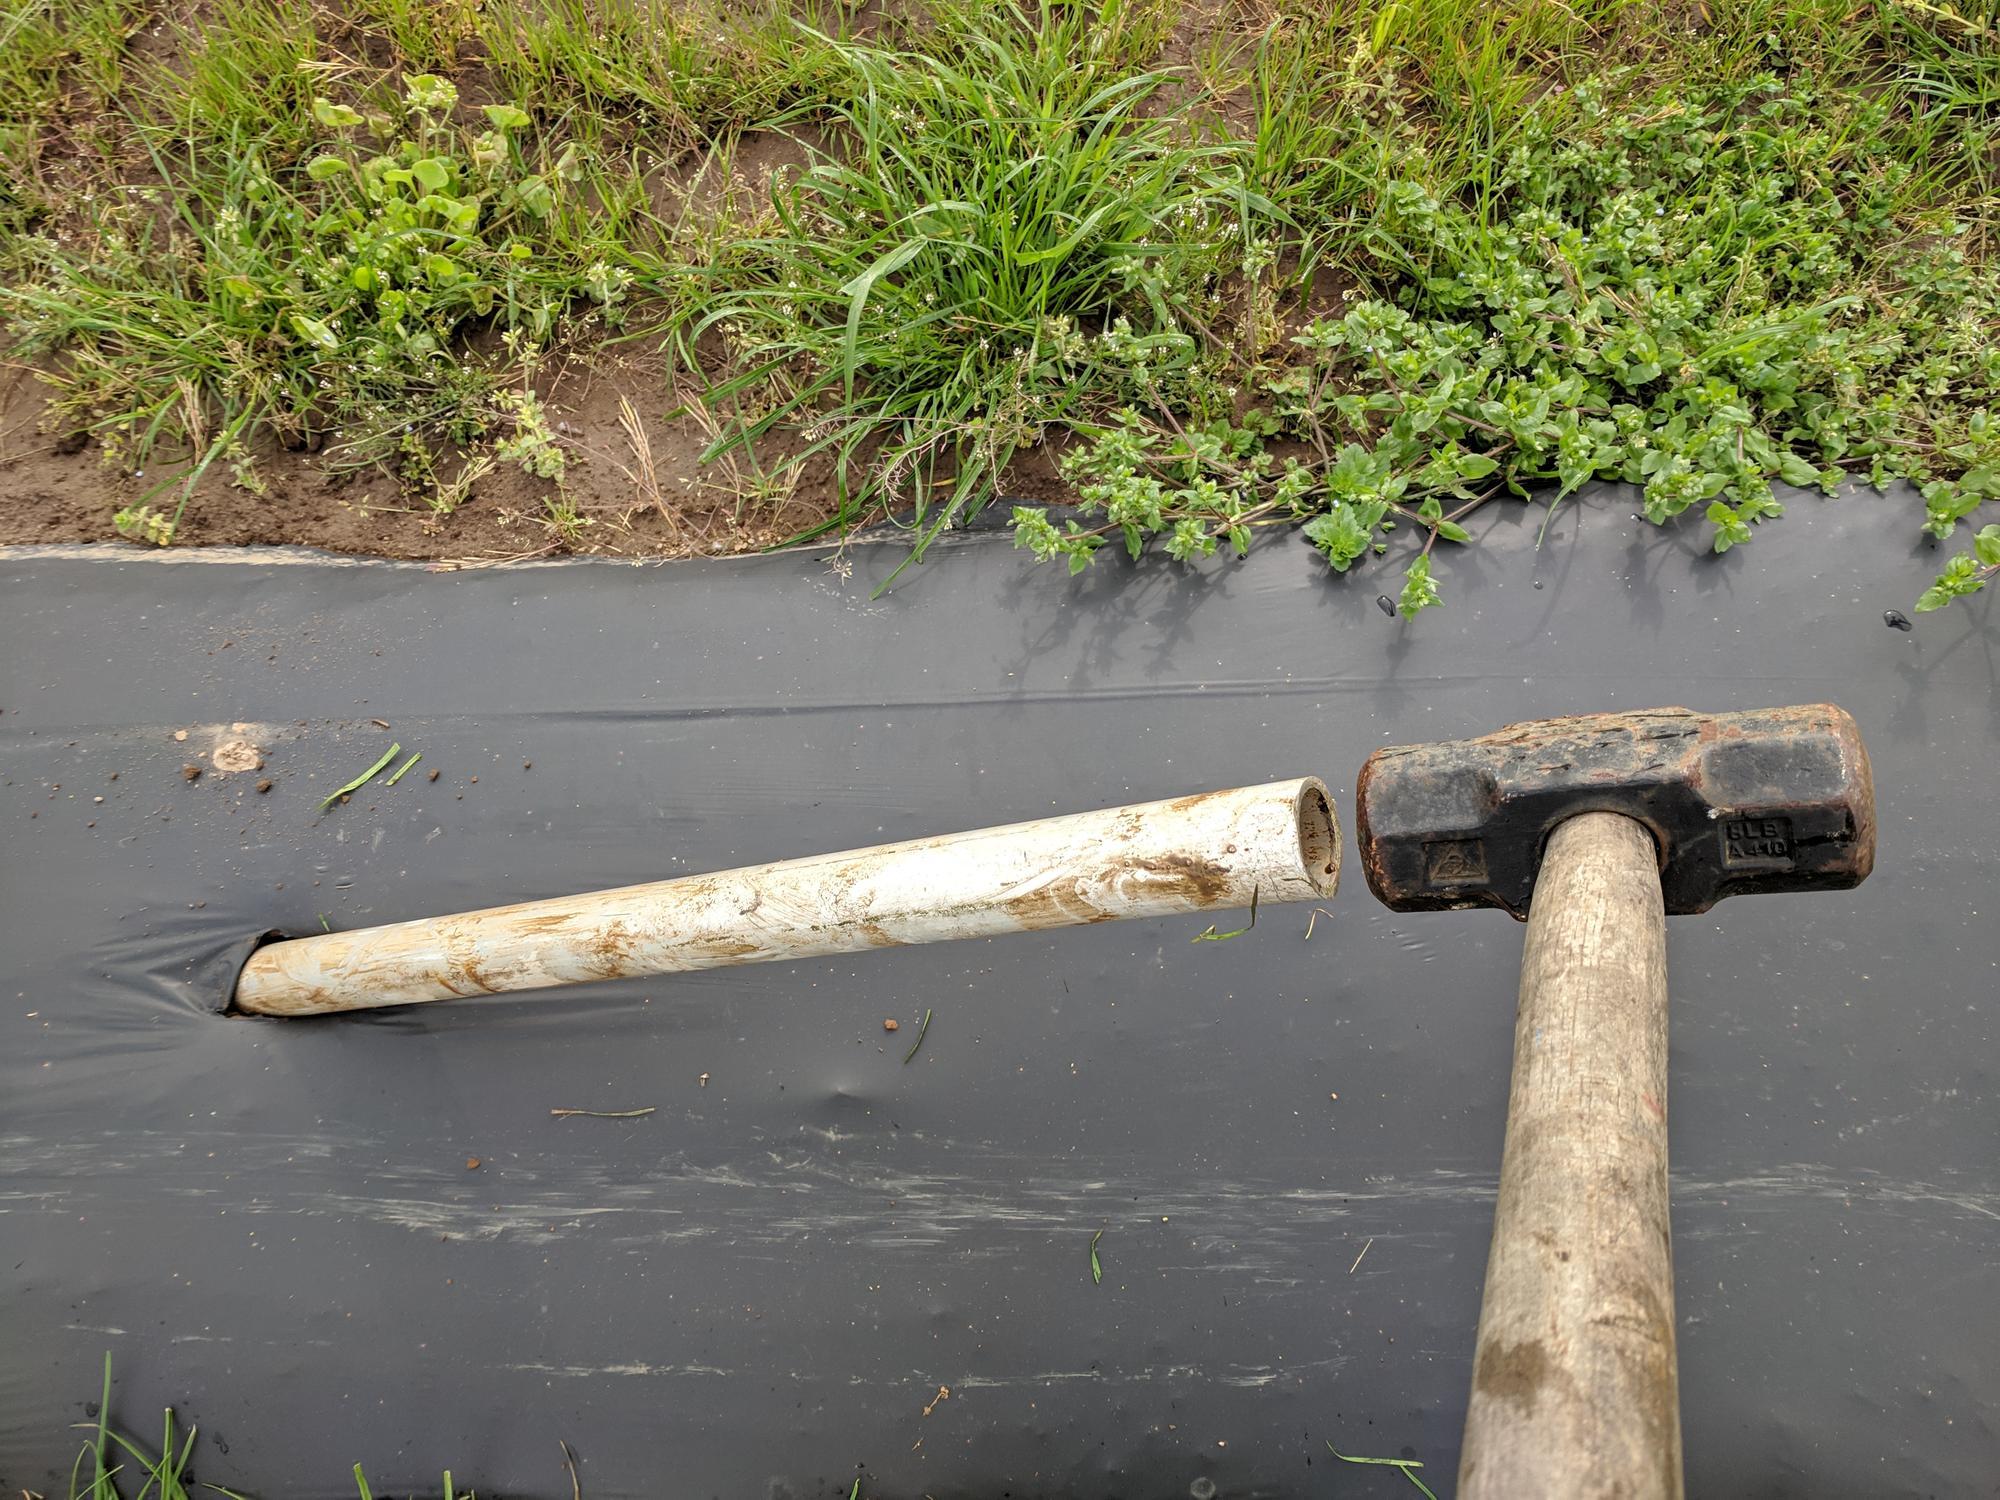
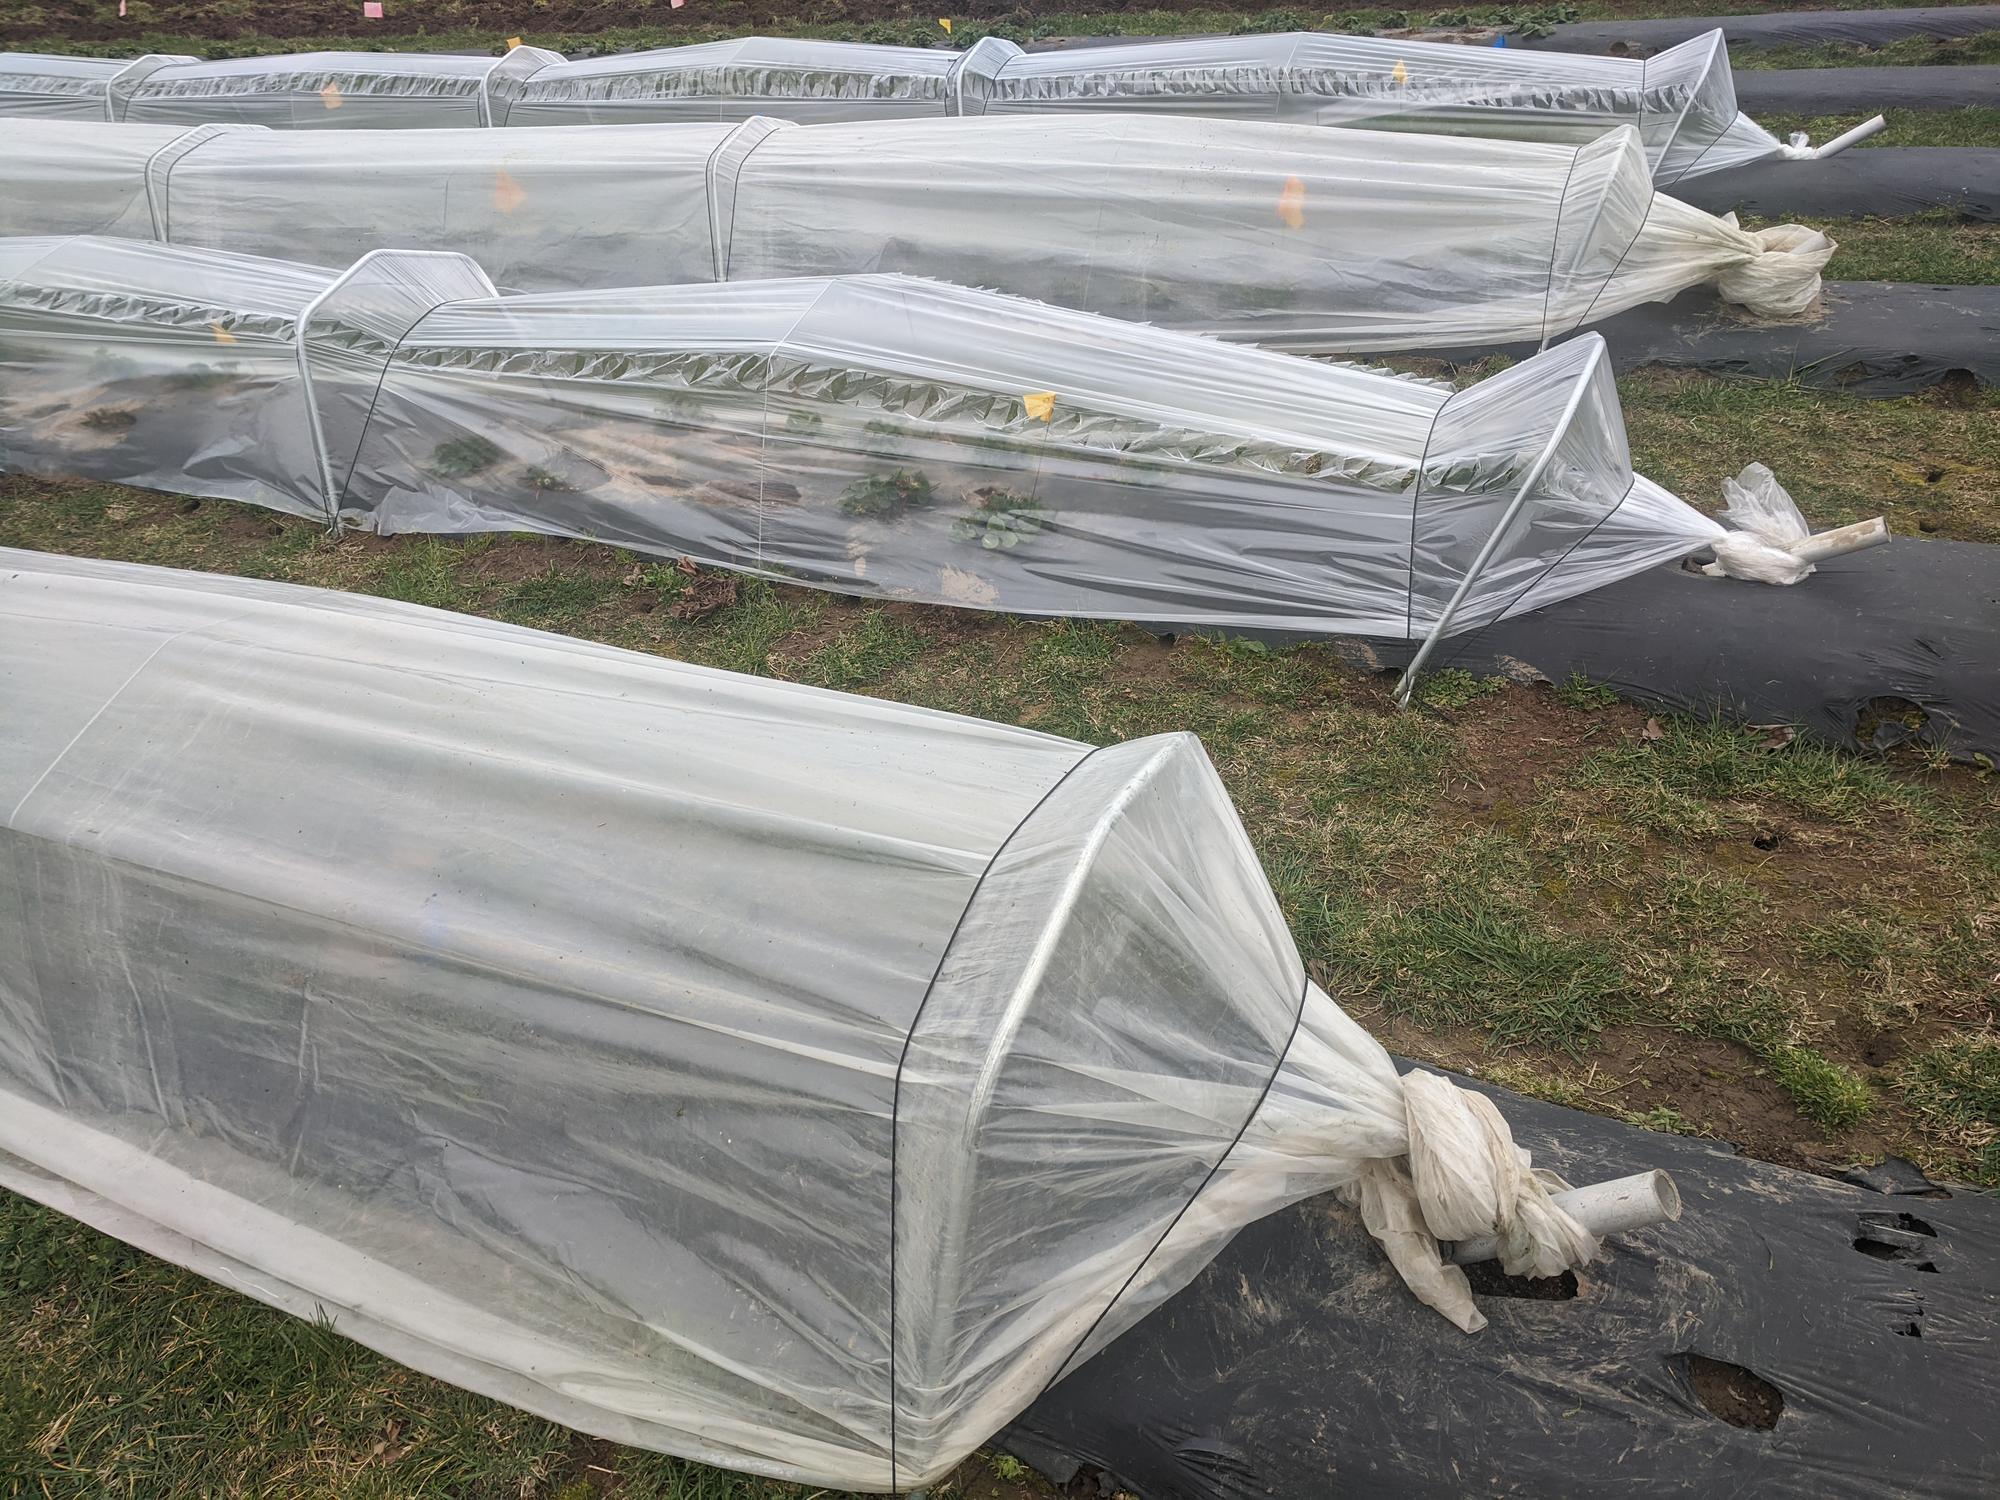
End anchors
Place a sturdy anchoring pipe or pole at both ends of the tunnel row or raised bed. Tie the plastic ends to the anchors to provide the needed support for the plastic and to keep the plastic taut along the ends of the tunnel. Install the anchoring object deeply into the ground to provide stability and prevent tunnel collapse. Anchor the pipe or pole at less than a 45° angle and up to 2 feet deep in the soil (with about 1.5–2 feet of pipe above soil), to keep the plastic from sliding off when tunnel sides are raised and lowered.
Plastic
For a 3- to 4-foot-wide bed, use clear plastic 5–7 feet wide to cover the entire width of the hoops. Adjust the width of the plastic if beds are wider or narrower than 3–4 feet. Some plastics are sized for taller tunnels and must first be cut to the correct width of the low tunnel. Other plastics are more suited to low tunnels.
Thicker plastics (4–6 mil) are more durable than thinner plastics and can be reused for multiple seasons. Thicker, high-grade plastics offer UV protection and typically last longer. However, thicker plastics are more likely to fall down on the sides when raised for venting, due to their weight. They can reach much higher temperatures during the day when the tunnel is closed.
Thinner plastics (0.8-2 mil) are made specifically for low tunnels at widths of 5–8 feet. They typically do not hold heat during the night as well as thicker plastics.
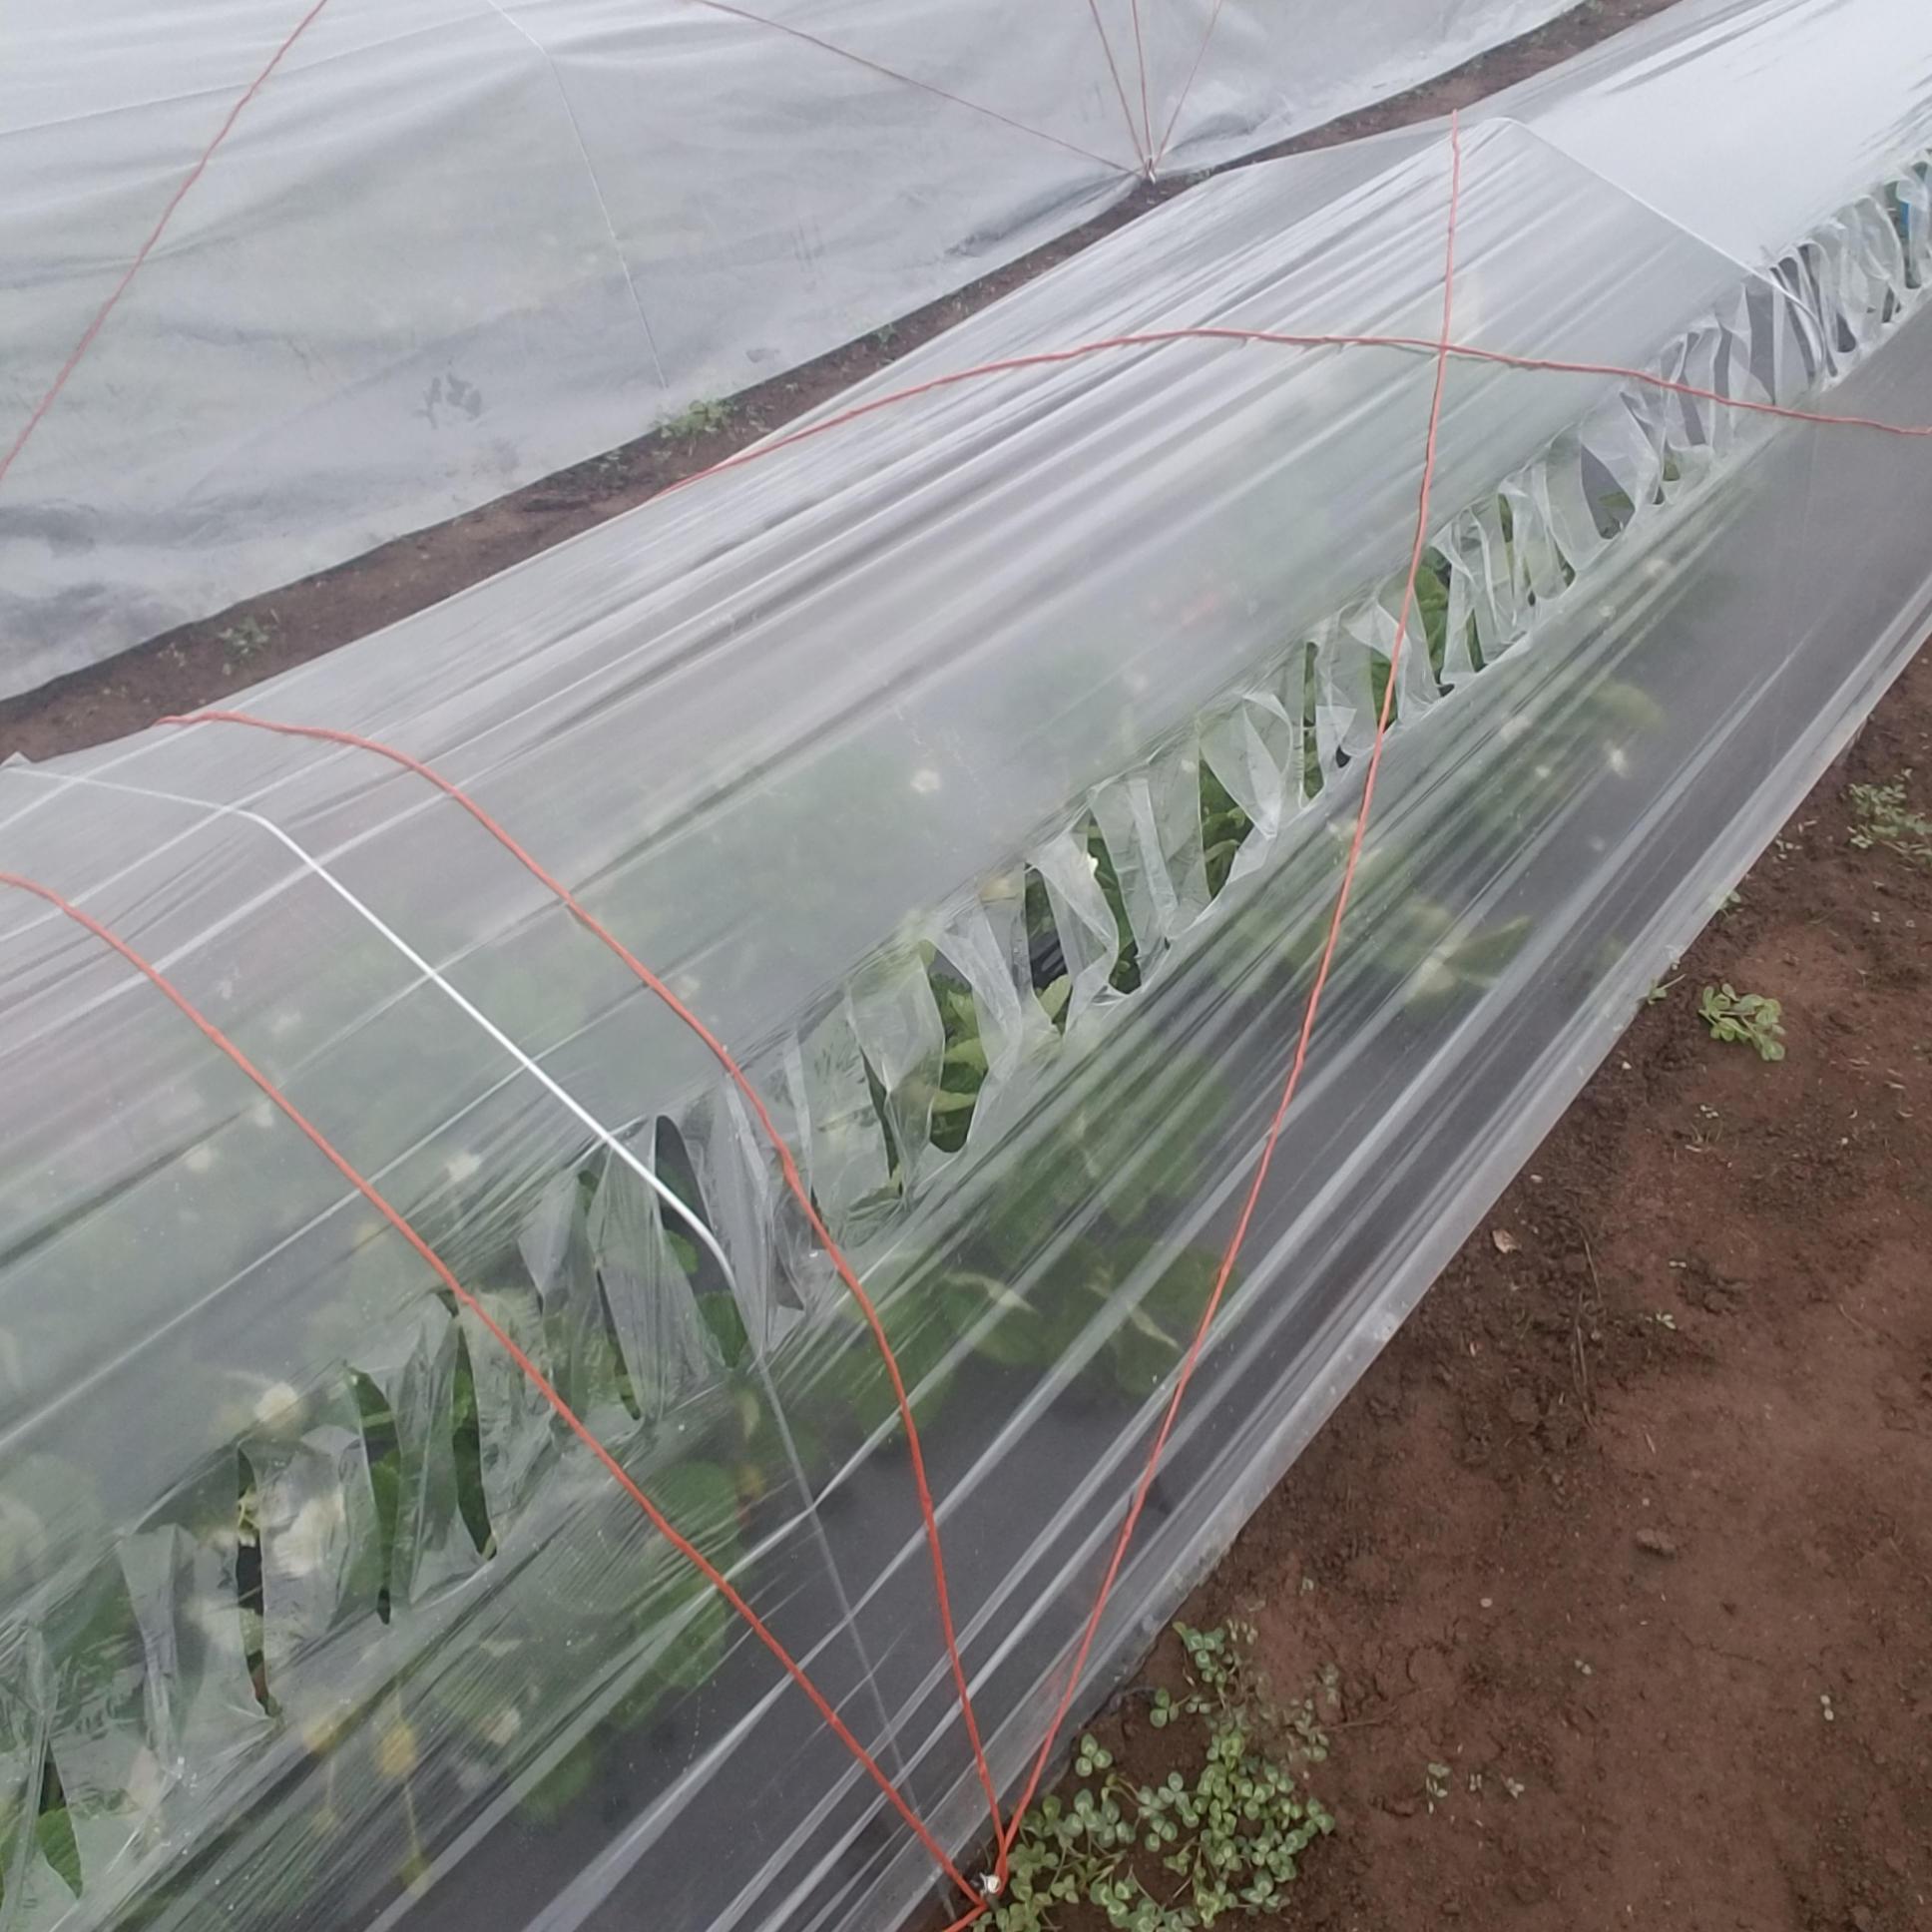
Some plastics feature perforated slits or punched holes along the sides or the entire surface. Slits or holes improve airflow, and moderate humidity and daytime temperature. This feature can reduce the need to manually ventilate the tunnel at higher temperatures. Thin, perforated plastics are more likely to stretch and tear, and may need to be replaced more often than thicker plastics.
Tunnel support cord
Use baling twine, rope or 1/8- to ¼-inch bungee shock cord to tie down the plastic at each hoop and hold the plastic in place when raised on the sides for venting. Depending on the material and color, some rigid or elastic cords may last longer than others.
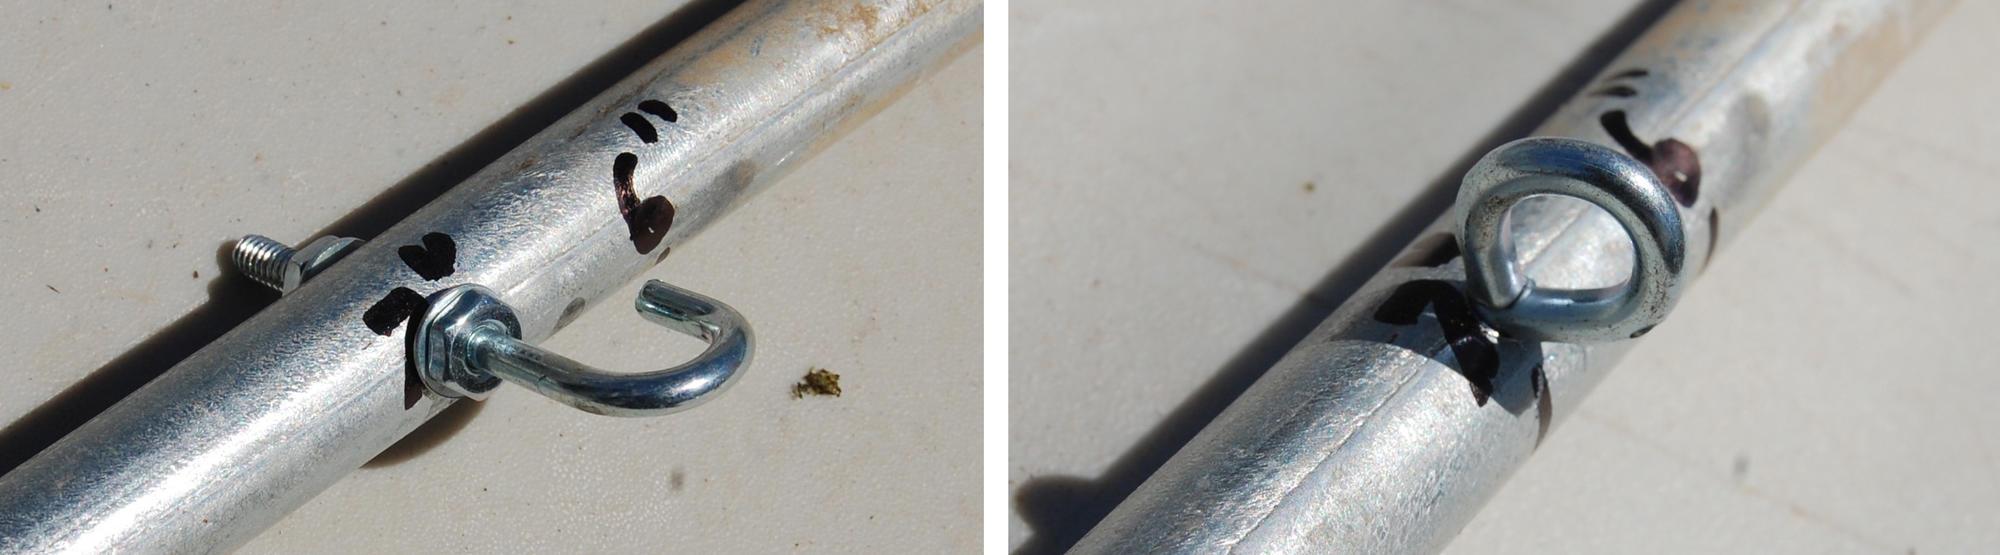
Cord hoop support
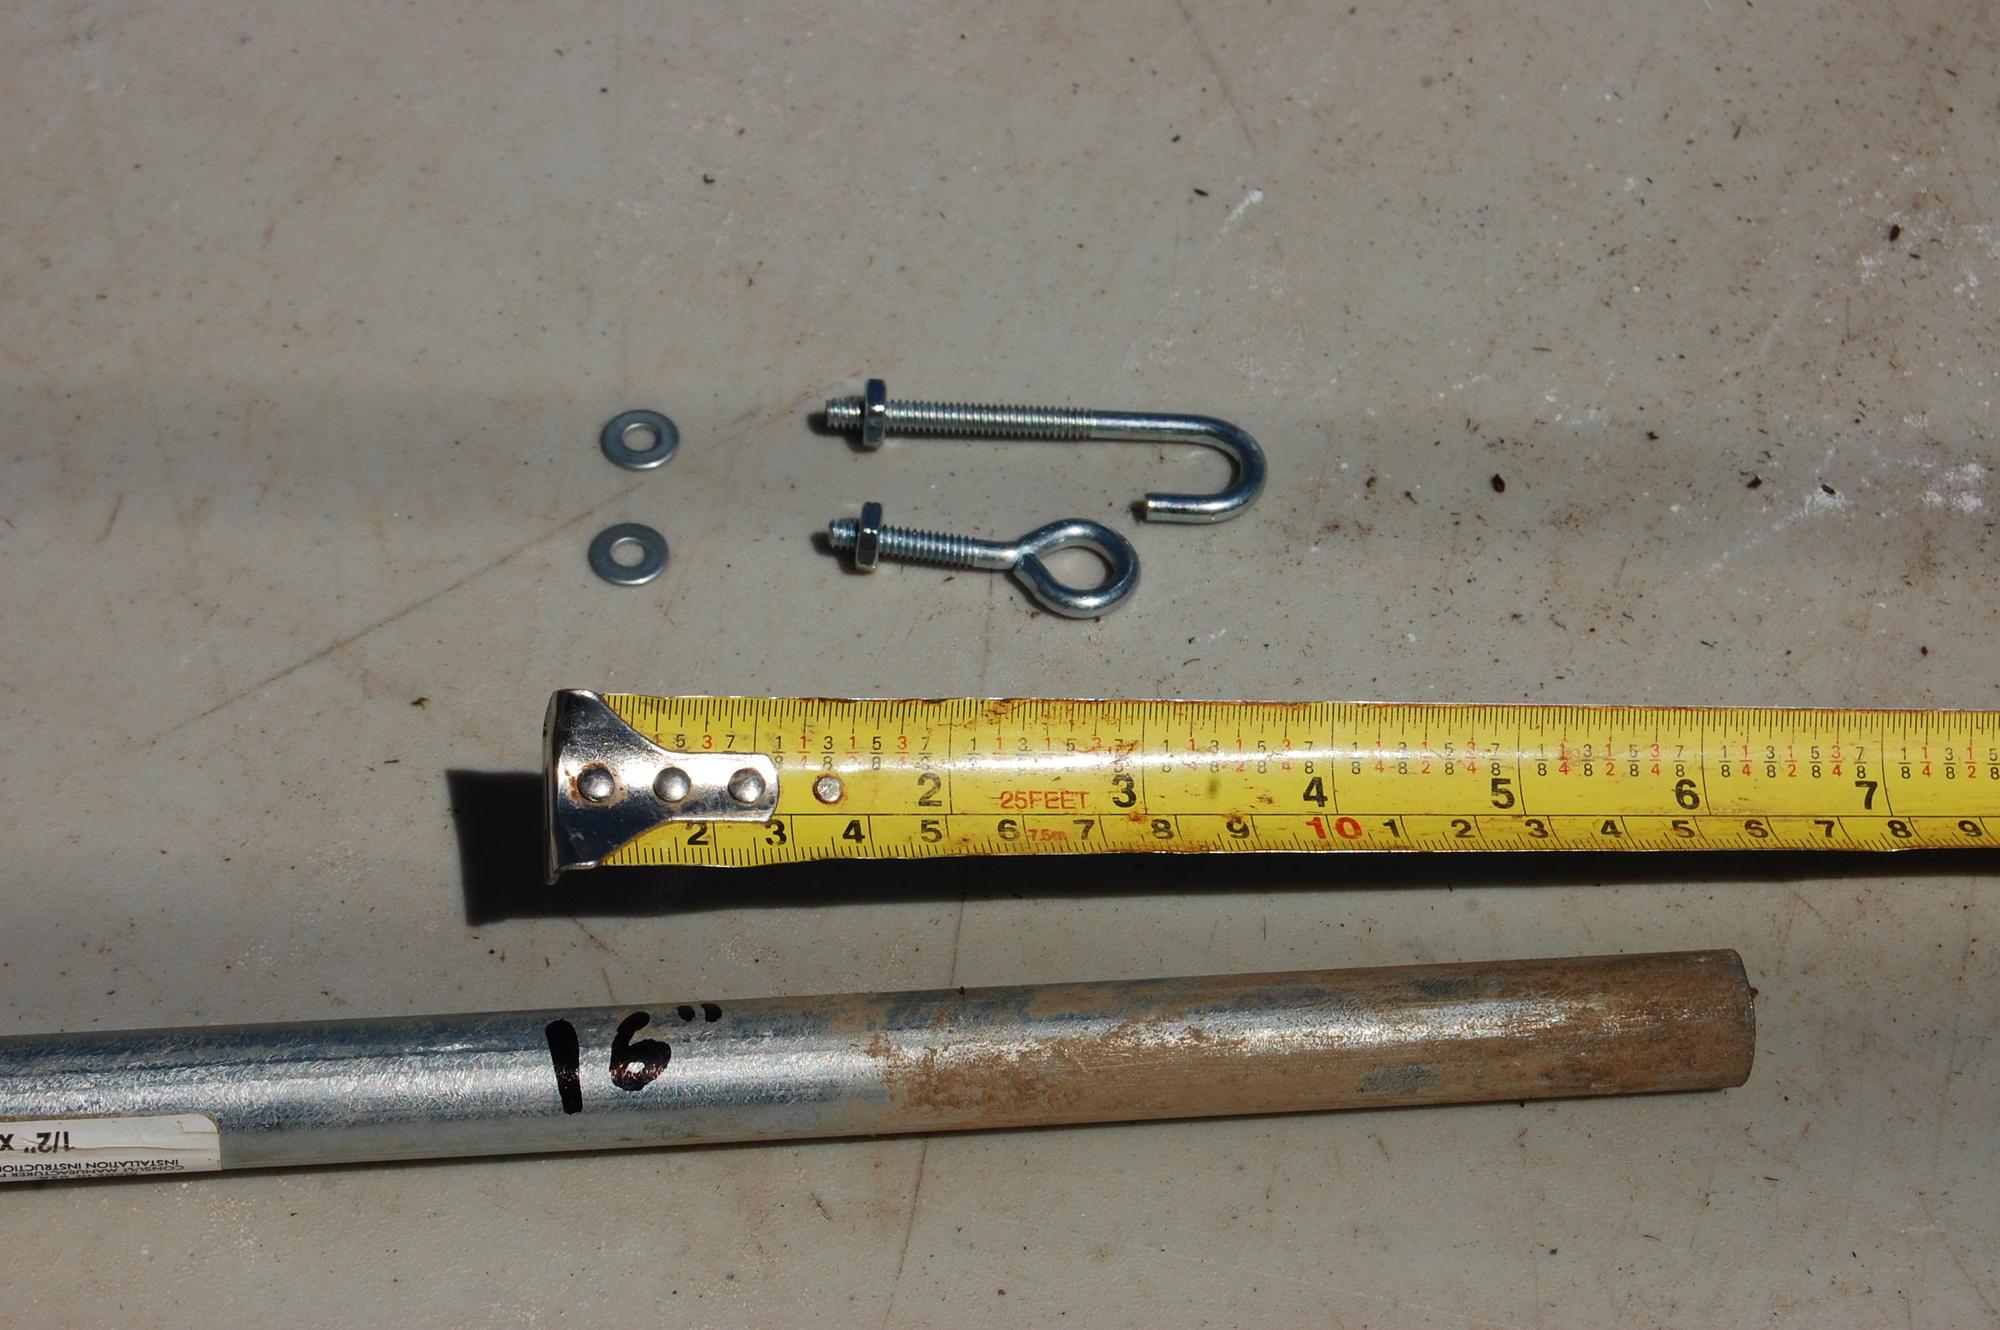
Using bent rebar, metal stakes or metal eye hooks, loop the twine or bungee cord through to tie down the plastic at the ends of each hoop. Insert stakes into the soil against the hoop. Insert eye hooks through holes drilled into the base of the hoop and secured with washers and nuts.
Pre-made kits
While you can buy low tunnel kits online, these are often expensive and may need additional components. You will need to test them under local conditions. We recommend using the locally available materials tested in our trials to save money.
How to build a low tunnel
You can build low tunnels over raised or flat beds. When shaping your beds, consider how they are oriented to light and wind. Orienting beds and tunnels parallel to the prevailing wind direction will decrease tunnel maintenance; the wind flow will have less impact on the structure. Optimizing sun exposure on low tunnels will enhance temperature benefits. Site tunnels away from trees or other shade.
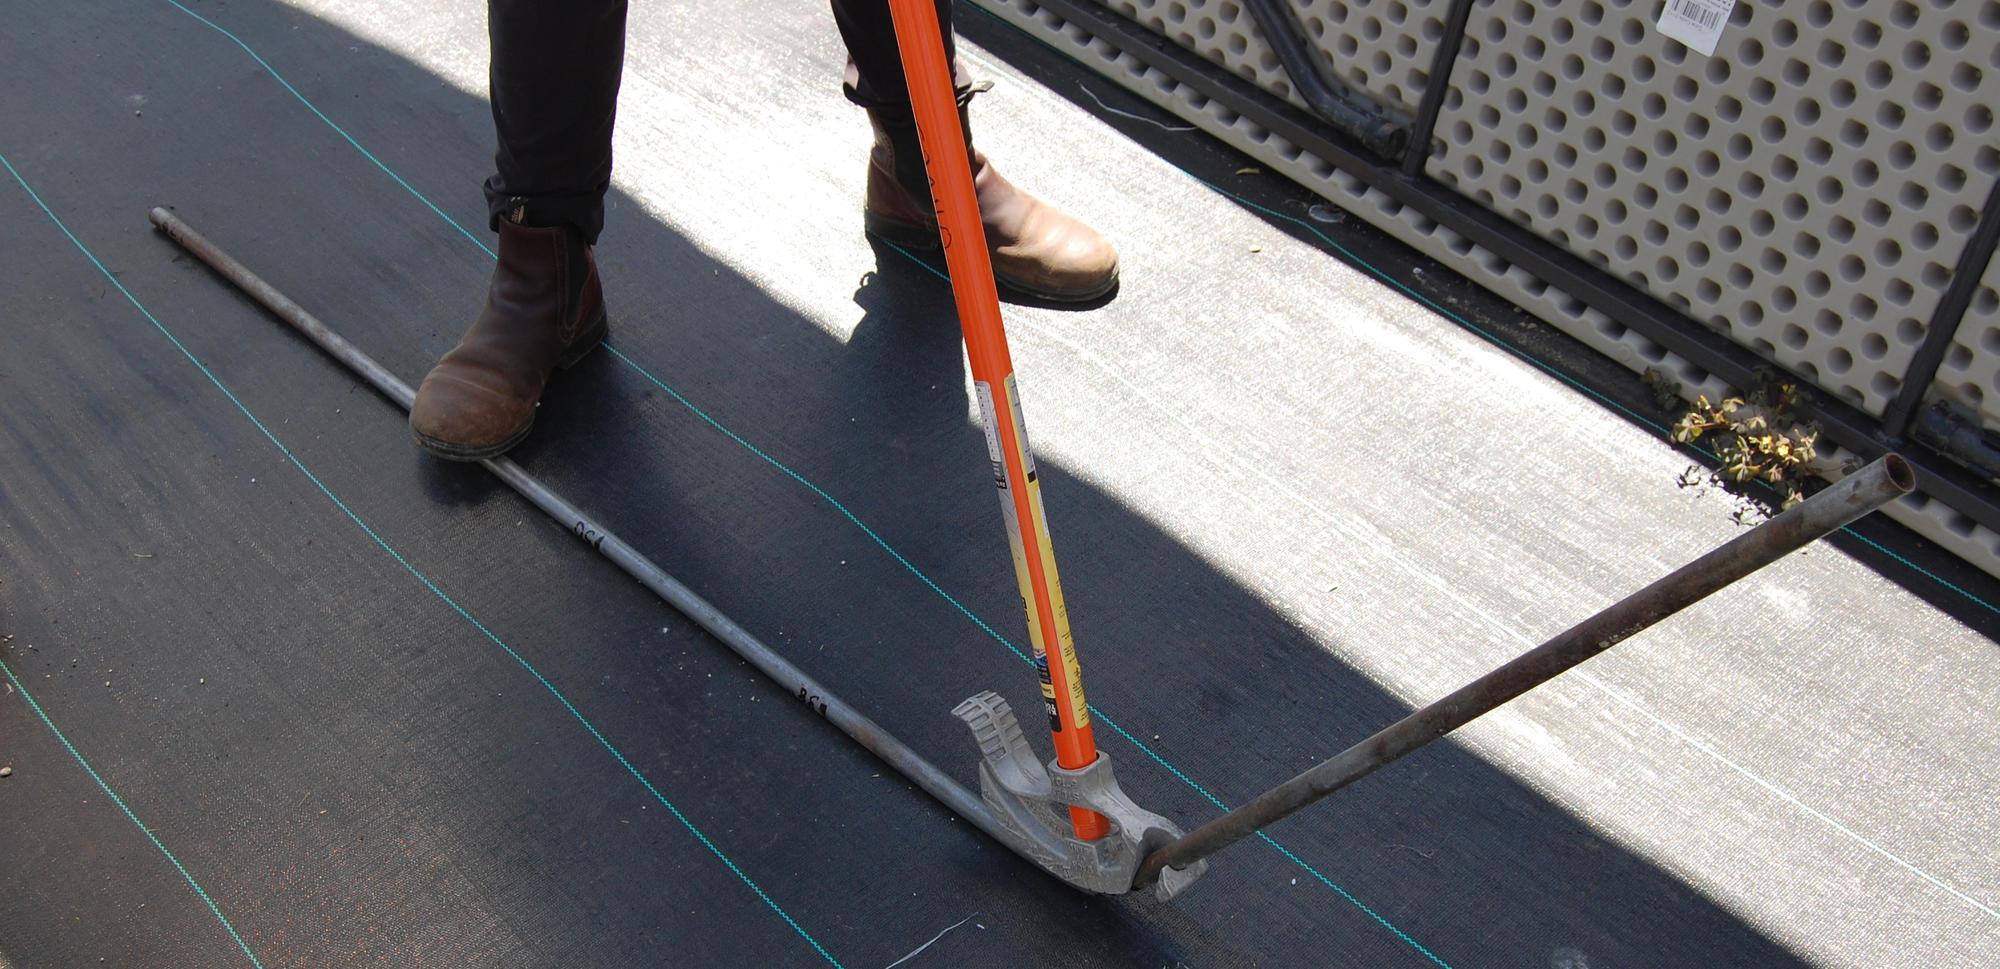
Installing the hoops:
- For a 3- to 4-foot-wide bed, cut one piece of 10-foot-long galvanized electrical conduit to 6 to 8 feet.
- Shape the metal into a hoop. You can shape wire hoops into semicircles as you install them in the ground. Or, you can shape wire and conduit hoops like roofs using a conduit bender. The angled tops of the “roof” help hold up the plastic when the sides are raised, and keep it from slipping down.
- Insert the ends of the hoops at least 6 inches into the soil on each side of the bed. Ensure that the top of the hoop remains 2 to 3 feet above the plant at full maturity.
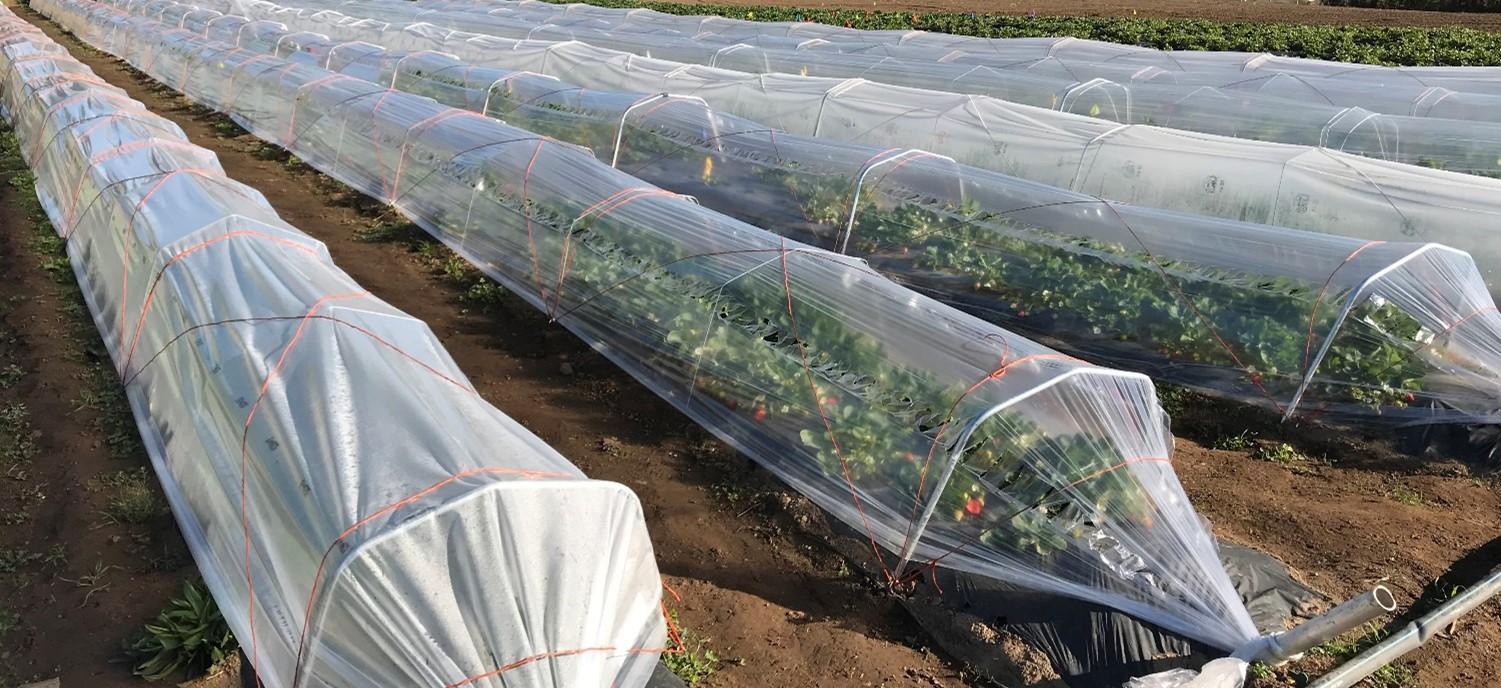
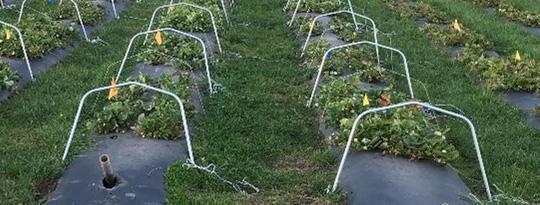
- Place one hoop every 4–5 feet down the length of the row. Rows can stretch up to 300 feet long.
- Insert a metal stake into the ground flush against the base of the hoop. Repeat on the other side and for all hoops.
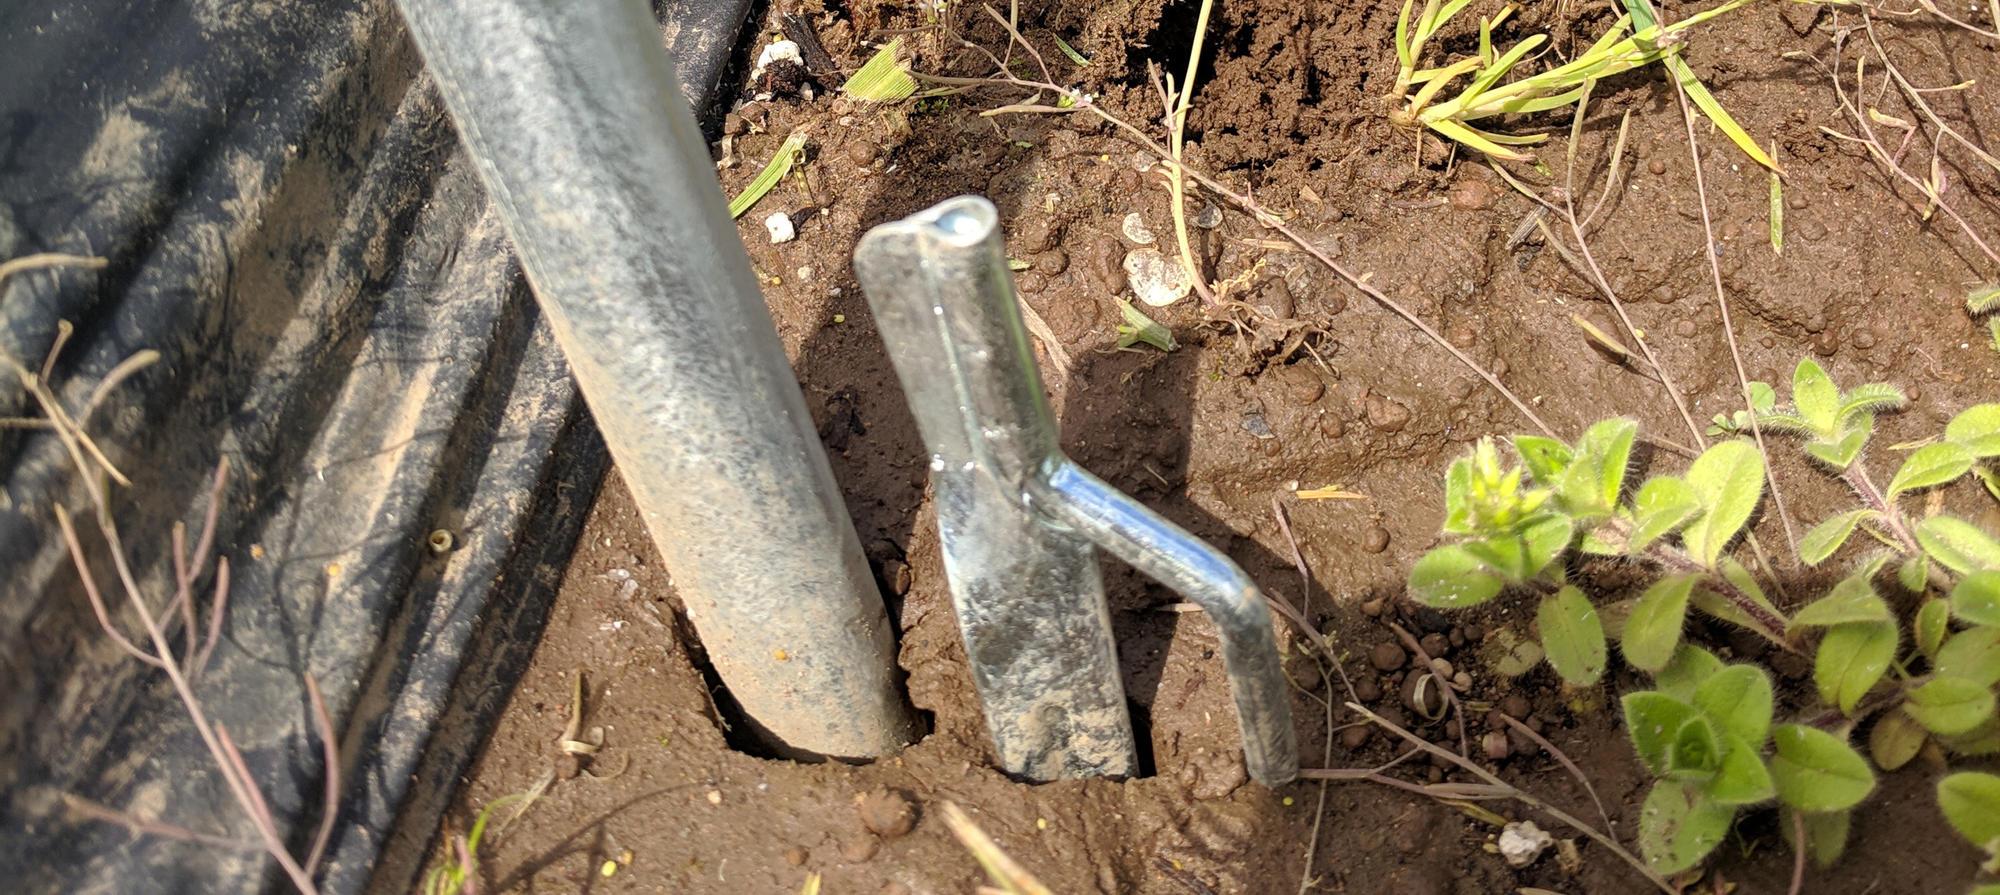
- An alternative to stakes: Drill holes through the conduit hoop near the soil surface and insert a threaded eye hook or looped bolt. Tighten with a washer and nut. This holds the bungee in place more securely. Wind or other disturbances can shake stakes loose or pull them out of the ground.
Installing the anchor
- Select a metal or wooden pipe or pole to anchor the plastic at each end of the row.
- Cut the anchor into two pieces, each 4- to 5-feet long.
- At each end of the tunnel, insert the pole halfway into the ground at less than a 45° angle.
Covering with plastic
- Select a solid or perforated plastic to cover the tunnel.
- If your plastic is 12 feet or wider, cut it to a width of 5–8 feet for a 3- to 4-foot bed. Adjust the width of plastic if your beds are narrower or wider.
- Cut the length of the plastic to the length of the tunnel plus an additional 4–8 feet at each end to tie to the anchors.
- Drape and center the plastic over the hoops.
- Tie the ends of the plastic loosely to the end of the row anchors.
Securing the plastic
- Select twine or bungee cord to secure the plastic against the hoops.
- Loop the cord around the stake on one side of the hoop.
- Run the cord over the plastic to the other side of the hoop, tighten, and tie a knot with both ends of the cord. Ensure that the cord is as tight as possible against the plastic and hoop before tying.
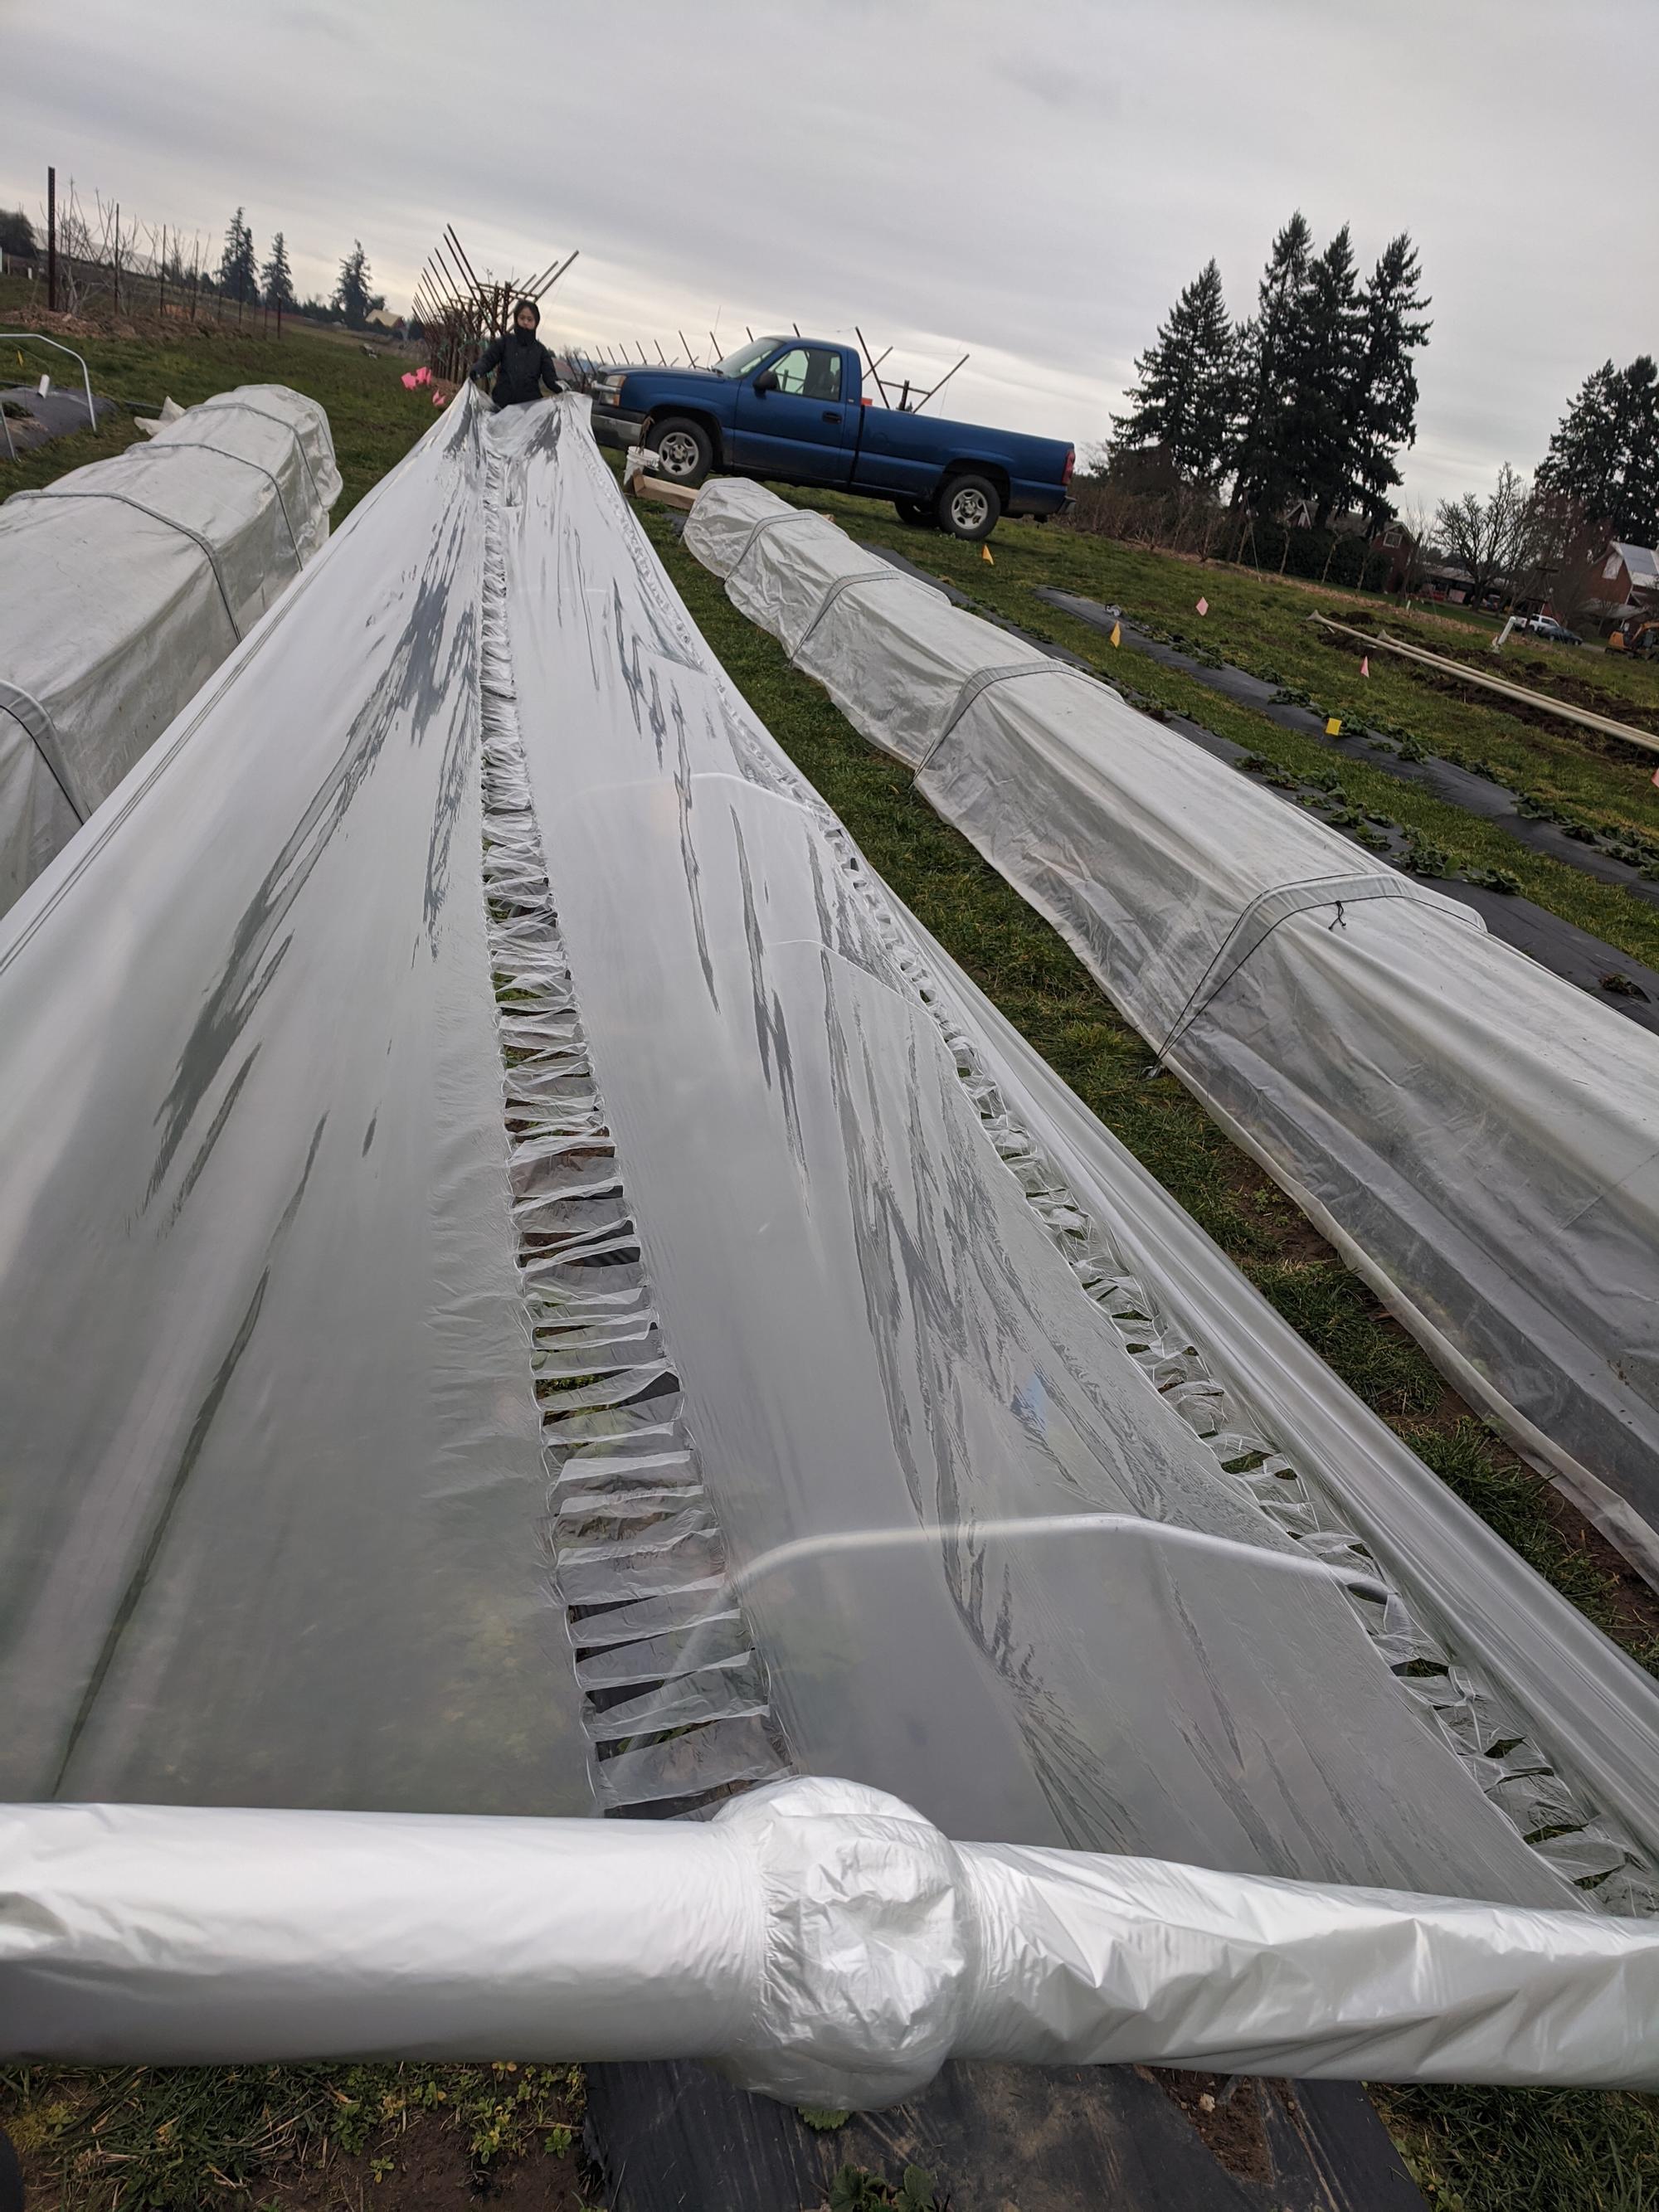
- You can also crisscross cord from hoop to hoop as one long piece (Figure 8). Instead of looping the cord around the opposite side of the same hoop, loop the cord around the opposite side of the neighboring hoop. Only tie down at the final hoop on each end of the low tunnel.
- Repeat down the row for all hoops.

Management, maintenance and seasonal care
Check the tunnels throughout the season to ensure the hoops and plastic stay secure, and to manage temperature and humidity for optimal plant growth and quality. You can easily raise or lower the plastic depending on the season, time of day and weather forecast. You can install sensors or simple digital minimum-maximum thermometers under the tunnels to guide your decision-making. Temperature and humidity sensors provide more complete data, and many can be monitored from an application on your smartphone.
You can raise the plastic above the bends of the hoop to provide overhead coverage while allowing airflow through the sides and underneath. During spraying or at harvest time, you can bundle the plastic at the top. During the cooler evenings of spring or fall, be sure to fully lower the plastic and keep it closed. Low tunnels must also be fully lowered during heavy wind and rain events. Raise or lower them one side at a time to help protect against regular prevailing winds.
Throughout the growing season, keep the plastic cover tight to keep water from accumulating on top of the tunnels. Wind and heat can cause the plastic to become loose. Daily and seasonal lifting and lowering of the plastic will also loosen the plastic. Tighten loose plastic by pulling it taut from the middle of the row out toward the ends. Tighten and re-tie the excess ends of the plastic to the anchors. The cord may loosen up or untie. Check and tighten it regularly to help keep the plastic secure.
Remove and wash the plastic at the end of the season. Dry it out before storing. You can leave hoops in the ground over winter or remove them and store them for safekeeping. Cords wear out during the season and typically must be replaced every year.
| Component | Cost/each ($) | Cost/tunnel ($) for a single, 100-foot system | Cost/acre ($) for 30, 300-foot tunnel systems with 5-foot-bed center distance, 2.5-feet-wide beds |
|---|---|---|---|
| Anchor (each end) | |||
| T post, 6' | 4.99 | 9.98 | 289 |
| Metal conduit, 2" x 2.5' | 6.08 | 12.16 | 353 |
| Earth anchor, 4" x 2.5' | 4.54 | 9.08 | 263 |
| Hoops (every 4 feet) | |||
| Wire, 10 gauge 76" | 0.50 | 12.50 | 1,088 |
| EMT conduit, 0.5" x 6.7' | 2.35 | 58.67 | 5,104 |
| Conduit bender | 38.00 | 38.00 | 38 |
| Plastic cover | |||
| Solid 4 mil poly film, 100' | 19.49 | 19.49 | 1,696 |
| Slitted 0.8 mil, 100' | 8.10 | 8.10 | 705 |
| Punched 1.0 mil, 100' | 6.30 | 6.30 | 548 |
| Solid 0.8 mil, 100' | 6.00 | 6.00 | 522 |
| Stakes (every hoop) | |||
| Metal yard stake, 9" | 0.50 | 24.88 | 2,164 |
| Rebar, 3/8" x 1' | 0.27 | 13.43 | 1,168 |
| Tie-down material | |||
| Bungee shock cord, 1/8" black, 5' | 0.14 | 3.50 | 305 |
| Poly baler twine, 8' | 0.04 | 1.08 | 94 |
| Complete system | |||
| Least expensive (all wire, punched plastic, rebar stakes, twine) | 42.38 | 3,161 | |
| Trial example (half wire/half conduit, slitted plastic, metal stakes, bungee) | 122.21 | 6,660 | |
| Most expensive (all conduit, solid plastic, metal stakes, bungee) | 156.69 | 9,659 |
Costs
Many different companies sell low tunnel kits made of different materials. Prices range from $35 to $600 per 100 feet for a basic to complete high-end kit. The more expensive kits typically include thicker galvanized steel hoops, steel stakes, plastic (1.5 mil film), bungee elastics and poles to anchor the beginning and end of each tunnel row. Lower-priced kits include thin wire to make hoops and perforated plastic, but no other materials. Companies often sell the components of these kits separately.
You have a number of choices when it comes to material. You can save money by choosing wire over conduit, twine over bungee cords or thin over thick plastic. But these choices can also reduce structural stability. While wire and twine are cheaper, electrical conduit hoops and bungee cords are more stable. At a minimum, we recommend commercial growers install three conduit hoops per 50 feet of low tunnel — two on either end and one in the center. An all-wire system will suffice for small systems such as those installed by home gardeners. Table 1 shows costs for each tunnel component. These estimates are based upon 2020 retail pricing from local stores and low tunnel companies.
References
Cornell fruit resources: Berries
Sideman, B. 2014. Using Low Tunnels for Overwintering Crops. University of New Hampshire Cooperative Extension. Accessed April 15, 2020.
Sideman, B., K. Orde, M. Pritts and K. Demchak. 2018. Low Tunnel Strawberry Production Guide. Accessed April 15, 2020.
Monthly weather forecast and climate, Oregon, USA. Weather Atlas. Accessed May 4, 2020.
